
A microphone does not work in Skype: how to configure a microphone on a computer, laptop? Why doesn't Skype see a microphone, what to do? How to check the microphone in Skype?
Guide to set up a microphone on a laptop for voice communication through the Skype program.
Navigation
To date Skype It occupies the top line of the rating of the most popular voice communication programs on the Internet. With it, you can make free calls to friends and relatives, arrange group video conferences and just communicate in a chat.
Naturally, for full voice communication through this program, the presence of a microphone is required. Most often, its connection and configuration does not cause any difficulties. It is enough just insert the microphone into the corresponding connector and you can start using the program.
However, inexperienced computers, in particular laptops, may encounter certain problems when connecting a microphone and its primary setting. Just about how to properly establish a microphone for communication in Skype, and will be discussed in our article.
The main causes of the non -working microphone in the Skype program
Physical malfunction of the microphone
- The banal, however, is a very common problem. Many users of external microphones faced with the difficulties of voice communication in the program Skype, begin to delve into the PC settings diligently, change sound parameters and even update the sound card drivers without having previously checked the microphone for performance. Even if the device was bought recently, it is quite possible that it was damaged during the transportation process or a marriage was sold to you. To check the performance, it is enough to connect the microphone to another computer and if it does not give signs of life, then the problems clearly lies in physical damage.
Figure 2. The main causes of the non -working microphone in the Skype program
Incorrect connection
- To connect a variety of sound devices on each computer, there are a number of special connectors. If we talk about laptops, then they have two of them: entrance and exit. The output is used to connect the speakers and headphones, and the input for the microphone. As a rule, on the case, the microphone input has red or pink coloring. If you insert a microphone into another connector, then, of course, you will not work for you.

Figure 3. The main causes of the non -working microphone in the Skype program
Incompatible driver card drivers
- A rare problem, however, it also has the right to exist. For various reasons, users have to reinstall or update sound drivers. By ignorance, newcomers download from the Internet and install the first drivers that are caught on their PCs, who often work incorrectly with their sound card, or even completely refuse to function. Drivers should be installed only from the official site of the manufacturer of your sound card or from the disk that came with the computer.

Figure 4. The main causes of a non -working microphone in the Skype program
Incorrect setting of microphone parameters in the system
- The most popular problem. Like other devices, the microphone requires proper and thorough setting. It is possible that the microphone volume is removed in the PC settings or the nest is completely disabled. Next, we will analyze in detail the correct setting of the microphone.
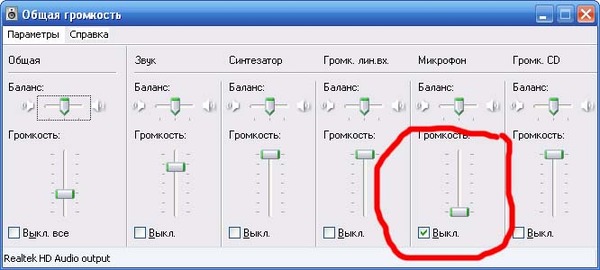
Figure 5. The main causes of the non -working microphone in the Skype program
Setting the main parameters of the microphone in the operating system
So, as already mentioned above, most often the cause of a non -working microphone lies in incorrectly set settings. Before proceeding to the program settings Skype, you need to deal with the settings of the operating system. Take the following steps:
- Step 1. Open the menu " Start"And choose a line" Control Panel". On the main page of the panel in the upper right corner in the section " View"Select the meaning" Small icons»For more convenient viewing of the contents. Find and open section " Sound».
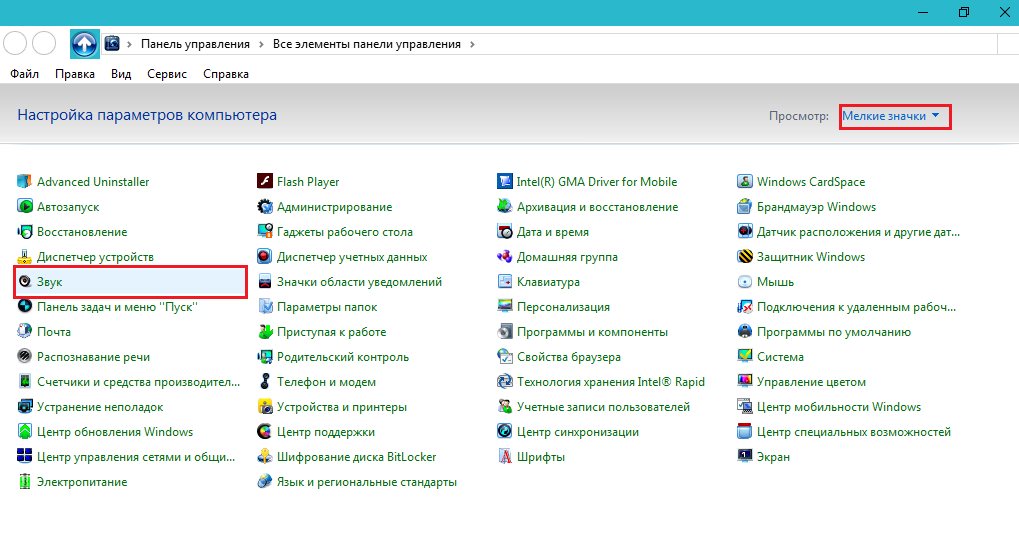
Figure 1. Setting the main parameters of the microphone in the operating system
- Step 2. In the window opened, go to the tab " Record»And click with the right mouse button on the connected microphone. In the list that opens, select the line " Properties».
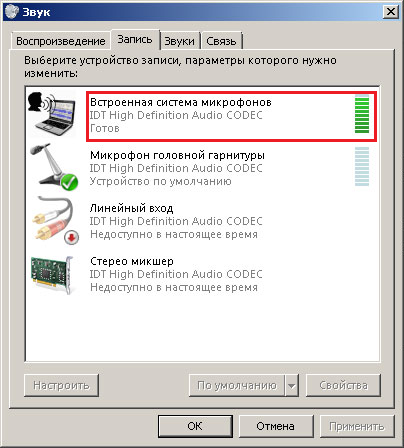
Figure 2. Setting the main parameters of the microphone in the operating system
- Step 3. In the next window, you must go to the tab " Levels"And carefully look at the set parameters. The slope of the volume volume should be moved to the right to the right, and the slider levels stand at zero. If you have a cheap microphone, rubles for 200, then it probably has a slight power. In this case, it is necessary to experiment with the parameters. Try to set the volume of the recording on 85%, and the slider levels on +20 decibel.
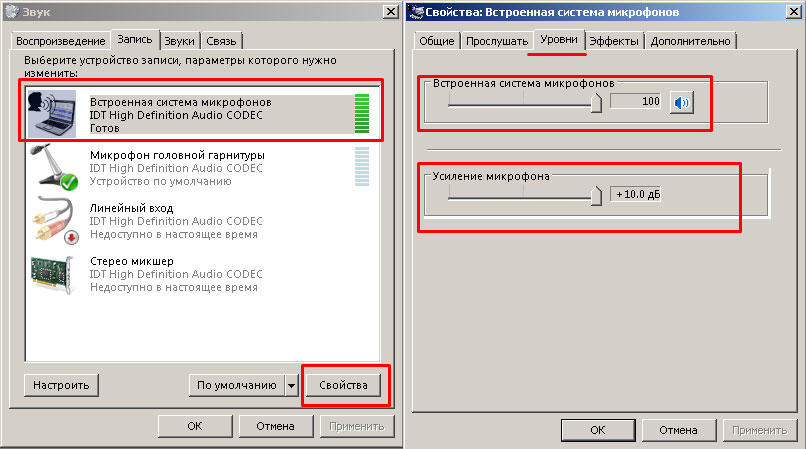
Figure 3. Setting the main parameters of the microphone in the operating system
- Step 4. Going to the tab " Improvements" or " Effects", You can set additional parameters to the microphone. For example, remove noise or background echo. It is recommended to activate these functions only if you use a built -in or high -quality external microphone. Next, click the buttons " Apply" and " OK».
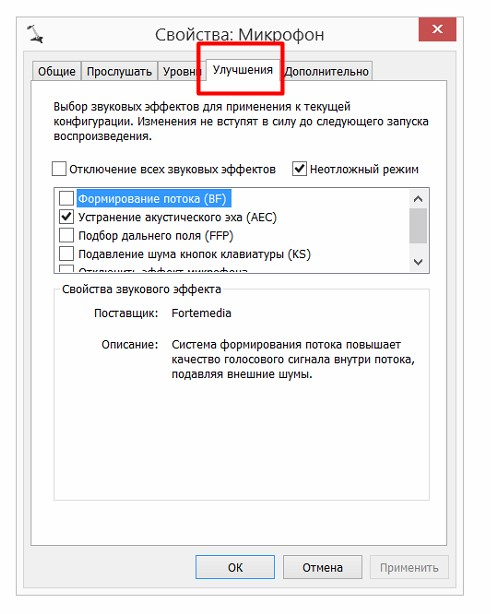
Figure 4. Setting the main parameters of the microphone in the operating system
Microphone setting in Skype
The microphone settings in the system figured out. It's time to move directly to the settings of Skype itself. To do this, take the following steps:
- Step 1. Run the program and in the upper menu click on the item " Instruments". In the list that appears, select the line " Settings"And in the window that opened, go to the tab" Sound setting».
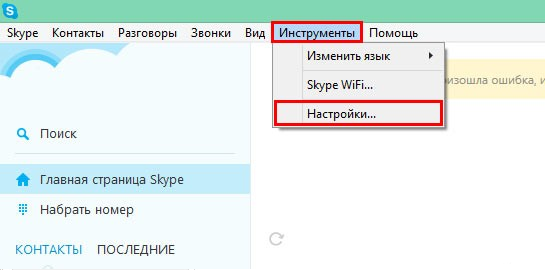
Figure 1. Microphone setting in the Skype program
- Step 2. At the very top of the opening window is the microphone settings section. If you are sitting through a laptop with a built -in microphone, but use the external one, then make sure that the device you need is chosen in the column.
- Below is a line volume line displayed. With any sound, the jackal should be filled with green. This will be a signal that your microphone is working properly.
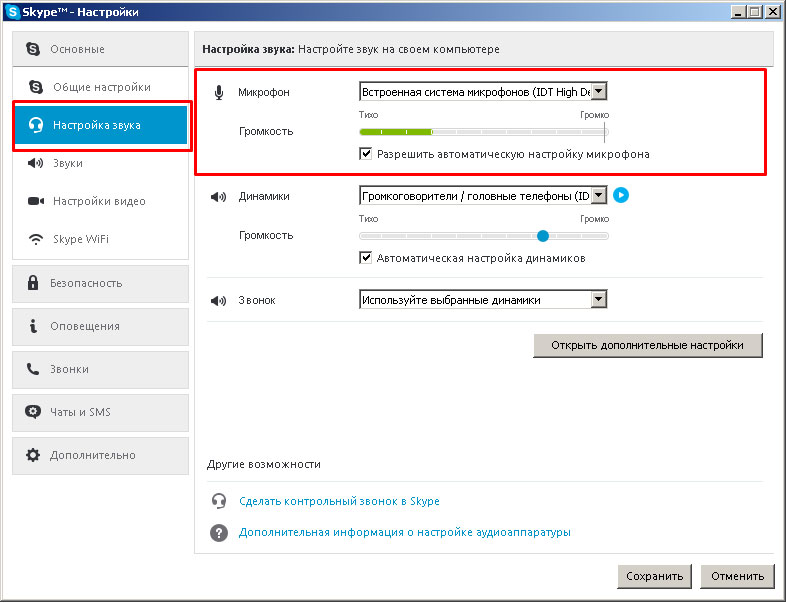
Figure 2. Microphone setting in the Skype program
- Install a checkplace opposite the line " Allow automatic microphone tuning"In order for the program to independently regulate its volume. To continue, click the button " Save».
The microphone setting is completed on this. You can start full communication in the program Skype. If, after all the actions you have done, the microphone volume scale in the settings is not filled with green, then your microphone is either not working or incorrectly connected, or you missed one of the stages of the setting.
In the event that everything works correctly, but your interlocutor still does not hear you, advise him to check his sound settings. Most likely, he has decreased the volume of playback in the system or in the program itself Skype.