
Refracting Meizu M2 Note and Russification
In this article you will learn how to reflash the MEIZU smartphone from the Chinese version to international.
Buyers who purchased a smartphone from Meizu are very often faced with the problem of the absence of an interface Russification, and at the same time with a bunch of unnecessary Chinese applications.
Therefore, today we will tell you how to Russify your smartphone, and establish an international firmware on it.

soBefore flashing your device, you need to find out which firmware is installed on your smartphone, since the firmware on MEIZU smartphones are five types:
- Unicom (U) - The firmware version, which is intended for users of the Chinese state, due to the availability of only Chinese.
- China Mobile (C) - The operator version of the firmware, which is also intended for users of the Chinese state, as there is only Chinese.
- Yunos (Y) - This version of the firmware was made in conjunction with the Alibaba Internet giant, it is also intended for users of the Chinese state.
- Universal (A) - Universal version of the firmware, which is suitable for all countries of the world, in view of the presence of almost all languages, including Russian, English and Ukrainian.
- INTERNATIONAL (I) - The most suitable version of the firmware, it is with this firmware that all smartphones and tablets from Meizu on the territory of Russia and Ukraine are supplied.
Clear things, what is interested in the IRNATIONAL (I) firmware version. Because it is in this firmware that everything is worked out to the smallest particles, concerning Russification.
It is worth notingthat if you want to try to reflash the firmware version with Yunos (Y) on International (I)T. you can't do it, in connection with which you will get an error "Firmware Corrupt".
But do not lose heart, after all, now we will tell how to get around this mistake, and finally fully Russify your smartphone.
How to install International (I) firmware?
So let's split in stages to understand the entire firmware procedure:
- Install Universal Firmware (A) via Recovery
- We get the necessary root rights and special access, as well as changing id, using a special script
- Install the IRNATIONAL (I) firmware via Recovery
I would like to warnthat the hardest of all here is second point.
Step 1. Install Universal Firmware (A)
- First of all, you need to download the official actual firmware version Universal (A)and you can do it on official Meizu website. The name of the firmware will be "Update.zip"Of course, you want to rename it, but it is categorically prohibited, it is also impossible to unzip this file.
- After the firmware booted, you need to turn off the phone.
- Now, when the phone completely turns off, you must hold and hold the power button together with the volume button, do it is necessary even before the phone starts, after starting, you can let them go.
- You probably noticed that they got into some kind of unknown black menu, but called this menu "Recovery"
- After that, you need to connect your smartphone to a computer or laptop using a USB interface.
- Your PC must recognize the smartphone as "Recovery"You also need to throw the firmware into the device "Recovery".
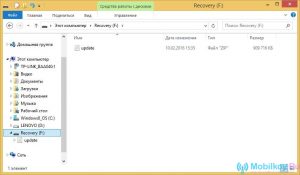
- Now on your smartphone should appear image with clouds on a blue background, where you from below you must put two ticksand then click the button "Start"After that, the device will start flashing.
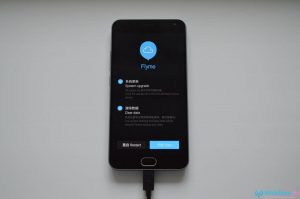
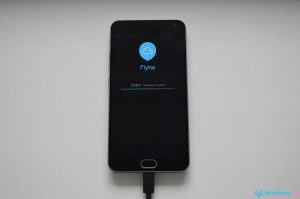
- During the firmware installation process to your smartphone, you may notice that the Flyme firmware check will first occur, and only the installation of the firmware itself will begin, you still have to keep calm and patience.
Stage 2. Get the necessary root rights and special access, as well as changing id, using a special script
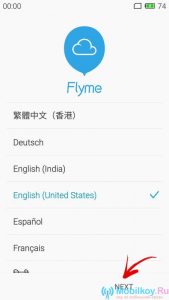
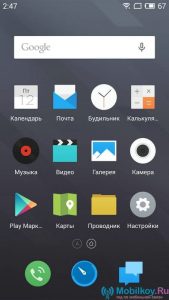
Let's bring a brief summary. So, on the first item, we have installed Universal (a) firmware to your MEIZU smartphone. In this connection, you may notice that now the welcome screen appears when you start your phone.
Well, continue!
- Here we need to choose "English (United States)", then click on the button "Next".
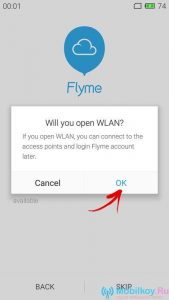
Now you need to connect to your Wi-Fi wireless access point to continue the procedure for which you press the button. Ok.
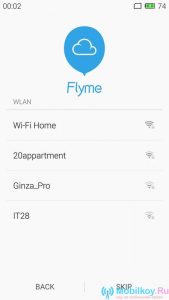
- After that, you need to find your network WLANAnd then connects to it, simply by entering the password to the appropriate field.
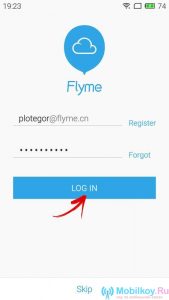
- It is advisable to immediately log in to the service account Flyme.In order not to do this in the future, as you can also forget about it.
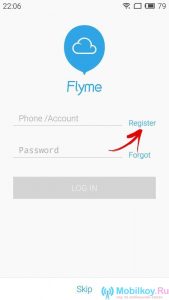
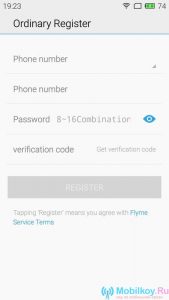
- Of course, if you do not have an account on the Flyme service, you need to immediately register it, simply by clicking on the button "REGISTER".
- Now you need to fill out all the necessary fields to register on the service. Flyme..
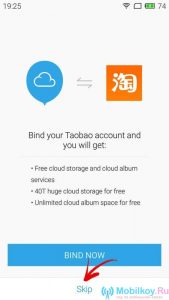
- After the registration has passed successfully, you will be offered automatic data synchronization with other services, but you can skip it, for what just click on the button "SKIP", and then "Next".
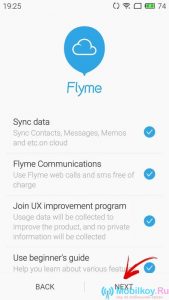
- Now you can press the button "COMPLETE"After which you will appear at the Flyme service.

Well, with registration on the Flyme service, we figured out, now our task is to get root and special access.
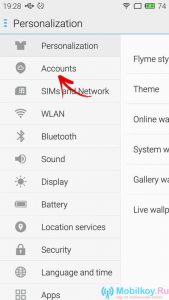
- So for this you need to go to "Personalization"
- Here you need to choose a subsection "Accounts"
- After that, you need to click on the item "My Flyme"
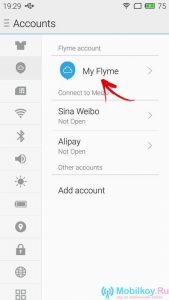
- Since we have previously visited our account, we can observe it, but we need to click on it
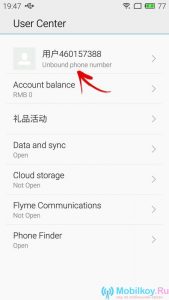
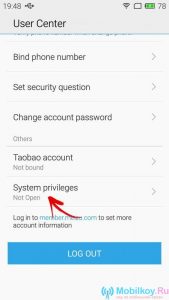
- After that you will be taken to the section "USER CENTER"where you need to scroll down and then enter the subsection "SYSTEM PRIVILEGES"
- Here you need to install a tick near the inscription. "Accept", then click Ok
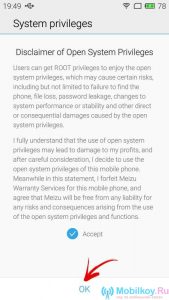
- The system will ask for a password from your Flyme account, so you need to enter it, and then press again Ok

- Now after your smartphone reboots, you will get the necessary root rights and special access.
Well, it's time to download the necessary files that will later need to be transferred to the root folder of your smartphone.
- Apk applications SuperSu. - Download you can from here
- Apk applications Terminal Emulator for Android - Download you can from here
- Special script "Chid.sh" - Download you can from here
After you downloaded these files and shifted them into the root folder of your smartphone, you need to open a file manager and go to the folder "Documents"and then run to run files "SuperSU" and "Terminal Emulator for Android".

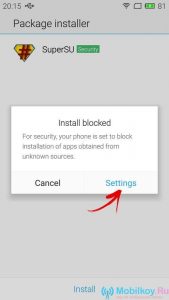
- Default, in security reasons, the system will warn you about what you open an unknown file that first can be malicious, but we know that it is without viruses, so click on the inscription "SETTINGS".
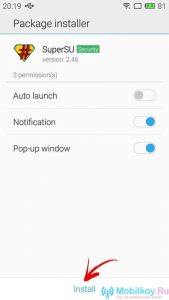
- Here I click on the inscription "Install."
- Now you have two necessary applications on your smartphone that will allow you to open the script. "Chid.sh".
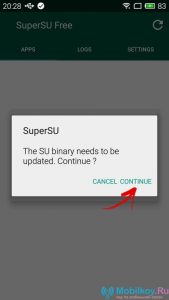
- After that you need to run the program SuperSu.when it starts you will see a pop-up notification about the availability of the SU binary file update, so you need to click "Continue".
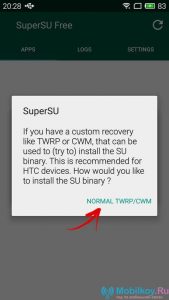
- Here we choose the mode "Normal".
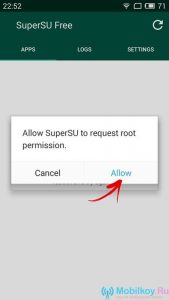
- Now you will be asked to give the right to the program itself, for which you should click on the inscription "Allow".
- After that, the installation process will begin, you can only expect about 2-3 minutes.
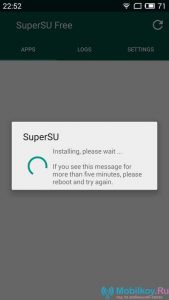
- When the installation is completed, you will receive a message about a successful installation, for which you click "OK."

If the installation ended incorrectlythen you will receive a message with the inscription "Installation Failed". In this case, you need to try to execute this procedure again.
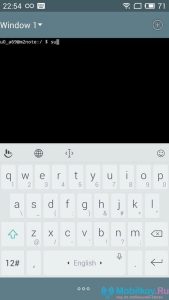
- Now you need to run the program Terminal emulator, and after the icon «$» Enter the value "SU"and then click "ENTER".
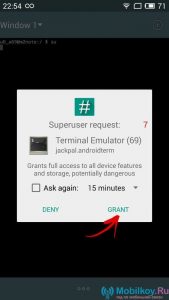
- You will receive the right request "SUPER USER"why you need to click on the inscription "GRANT".
- So, now we need to launch the script itself "Chid.sh"For which it is easy to enter in the Ternal Emulator application "Sh /ssdcard/chid.sh".
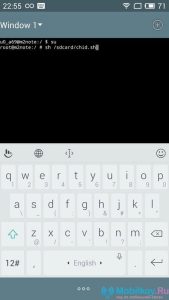
- After you entered the command, you need to press the button. "ENTER", It will then be rebooted by a device with an already modified ID.
Stage 3. Installing the IRNational (I) firmware via Recovery
- Now you need to download the official actual version of the firmware. INTERNATIONAL (I)and you can do it on official Meizu website. The name of the firmware will be "Update.zip"Of course, you want to rename it, but it is categorically prohibited, it is also impossible to unzip this file.
- After the firmware booted, you need to turn off the phone.
- Now, when the phone completely turns off, you must hold and hold the power button together with the volume button, do it is necessary even before the phone starts, after starting, you can let them go.
- You probably noticed that they got into some kind of unknown black menu, but called this menu "Recovery".
- After that, you need to connect your smartphone to a computer or laptop using a USB interface.
- Your PC must recognize the smartphone as "Recovery"You also need to throw the firmware into the device "Recovery".
- Now on your smartphone should appear image with clouds on a blue background, where you from below you must put two ticksand then click the button "Start"After that, the device will start flashing.
- During the firmware installation process to your smartphone, you may notice that the Flyme firmware check will first occur, and only the installation of the firmware itself will begin, you still have to keep calm and patience.
- After completing the installation of the IRNATIONAL (I) firmware, it will be rebooted by your smartphone. Now you can see what the smartphone interface looks like without any Chinese garbage.
By summing up, we would like to note that the installation and firmware of other versions on the MEIZU smartphone is not much difficult, in connection with which even a beginner will figure out here.
Phone shoved. When trying to flash it through the recovery issues the Firmware Not Found error.
Tell me what to do ?????
Add this path to the instruction, on some /sdcard/chid.sh devices, but there is sh /storage/emulated/0/chid.sh