
How to disassemble and remove the built -in keyboard from a laptop with your own hands? How to remove the keys on a built -in keyboard in a laptop and how to get a built -in keyboard from a laptop?
The step -by -step guide to remove the built -in keyboard from the laptop, as well as its keys.
Navigation
Almost every laptop owner knows that these devices, like stationary computers, require careful handling and good care. In order to prevent the device overheating and not break the cooling system, each computer must be periodically disassembled and its components from dust. If with stationary PCs, this procedure is quite easy and simple, then when cleaning the laptop, many may encounter a number of some difficulties. One of them is the removal of a built -in laptop keyboard.
In our article, we will analyze the reasons why it may be necessary to remove the built -in laptop or its keyboard, and also tell you how to do this.
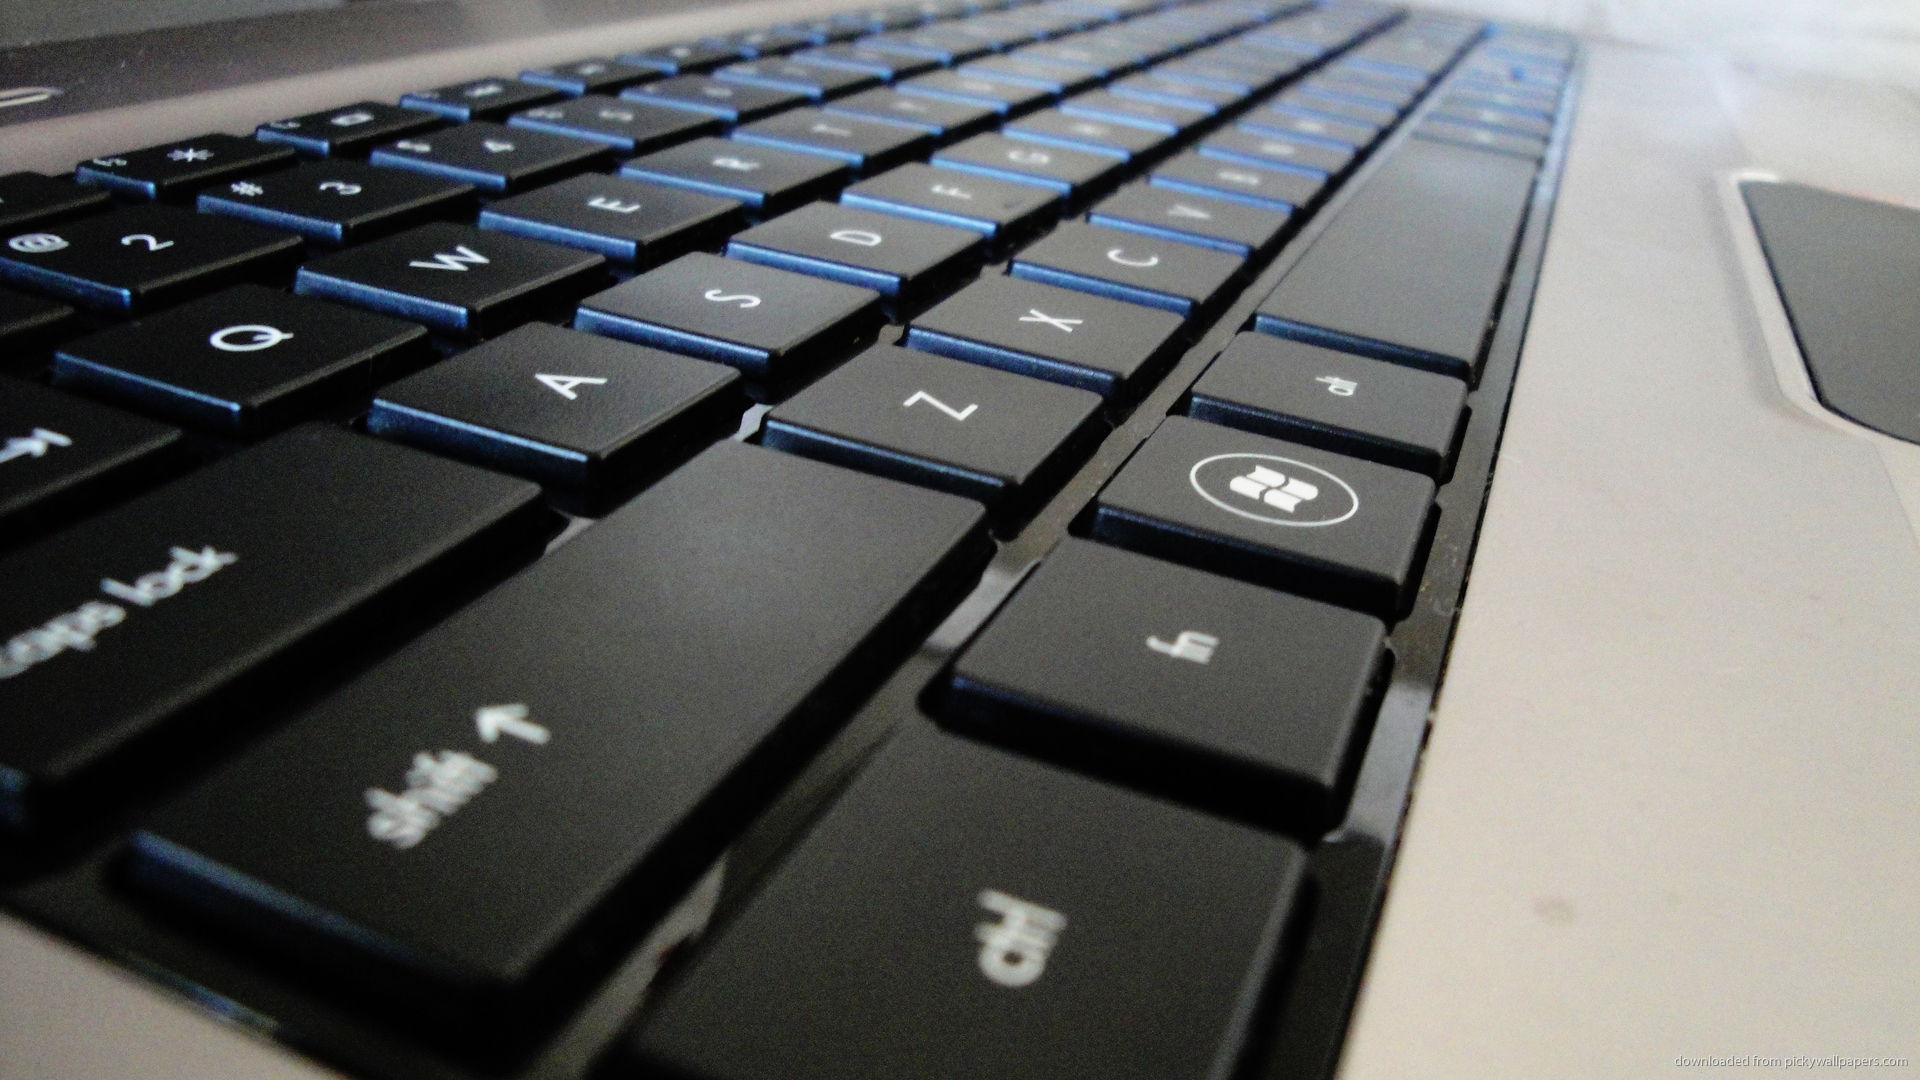
Step -by -step instructions for removing the built -in laptop keyboard
Why can you need to remove the built -in laptop keyboard?
The one who at least once tried to remove the keyboard from the laptop, understands that it is impossible to do this without its complete disassembly. If a person decided to carry out this difficult operation, then he should have one of the below reasons:
- It is required to clean the cooling system and other components of the laptop from dust;
- There was a need to replace thermal grease for better heat transfer of the radiator and processor;
- It was required to replace the oil in the bearings of the coolers;
- Microcircuits or other components need to be replaced or repair;
- The need to clean the keyboard from dirt or restore the damaged conducting film;
- The desire to replace the keyboard completely or its individual parts;

Figure 1. Why can you need to remove the built -in laptop keyboard?
In the event that none of the above reasons is suitable for you, and you just want to see what is inside, then it is better to abandon this venture.
Laptops, especially with plastic cases, have very fragile mounts, loops and boards. One incorrect movement and you will have to take your electronic friend to the trash.
How to remove the built -in keyboard from a laptop with your own hands?
Before proceeding to remove the keyboard, we will make a slight retreat on fasteners. There are two types of them:
- First view Fastards are found on modern laptops and netbooks. The mounts are plastic latches, reliably hidden inside the case. So, for their detection you will have to strain vision.
- As a rule, modern models have from four to eight mounts located around the perimeter of the keyboard and you can notice them by characteristic recesses.
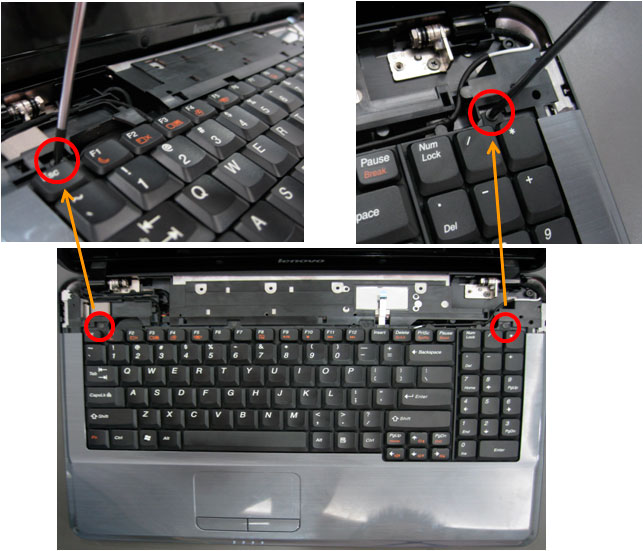
Figure 1. How to remove the built -in keyboard from a laptop with your own hands?
- Second view The fasteners have more ancient models of laptops. Most often they are found on the devices of TOSHIBA.
- Such mounts are several bolts that are removed by a regular cross screwdriver. However, they are not used on modern models.
After you have an idea of \u200b\u200bthe keyboard mounts and you know what should be expected, you can proceed directly to the keyboard withdrawal. Take the following steps, carefully paying attention to the photographs:
Step 1.
- First of all, you need to turn off the laptop and turn off the power supply. Next, you will need to get rid of the laptop body, since the keyboard mounts are under it and it is impossible to get to them.
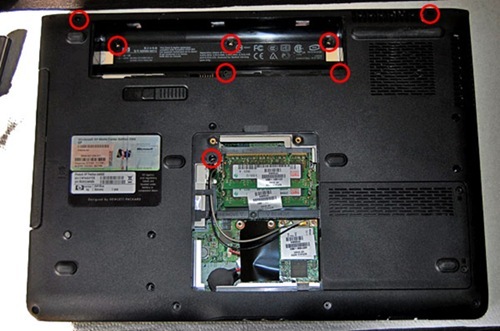
Figure 2. How to remove the built -in keyboard from a laptop with your own hands?
- Turn the laptop down the lid down and unscrew all the screws on the back panel, including those that hold the covers of RAM and the hard drive. If the front panel also has a couple of screws, twist them the same way.
Step 2.
- Next, get rid of all the rear parts removed, carefully turn the laptop and remove the upper parts of the case.
- Take a knife or other similar thin object, find the first removal of the mount on top in the left corner of the keyboard and lightly pry it with the tip to a characteristic click. Do the same with mounting in the opposite corner.
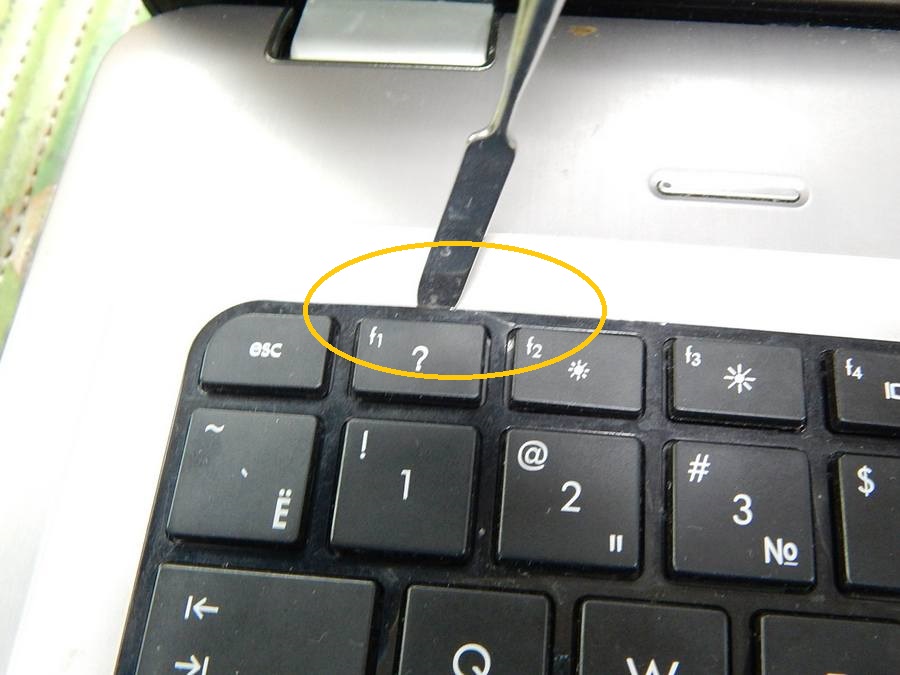
Figure 3. How to remove the built -in keyboard from a laptop with your own hands?
- After disconnecting the two upper side mounts, do the same with the corners below. Next, squeeze all the others in the same scheme, if any.
Step 3.
- After you disconnected all the latches, remember that the keyboard is connected by the wire to the motherboard. In no case do not pull it on yourself! First of all, you need to turn it off. Gently lift the keyboard panel and you will see a wide train that comes from it to the motherboard.
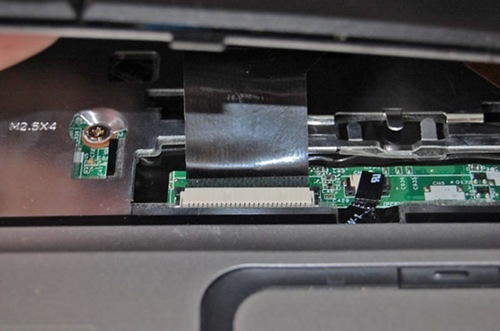
Figure 4. How to remove the built -in keyboard from a laptop with your own hands?
- Without making efforts, carefully pull for each edge of the train and remove it from the connector. Its end should look something like that shown in the figure below.
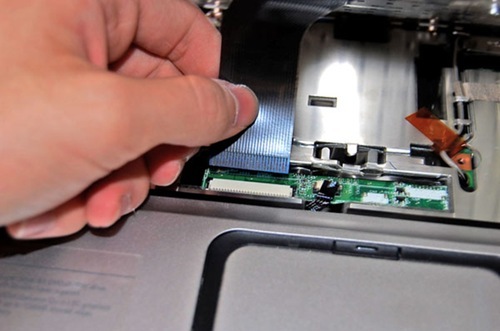
Figure 5. How to remove the built -in keyboard from a laptop with your own hands?
- That's all, the keyboard is withdrawn. Now you can carry out with her all those actions for which everything has been started. Its installation is carried out exactly in the reverse order. First, connect the train, tighten the mounts, tighten the bolts and use the laptop.
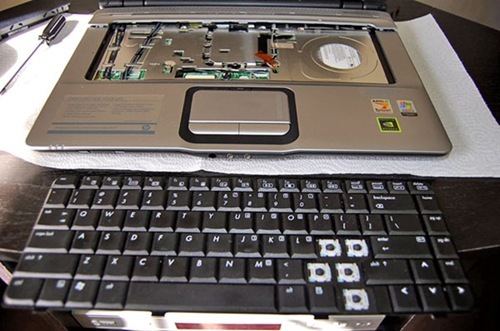
Figure 6. How to remove the built -in keyboard from a laptop with your own hands?
Important: Remember that the main thing in this matter is accuracy. All details of the laptop, starting with mounts and ending with the train, are very fragile. In no case do not use force in the process of removing the keyboard, otherwise your device may fail forever.
How to remove the keys from the built -in laptop keyboard?
- This issue is also interested in many. Indeed, it is under the keys that a large number of crumbs, dust and frozen sugar from spilled tea most often accumulate.
- As in the case of withdrawing the keyboard, the removal of its keys also has a number of certain difficulties compared to a stationary keyboard.
- In general, the principle of action is the same: tidy the key with the tip of the knife, pull up and the button is clutching. However, some accuracy is needed here.
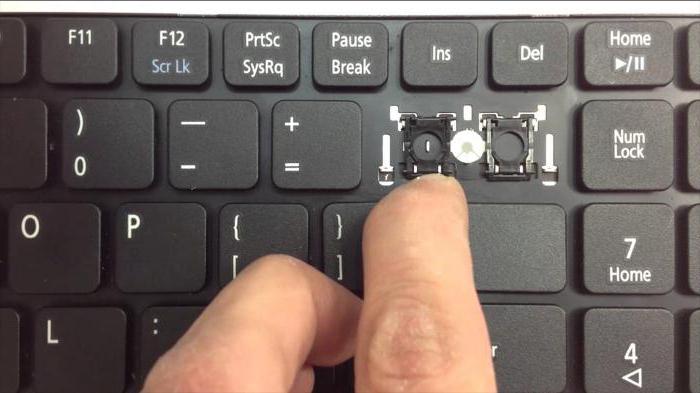
Figure 1. How to remove the keys from the built -in laptop keyboard?
- Pay attention to how the keyboard mounts on the laptop keyboard are arranged. The lower right angle on the lower side should be tidied. Otherwise, you can break the mount.
