How to put up from a flash drive in a bios? There is no load from a flash drive in the bios: how to set up a bios for loading from a flash drive?
A detailed guide for setting up different versions of the BIOS for installing the operating system with a flash drive.
Navigation
Today, almost all stationary computers and laptops are sold with the operating system already installed on them. However, at a certain moment it may be reinstalled. Most users believe that this can only be done with the help of a CD-disk that comes with a PC. But what if you have acquired a netbook on which, as a rule, there is no a drive?
Especially for such cases in the subsystem BIOS The loading function from the USB flash drive is provided. From our article you will learn how to activate this function in various versions BIOS.
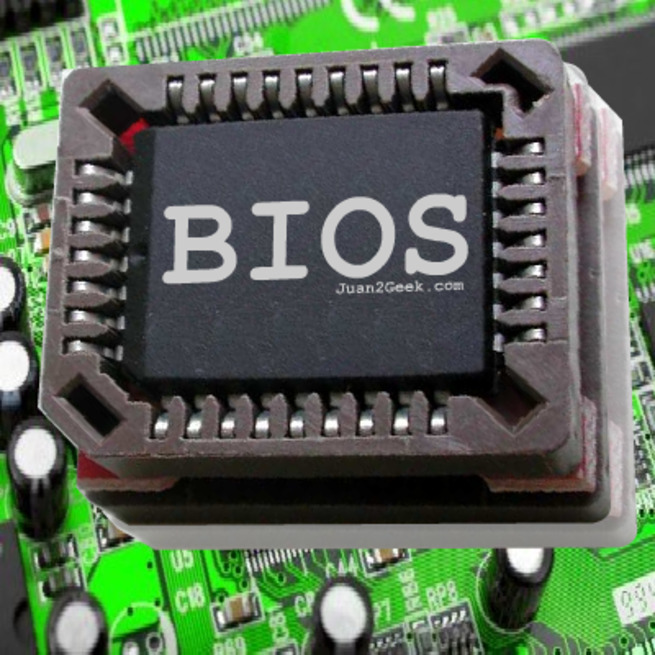
How to set up different versions of the BIOS for installing the operating system with a USB flash drive?
How to put up from a flash drive in a bios?
- BIOS - This is standard software that is present at any PC. With its help, all components of the system unit are set up, starting with the motherboard and ending with a variety of computer connectors.
- Entrance to BIOS It is carried out almost immediately after pressing the computer power button and before starting the operating system. To do this, click a certain key during the loading of the PC. Most often, buttons such as " Del», « F2" or " F12". However, on different computers models, the buttons responsible for input may vary. Therefore, during loading, it is necessary to carefully monitor the text popping up on the monitor.
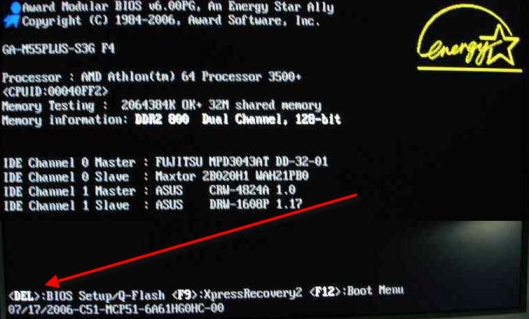
How to enter BIOS?
- Bios control is carried out using keyboard shooters and keys " ESC" and " Enter". The mouse does not work in it.
- Interface in various versions BIOS differs among themselves. Therefore, in order to carry out the correct setup from the flash drive, the first thing you will need to determine its version. You can understand this by his appearance.
How to configure Award BIOS for loading from a flash drive?
If during the entrance to BIOS You observe a menu of this type, as shown in the figure, which means that you have a version installed Award BIOS. It is quite popular and is often installed on most models of motherboard.
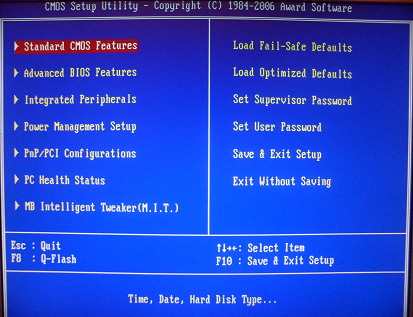
Figure 1. How to configure different versions of the BIOS for installing the operating system with a USB flash drive?
To set the load from the flash drive, you will need to perform a few simple actions:
Step 1.
- First of all, you should make sure that the USB controller is activated in the BIOS. Using arrows left/right, switch to the tab " Integrated Peripherals».
- In this section, find the lines " USB Controller" and " USB Controller 2.0". In turn, stand on each of them and press the key " Enter».
- A new window will appear in front of you, where it is necessary for each of these two points to select the parameter " Enable". After choosing, click " ESC»To get out of this section.
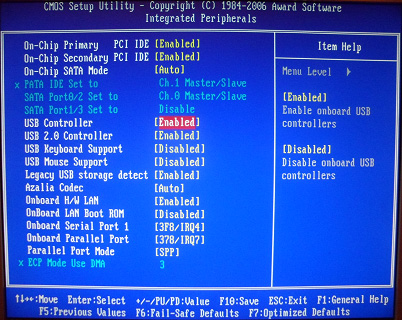
Figure 2. How to configure different versions of the bios for installing the operating system with a USB flash drive?
Step 2.
- Having made sure that the controller is activated, switch to the tab " Advanced Bios Features"And select the subsection" Hard Disk Boot Priority».
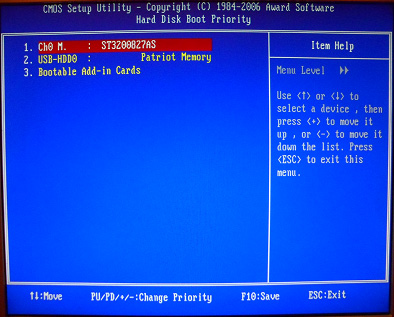
Figure 3. How to configure different versions of the bios for installing the operating system with a USB flash drive?
- As you can see, in this subsection there are three lines and in the very top there is a hard drive. You need to put the first USB flash drive in advance to the computer.
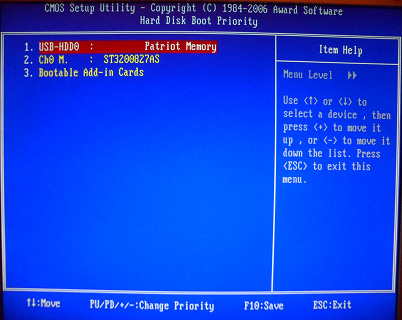
Figure 4. How to configure different versions of the BIOS for installing the operating system with a USB flash drive?
- Highlight the item " USB-HDD0"(On the right is the name of the drive) and move it to the upper position using the button" +" on keyboard. After moving, click " ESC»To return to the previous section.
Step 3.
- At the next stage, you will need to stand on the line " FIRST BOOT DEVICE", Press the key" Enter"And in the jumped window, select the parameter" USB-HDD". Previously, you have been installed " CD-ROM».
- After choosing a flash drive, press the key " ESC»To exit the menu.
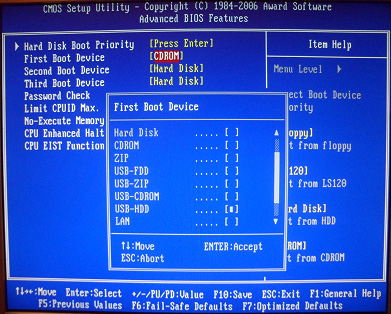
Figure 5. How to configure different versions of the BIOS for installing the operating system with a USB flash drive?
Step 4.
- The final step will be maintaining the changes and the restart of the computer. You will need to highlight the line " Save & Exit Setup", Then confirm the application of the changes with the button" Y"And click" Enter».
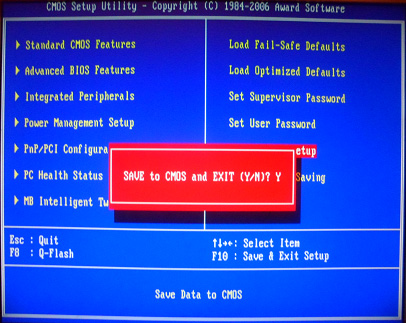
Figure 6. How to configure different versions of the BIOS for installing the operating system with a USB flash drive?
- The computer will go for a reboot, after which you will have a loading from a flash drive.
How to configure Ami BIOS for loading from a flash drive?
This version of the BIOS is more fresh and is present on the latest computers and laptops. If your screen displays such a menu as in the image from below, then you are dealing with Ami BIOS.
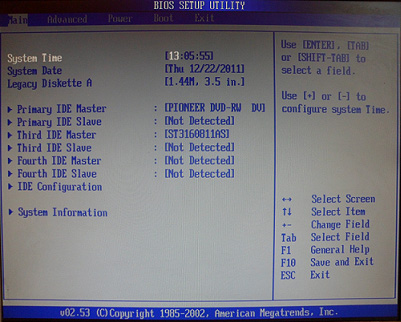
Figure 7. How to configure different versions of the BIOS for installing the operating system with a USB flash drive?
To set the load from the flash drive in this version, you will need to take a few simple steps:
Step 1.
- As in the last version, the first thing you need to make sure that you have activated a USB controller. To do this, switch to the menu section " Advanced"And select the subsection" USB Sonfiguration».
- To the right of the lines " USB Function" and " USB Controller 2.0»The current status is displayed. You need to stand on each line in turn, click " Enter"And set for both the parameter" Enable».
- To return to the previous menu, press the key " ESC».
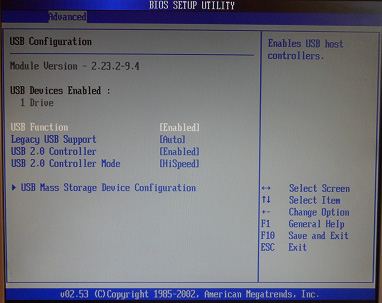
Figure 8. How to configure different versions of the BIOS for installing the operating system with a USB flash drive?
Step 2.
- Having made sure that the controller is active, switch to section " Boot"And choose the subsection" Hard Disc Drives».
- In this interface, instead of three points, there are two. The first device and the second. As in the previously given example, you will need to first install a flash drive.
- Stand on the first line, click " Enter»And in the jumped window, install your USB drive. Only his name is displayed here, so first recognize him through " My computer».
- To return to the previous menu, click again " ESC».
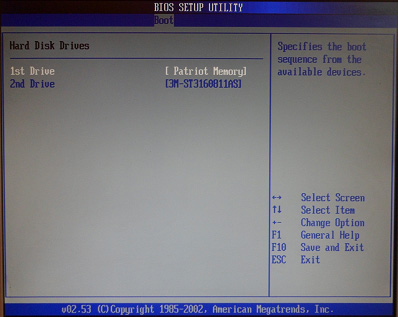
Figure 9. How to configure different versions of the BIOS for installing the operating system with a USB flash drive?
Step 3.
- Next, you need to go to the menu section " Boot Device Priority"And in the same way as in the previous step, install your USB flash drive in the first line.
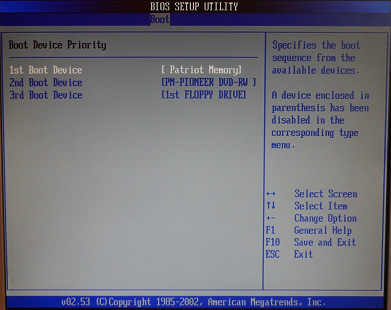
Figure 10. How to configure different versions of the BIOS for installing the operating system with a USB flash drive?
Step 4.
- The last step again will be the use of all changes and the restart of the PC. Switch to the tab " Exit", Select the line" Exit & Save Changes"And confirm the preservation of the button" Enter».
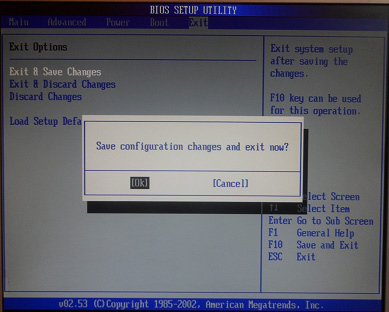
Figure 11. How to configure different versions of the BIOS for installing the operating system with a USB flash drive?
- After the computer restart, you can install Windows from a USB flash drive.
How to configure Phoenix-Award BIOS for downloading from a flash drive?
The latter on our list is the Bios version Phoenix-Award. If the menu is displayed on the screen of your monitor as in the figure below, then you have it.
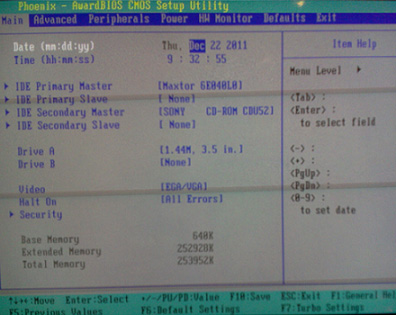
Figure 12. How to configure different versions of the BIOS for installing the operating system with a USB flash drive?
In order to configure this version for loading from a flash drive, you will need to perform a few simple steps:
Step 1.
- In the same way as in past examples, first of all, you should check the activator’s activation. Switch to section " Peripherals"And set the lines" USB Controller" and " USB Controller 2.0" parameter " Enable».
- To return to the previous menu, click " ESC».
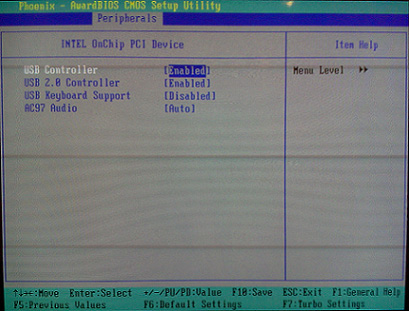
Figure 13. How to configure different versions of the BIOS for installing the operating system with a USB flash drive?
Step 2.
- Next, switch to section " Advanced"And set the line" FIRST BOOT DEVICE" parameter " USB-HDD».
- Click " ESC»To return to the previous menu.
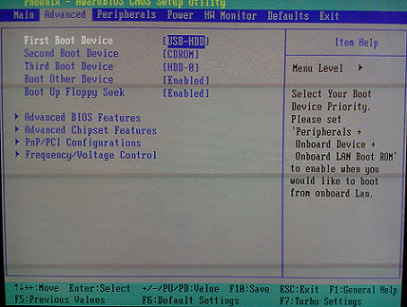
Figure 14. How to configure different versions of the BIOS for installing the operating system with a USB flash drive?
Step 3.
- At the final stage, it will be necessary to apply changes and restart the computer. Switch to section " Exit"And highlight the line" Save & Exit Setup", Then click" Y"And the key" Enter».
- After rebooting, you can install Windows from a flash drive.
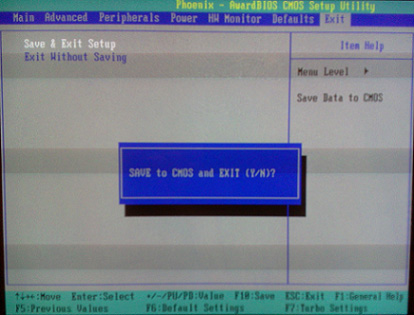
Figure 15. How to configure different versions of the BIOS for installing the operating system with a USB flash drive?
The article presents the most common versions of the BIOS. On different models of computers, they may vary slightly, however, adjusting the loading from the flash drive on each is approximately the same.
Important: If you are not an experienced user, do not try to independently change other parameters in BIOS! This can disable your computer.
