How to install or reinstall Windows XP on a netbook via bios from a flash drive: instruction
Guide to write a Windows XP image on a USB flash drive and an instruction for installing the operating system to a netbook via BIOS.
Navigation
Operating system version Windows XP. It has long been outdated and removed from the release, but many users of weak stationary computers and netbooks still prefer to her, because This version of the OS does not require a large number of system resources, it works fast enough and supports almost all modern applications.
Since it is no longer possible to buy in the store disk with this version of the OS, users have to download its images from torrent trackers and other resources on the Internet, after which they independently write them on removable media. Due to the fact that today the CDs are few people use, and there is no drive on netbooks at all, most often USB flash drives are used to record the image of the operating system.
In our article you will learn how to install or reinstall the operating system Windows XP. on a netbook with a flash drive through BIOS.

Image 1. Instructions for installing Windows XP on a netbook through the BIOS from the flash drive.
How to install or reinstall Windows XP on a netbook via bios from a flash drive: instruction
Users who have previously ever dealt with the installation of operating systems from a USB drive, this process may seem at times more complicated than installing the OS from the CD. However, there is nothing complicated in this procedure. You will need:
- Ready image of the operating system Windows XP.;
- Special utility for recording the image of the operating system on the USB flash drive;
- Minimum Knowledge of PC Settings BIOS To select installation media;
Any special skills you will not need, since most of the actions will be performed by programs without your participation. Below, the above-step instructions for installing the operating system is suitable for all manufacturers and netbook models, and instead of a USB flash drive, an SD card use option is possible.
First stage: Choosing an operating system image

Image 2. Selecting a suitable operating system image.
- Most important component for installation Windows XP. It is its distribution, which can be found and free download on various torrent trackers online. For example, high-quality assemblies are found at the resource. mainTracker.org..
- However, in order for you in the future, you do not encounter certain system errors, it is strongly recommended to download the original distribution of the operating system in which custom programs and settings are not embedded. To understand which one is clean, read the description of the distribution and user comments.
Second Stage: Preparation of the USB flash drive and write an operating system image
In one of our articles, we told how to create a loading USB flash drive using the RUFUS program. To record the image of the operating system, you will need it. You can download the program by of this link.
Insert the prepared USB flash drive to the computer, the desired size of which should be no less 4 GB and do the following:
Step 1.
- DownloadInstall and run the RUFUS program.
- In the upper line, select your flash drive or memory card from the list, to which you are going to write the image of the operating system.
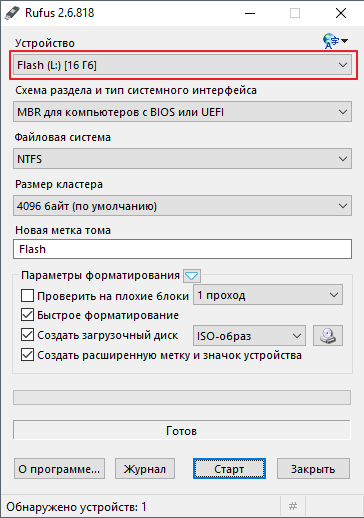
Image 3. Selecting a USB media for writing an image.
Step 2..
- In the column " File system»Set the parameter" NTFS", And in the lines" Section section"And" Cluster size»Leave default values.
- Below, on the right side, select the type of disk image (ISO, MDS, etc.), then click on the drive icon and specify the path to the distribution of the operating system.
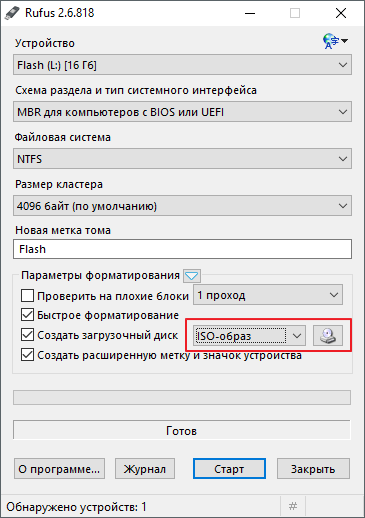
Image 4. Select the image of the operating system to record on the USB flash drive.
Step 3..
- Mark the stitch markers " Fast formatting», « Create an extended label and device icon"And" Create boot disk».
- Under the string " Create boot disk»Two options for installing the operating system will appear. You need to mark the marker " Standard installation of Windows", Then click on the button" Start».
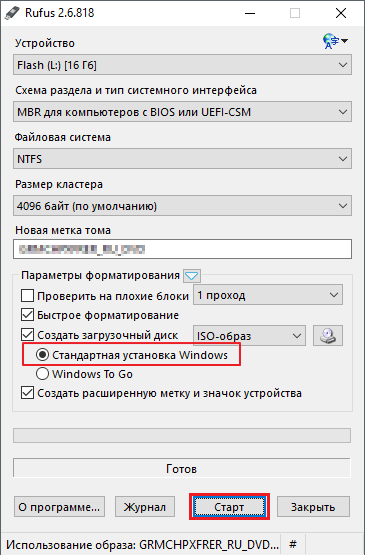
Image 5. Understanding the program and start writing a flash drive.
- During 10 – 15 The selected image will be recorded on your USB flash drive and you can go directly to the installation of the operating system.
Third Stage: Installing the Windows XP operating system through the installation file
For those who are afraid to climb the settings Bios. and change parameters in it is the ability to install Windows XP. From under the already installed operating system as follows:
Step 1.
- Open " My computer"Right click on the boot flash drive created by you, and in the context menu that appears, select the line" Open».
Step 2..
- In the folder that opens you need to find an installation file with the extension " eXE" In his title should appear the word " Setup."Or abbreviation on like" Winxpsp3." Twice click on it with the left mouse button to start.
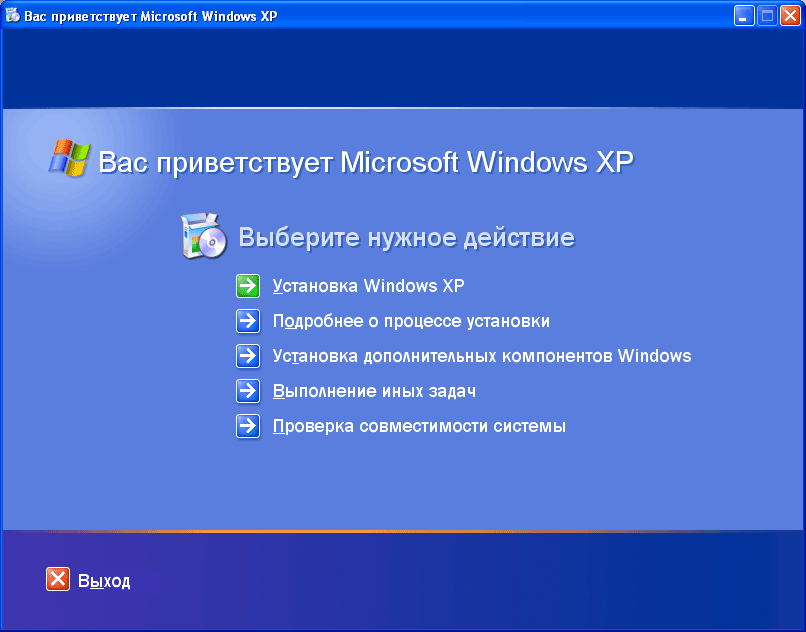
Image 6. Installing Windows XP through My Computer.
Step 3..
- A special installation program will be launched. Windows XP.In the main window of which you will be prompted to update the operating system, update it or reinstall.
- To install the latest operating system, select the option " Installing Windows XP."And then follow the tips of the installation program. All necessary settings for you will complete for you.
Despite the fact that this method of installing the operating system is extremely simple and understandable for an inexperienced user, it has several serious shortcomings:
- When using this method, you will not have the ability to fully format the hard disk and get rid of the already existing operating system;
- After installing Windows while the computer is loaded, you will constantly have to choose one of the two installed operating systems;
- The old operating system will occupy a hard disk space. In the installed video, it weighs approximately 15 - 20 GB;
Fourth Stage: Installing Windows XP Operating System through BIOS
To carry out high-quality installation of the operating system Windows XP. With full formatting hard disk, it is recommended to carry out this process through BIOS. However, in order to do this, just insert a flash drive into a computer. To begin, it is necessary to set certain settings in BIOSE. Namely - the order of loading devices.
For entry B. BIOS Immediately after turning on the computer, you must press a specific button. Most often, while turning on the computer, a hint appears on the screen with the title button that must be clicked for the entrance to BIOS. Usually these keys Del., F2. or ESC. The signal about the successful input will be the appearance on the screen of the corresponding menu. Most often these two options are found:
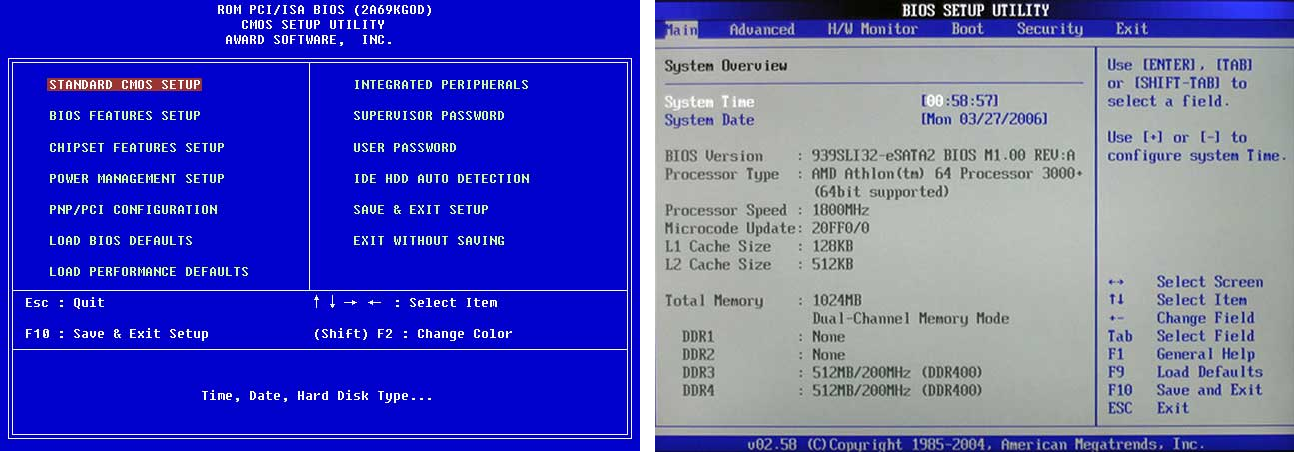
Image 7. Popular BIOS versions.
In the event that the standard login buttons did not give the desired result, reboot the computer again and try using the keys from this table:
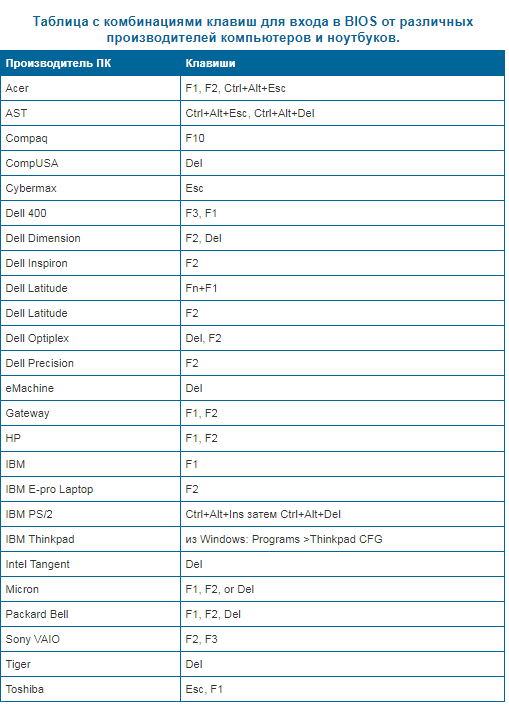
Image 8. Combinations of keys to enter the BIOS on netbooks and laptops from different manufacturers.
After you entered the BIOS, you need to set the download from the flash drive. To do this, do the following:
Step 1.
- Go to section " Advanced Bios Features."And then go to the tab" Hard Disc Boot Priority».
- In the window that opens in the top line, a hard disk is located in our example. In his place you need to move the USB flash drive, which is below. Arrogments stand on a line with a flash drive and with the key " +»Move it into the upper line.
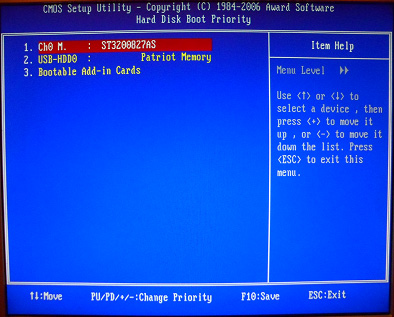
Image 9. Installation of load priority.
Step 2..
- Using the " ESC»Return to the previous menu, stand on the line" First Boot Device.", Click" ENTER"And in the small window that appears, select the" USB-HDD.».
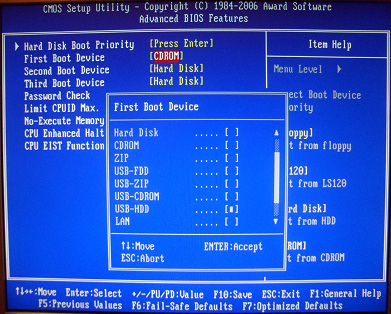
Image 10. Selecting a Windows boot device.
Step 3..
- Using the " ESC»Exit the initial menu Bios. and press " SAVE & EXIT SETUP", After which the key" Y.»Confirm the action. Changes will come into force and the computer will go on a reboot.
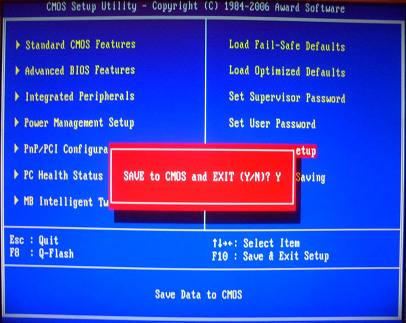
Image 11. Saving changes and reboot the computer.
Step 4..
- If you are all done correctly, then the next inscription will appear in the process of downloading the computer:
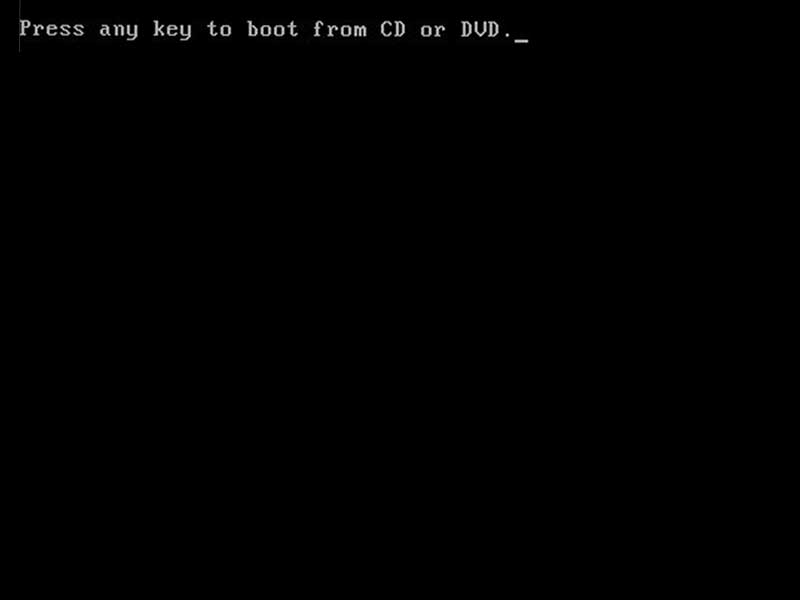
Image 12. The beginning of the installation of the operating system from under the bios.
- She will serve as a signal that it is possible to start the installation. Windows XP.. To start the installation, you must press any key on the keyboard until this inscription disappears.
- Next, the installation program will be launched. Windows XP., Following the prompts of which you will be able to install the operating system without any assistance.
Important: Location of the priority of downloads in other versions Bios. Slightly different from the one that is specified in our example, however, you can easily find this setting on the tab, in the title of which the word is present " Boot.».
