
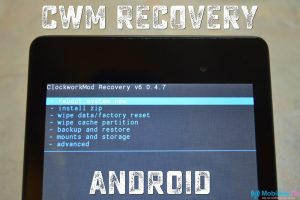
How to install CWM Recovery Android?
In this article you will learn how to install CWM Recovery.
Navigation
Many users, even the most experienced, there are difficulties in which they can't install a modified recovery or simply CWM Recovery.
It should be noted that today there are only two modified recovery - it is TWRP and CWM Recovery, but as we will discuss today about CWM Recovery, then TWRP Recovery We will not affect.
But still, who is interested in installing TWRP Recovery, you can familiarize yourself with it in this article.
So, as you understood today, we will consider the installation of the modified CWM Recovery recovery, while installing, both from the computer and on the device.
What methods of installing CWM Recovery exist?
Method 1. Install CWM Recovery using the ROM Manager program
So, the very first and main way that can be said very popular.
At the same time, I would like to note that the installation of a modified recovery in this program is very simple, and it takes about 10 minutes from strength, and fulfillment is performed at all by pressing one point in the ROM Manager.
Well, let's move on to the process of installing a modified recovery.
- First of all, you need to go to the official website of the ROM Manager program in order to check the availability of your Android device in the display list of devices.
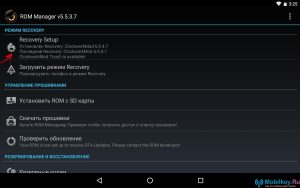
- Now you actually start the ROM Manager program, and then in the initial window to select the item called "Recovery Setup".
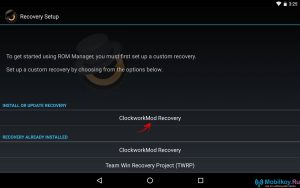
- After that you will go to another section where you need to find a subsection "INSTALL OR UPDATE RECOVERY"and down to Point from him CLOCKWORKMOD RECOVERY.
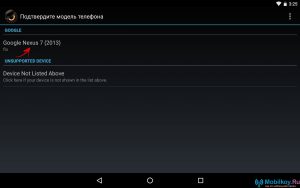
- The program will then scan your device, as a result of what you will see the name of your Android device. In our case, this is the device Google Nexus 7 (2013). You need to click on your device.
- When you click on your Android device, you will go to the next step in which you need to click on the section "Install CLOCKWORKMOD".
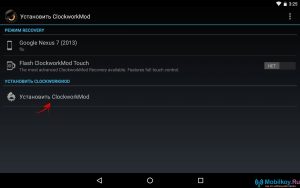
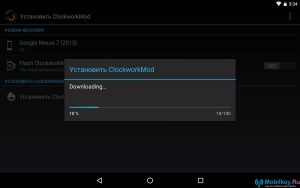
- Well, after that you will notice that I started downloading something, namely downloading ClockworkMod.
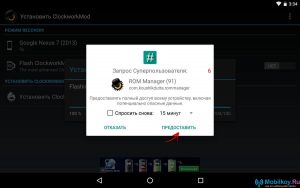
- After everything is downloaded, you will get request for superuser rightswhich actually need to provide this application.
- Now after a while you will need to get a special notice "SuccessFully Flashd ClockworkMod Recovery!". Therefore, as soon as you get it right away, click on the button. "OK".
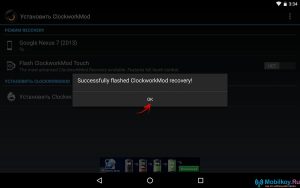
- Ready! You installed modified CWM recovery on your smartphone, but for its operation you need to simply restart your Android device.
Method 2. Install CWM Recovery using FastBoot Program
So, now we will consider the installation of this recovery through the most popular way, for which the FastBoot program is useful.
- First of all, you need to download FastBoot program, for which you must go to link, and then go down to the section "GET JUST THE COMMAND LINE TOOLS" And select the desired boot distribution of this program, depending on which operating system is installed on your computer / laptop.

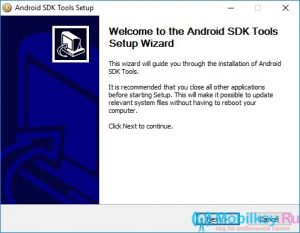
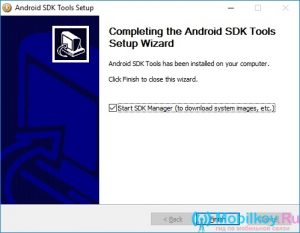
- After the loading distribution is downloaded from the site, you need to run it, in the end you get this window with the inscription "Welcome to the Android SDK Tools Setup Wizard". You just need to click on the button. "NEXT\u003e", To redirect to the next installation phase.
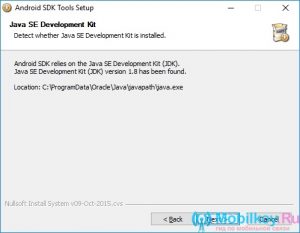
- Now the installation window automatically checks the presence of the required Java SE component, if it is not, then the installation program will automatically send you to download what is necessary for further installation. If the directions and openings of new tabs in the browser were not detected, then you need to just click on the button "NEXT\u003e".
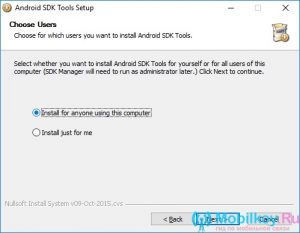
- Here you need to choose the item "INSTALL FOR Anyone Using This Computer"What means "Install for other users of this computer", and after clicking on the button "Next\u003e".
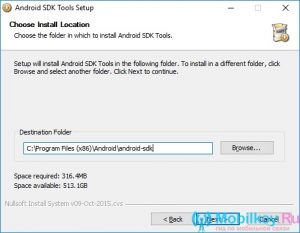
- Now you will go to the step of selecting the path, that is, the places where this program will be installed. If you are an inexperienced user, you do not advise you to change anything here, just click on the button "Next\u003e".
- Ready! Instalo Android SDK Tools programIf you want to run the program now, check the box. But now she is not needed for us.
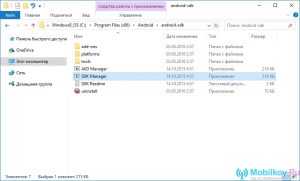
- After that you need to go to the folder "Android-SDK", and after run executable file "SDK Manager".
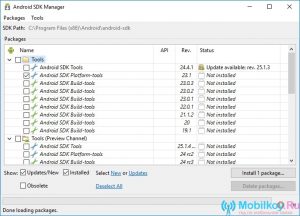
- In the window that opens, you will be offered a list of parameters and settings, as well as the possibility of setting the tick, but we also need to install only one tick, and it is opposite item "Android SDK Platform-Tools", and after clicking on the button "Install Packages".
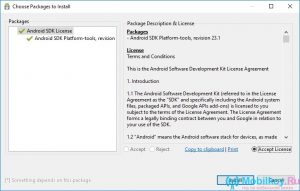
- Now you need to confirm your consent, for which you select item "Accept License", and then click on the button "Install."
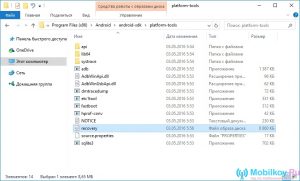
- Now that you have done all these actions to one, you will notice the appearance of a new folder. "Platform-Tools"which will be the necessary programs for us, such as "ADB" and "FastBoot".
CWM Recovery Installation Process
- First of all you need to download a file version "Recovery-clockwork.imd"and you can do it by link. In this case, you need to choose exactly the version that your Android device supports.
- After the file "Recovery-clockwork.img" Downloaded, you will need to move it to the folder "Platform-Tools". By the way, for more convenience you better rename the file "Recovery-clockwork.img" In the name "Recovery.img"Believe me so much easier, as when working with the command line, and this will be subsequently and in entering the name of the file itself.
- Turn on the phone on the phone "USB debugging"for which you pre-connect it to the computer via the USB interface
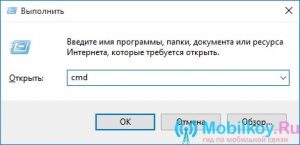
- Then run the command line (CMD)By combining keys "Win + R"where just enter the command "CMD"then click "ENTER".
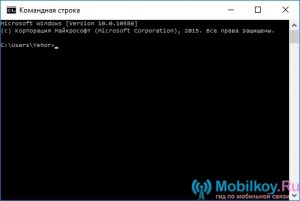
- After that, the command line will open, in which you need to sequentially enter the command data, and after the introduction of each press the button "ENTER".
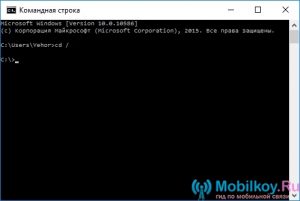
CD /
CD path to the "Platform-Tools" folder
- In our case, we got this command, that is, we supplement it using the path to the files.
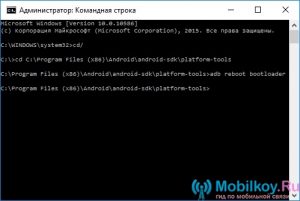
cD Program Files (x86) \\ Android \\ Android-SDK \\ Platform-Tools
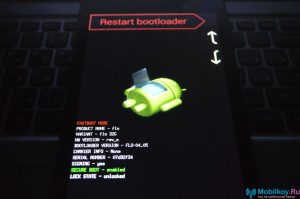
adB Reboot Bootloader.
- So, if you did everything right, that is, as it was put according to our instructions, you will receive the following
- Now you need to use the command "CD /" In order to go back on the way to one or another folder. If you need to go to the previous section of the folder, simply suck the command on the command prompt "CD /", and after click on the button "ENTER"And in the end we will move on from one way to another.
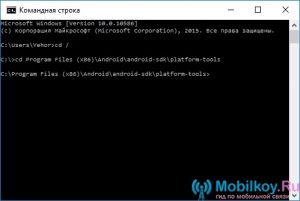
- Now we need to go to the folder itself "Platform-Tools"why just write down on the command prompt and click "ENTER".
cD Program Files (x86) \\ Android \\ Android-SDK \\ Platform-Tools
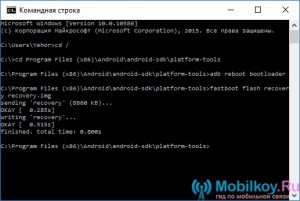
- After that, you need to enter a command that can be said to automatically install CWM Recovery. The command you want to enter into the command prompt FastBoot Flash Recovery Recovery.img ».
- If you are all right, that is, as we described, you will receive a message in the command line, which will be called by such an inscription "FINISHED, TOTAL TIME: 0.800S" - This means that the firmware of the recovery was fulfilled successfully.
- Ready! Now on your smartphone is installed modicated CWM Recovery instead of the basic, which is pre-installed at the production.
Method 3. Install CWM Recovery using Rashr
It is worth noting, The Rashr program is a very convenient and easy-to-use application that will allow you to make actions that are not available to the eye of the usual user.
- First of all, you need to download Rashr app, and you can do it on the official service. Play Market..
- Now that the application is automatically installed, you need to run it. When you first start the Rashr application, you will receive request for superuser rightsthat must be provided for further work with the program.
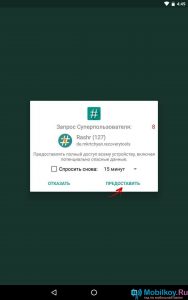
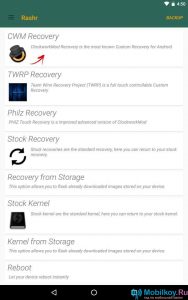
- Here you need to choose the necessary program that we will issue the rule of superuser, and you need to choose a program "CWM Recovery".
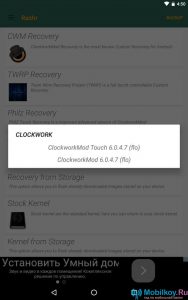
- After that, all versions of the CWM Recovery program will occur. In our case, we got 2 versions ClockworkMod.
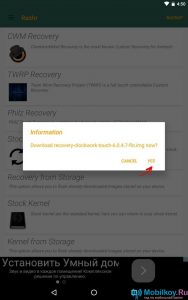
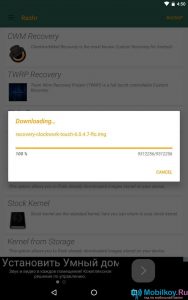
- Then you will receive a request for downloading a file called that "Recovery-Clockwork-TOUCH-6.0.4.7-Flo.img"You also need to just click on the button "YES".
- Now it will start downloading the boot file of the recovery and the version you have chosen in the available list of versions.
- When downloading is over, you will receive a message in which it will be aware of the successful installation of the CWM Recovery firmware by pressing the button. "YES"You will allow the smartphone to reboot with the already modified recovery.
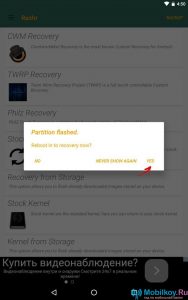
- Ready! Now you have CWM Recovery on your Android device.
Method 4 Install CWM Recovery on Samsung devices using ODIN
It is worth notingThe owners of smartphones and tablets from Samsung are very lucky, for they can install CWM Recovery by using the ODIN program.
- First of all, you need to download CWM for your device from Samsung.
- After that, you need to connect your device to your computer / laptop, which can be both a tablet and a smartphone, and you need to connect via a USB interface.
- Now you must Open the ODIN3 V3.10 programin order to in the field "AP" Adding a file from recovery.
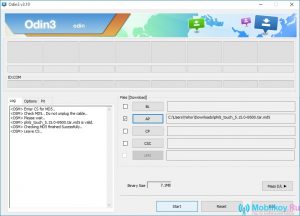
- After that you need to click on the button "Start"And then the process of installing a modified recovery will go.
- When the installation process is over, you will need to just restart your device.
- Ready! Now on your smartphone is CWM Recovery!
Well, as you see the process of installing a modified recovery CWM Recovery is not so complicated. Therefore, if you decide to once again experiment with your device, or to turn it into a certain similarity of a non-standard smartphone at all, then use CWM recovery.