
How to make a screenshot and insert into the document in the Word?
Step-by-step instructions for creating screenshots in two ways and their subsequent insert in the text document of Microsoft Word.
Navigation
In our article " How to make a Word document screenshot?»Details described the creation procedure screenshot Built-in programs of the program Microsoft Word. With the subsequent addition of the resulting image into a text document. However, the screen snapshot function from the editor itself is available exclusively in the package versions. Microsoft Office 2010. and later. The question arises: how to be people who use packages Microsoft Office 2003. and 2007where the screen snapshot function is program Word. absent?
In this article you will find detailed instructions for creating screenshotov and their inserts into documents Word..

Image 1. Description of ways to create screenshots using Windows tools and insert them into Word document.
How to make a screenshot and insert into the document in the Word?
Due to the fact that in old versions Microsoft Word. No screen snapshot function, to create screenshot We have to resort to third-party means. There are many programs that allow you to "take pictures" the entire screen or separate area, but the article will consider two ways to create screenshotov built-in tools of family operating systems Windows.
Screenshot Creating: Printscreen Button and Paint Graphic Editor
The first way to create screenshot - this is the use of the key Printscreen.", Which is present on any keyboard of any computer. The sequence of creating the following:
Step 1.
- Open on your screen a window that you need to take a picture and press the " Printscreen."Located on the right side of the keyboard in its top.
- Open menu " Start", Go to section" All programs», Expand the folder" Standard"And run the program" Paint.».
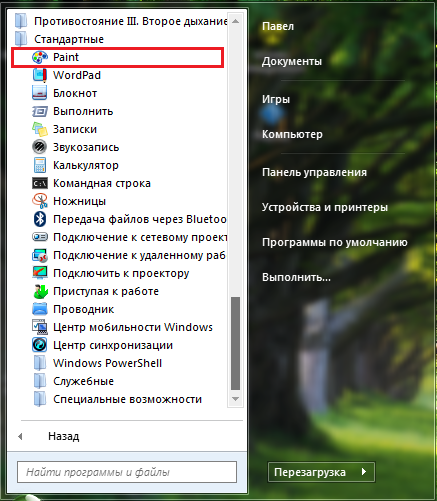
Image 2. Running a graphic editor.
Step 2..
- Using a combination of keys " Ctrl + V."Insert created screenshot to the working area of \u200b\u200bthe opened editor.
- You will display an exact copy of your screen at the time of pressing the " Printscreen." On the toolbar, click the left button on the pencil icon to reset the selection, after which you again select the " Selection", Highlight the desired on screenshot Area and click the icon in the form of scissors for trimming screenshotif there is such a need.
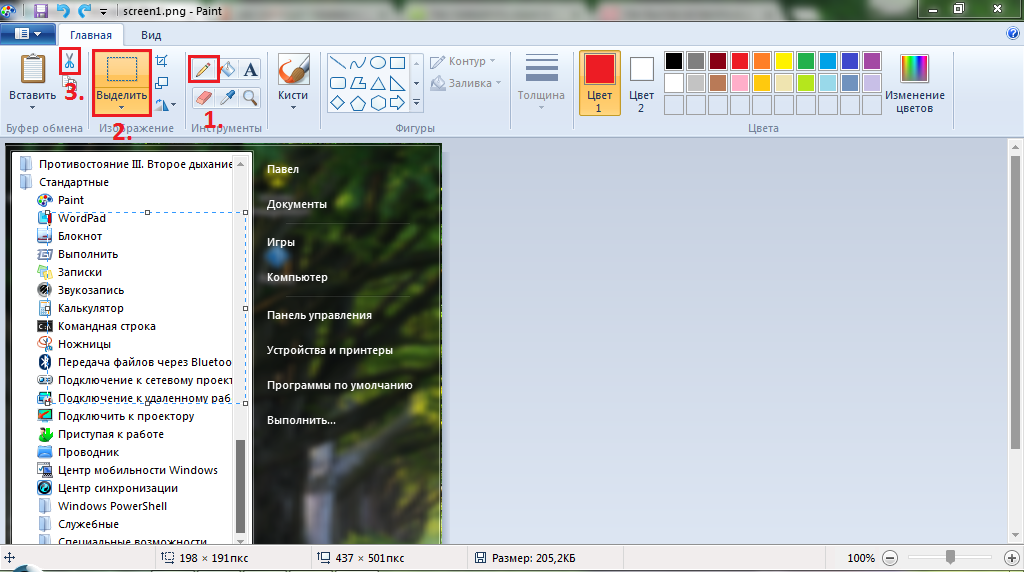
Image 3. Insert the screenshot and its primary processing.
Step 3..
- After editing an editing, click on the icon in the upper left corner of the program and select the list in the list. Save as».
- Set the file name and select the folder to save your screenshot.
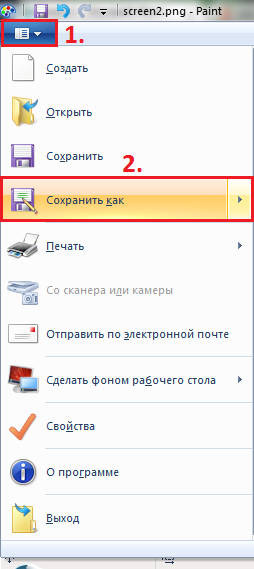
Image 4. Saving a screenshot to a computer.
Creating a screenshot: Built-in Windows Scissors tool
Method for creating a screenshot using tool " Scissors»It is much more convenient to have been described above. You do not have to open additional programs to insert the image and cut the desired area from it. The tool allows you to immediately select the desired part of the screen you want to capture. This happens as follows:
Step 1.
- Like the last time, open the window you need, an application or a document that you need to take a picture, then expand the menu " Start", Go to section" All programs", Open the folder" Standard"And run the tool" Scissors».
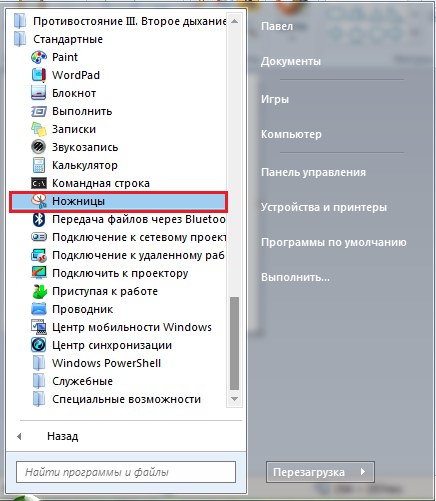
Image 5. Search and launch scissors tool.
Step 2..
- After starting the tool, your screen will be blocked a little. You need to hold the left mouse button and select the part of the screen you want to convert to the graphic file.
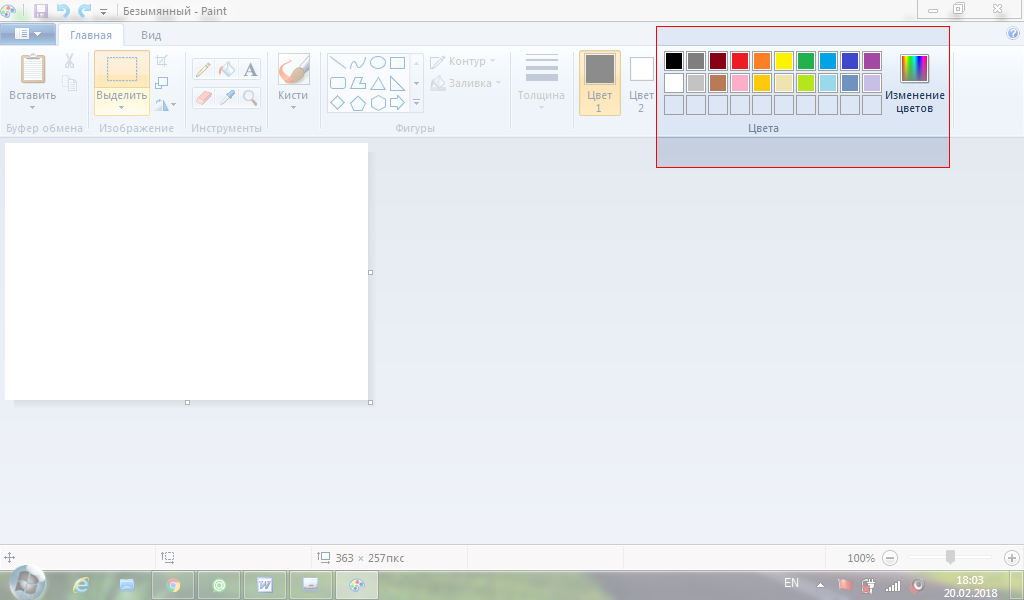
Image 6. Selecting the screen area.
Step 3..
- After selecting the desired area, release the mouse button. You will appear in front of the selected part of the screen. Optionally, you can trust something on the resulting image using the tools " Pen" or " Marker».
- For preservation screenshot Click on the section " File", Select a line" Save as", Set the file name and select the folder to save.
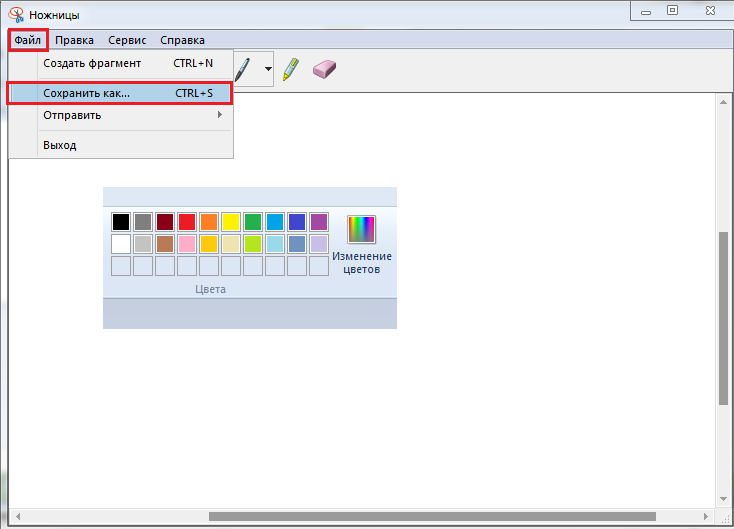
Image 7. Editing an image and saving it to a computer.
Insert a screenshot in document Word
Now that you have got acquainted with two simple ways to create screenshotov, you can move to their insertion into the document Word.. This is done as follows:
Step 1.
- Run the program Microsoft Word.Create a new text document or open earlier.
- At the top of the program window, expand the section " Insert", Mouse over the mouse over the line" Picture"And in the lateral list that appears, click on the line" From file.».
- A window will open where you need to choose screenshot, pre-stored on the computer.
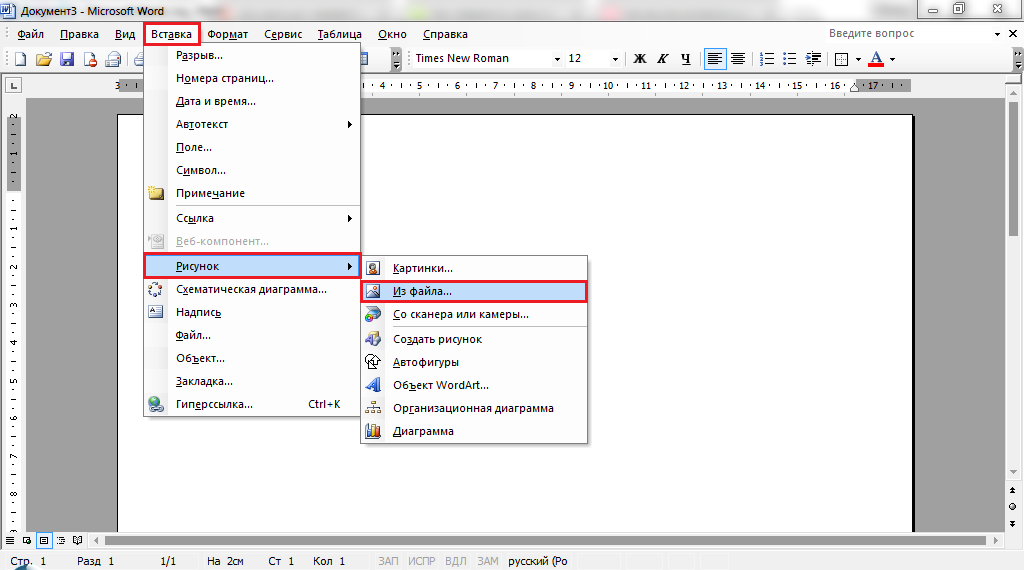
Image 8. Insert a screenshot in Word.
Step 2..
- After selecting the file, in the document Word. Display made by you screenshot. If you click on it with the left mouse button, the image settings panel will appear where you can change its transparency, contrast, set the display settings and much more.

Image 9. Screenshot Processing in Word Document.
Finally, it should be said that the article provides an example insertion. screenshot in text document program Microsoft Word 2003.which is distinguished by the interface from Microsoft Word 2007.. However, the sequence of adding an image to the text remains exactly the same.