
How to make a Word document screenshot?
Step-by-step instructions for creating a screenshot through the Microsoft Word 2010 program.
Text editor users Microsoft Word. Often you have to insert into your texts accompanying illustrations or screenshots. In earlier versions of the program to add screenshot A text document was required to make it with third-party means, save to the computer and separately download to the editor.
However, starting with the version Microsoft Word 2010.The program has appeared in the program screenshot Tools of the editor itself with an instant adding an image to the desired place of a text document. The use of this function will greatly facilitate work with texts that have graphic support, and from this article you will learn how it can be done.

How to make a Word document screenshot?
Before reading the instructions for creating screenshot Make sure the package is installed on your computer. Microsoft Office 2010. or more fresh. In versions Microsoft Office 2003. and 2007 This function is missing.
For creating screenshot You need to perform the following actions:
Step 1.
- Run the program Microsoft Word., Create a new document or open ready.
- In the top of the program window, expand the section " Insert"And on the tool panel, click on the" button " Snapshot».
- A small window will open, in which the thumbnails of all the currently running programs and folders will appear.
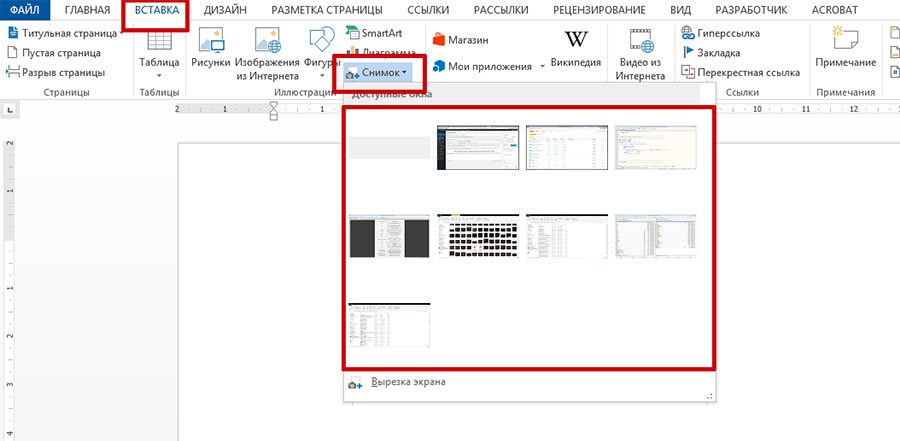
Image 2. Creating a document and transition to tools for a screen image.
Step 2..
- Next, you need to click the left mouse button on the miniature of the program, folder or document to create a snapshot of this window.
- After clicking on a thumbnail in an open text document, an image of that program itself or the folder you selected will appear.
With the mouse, you can move it to any place of a text document.
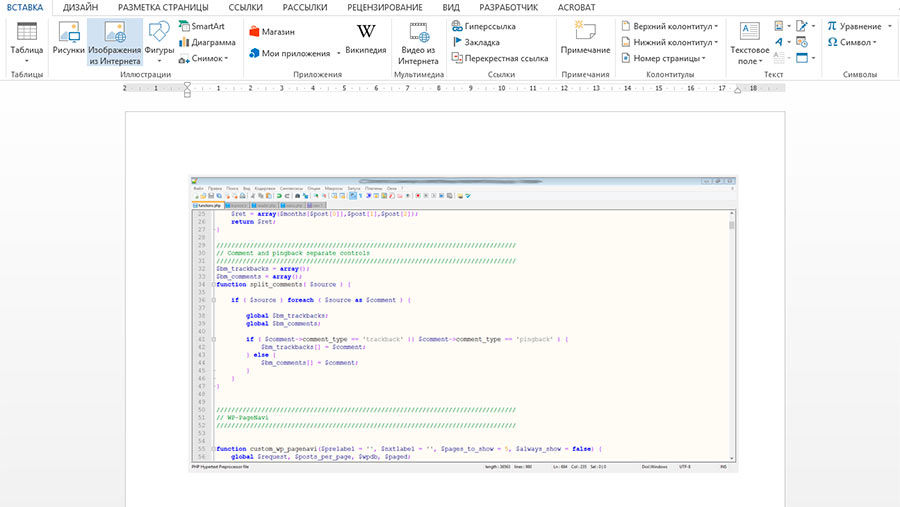
Image 3. Adding a finished screenshot into a document.
Step 3..
- As Microsoft Word. He is a professional text editor with the possibility of adding illustrations, it also contains a number of functions for editing these same illustrations.
- For example, an extremely useful tool is the effects of blur of edges of the image. This allows you to emphasize the contents. screenshot.
- To apply the effect, click two times the left mouse button to the image inserted into the document and you will be taken to the section " Format" Next, on the toolbar at the top of the program window, click on the "button" Effects for Figure».
- In the discontinued list, hover the mouse over the line " Smoothing"And in the lateral list that appears, select the appropriate format of the image edges of the image.
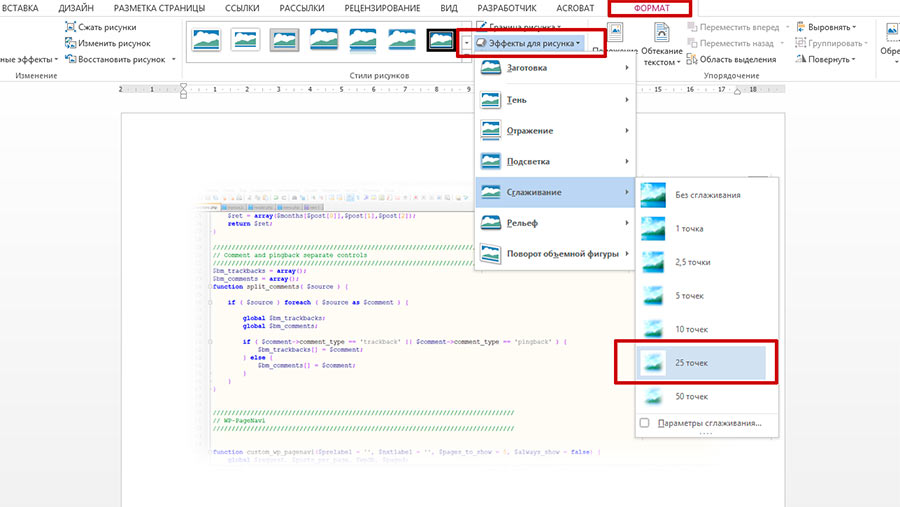
Image 4. Processing the finished screenshot.
- In addition to blur you can give your screenshots Volume by applying shadows, add backlighting or rotate the image by creating an effect 3D.
How to make a screenshot of the Word document?
In some cases it may be necessary to make screenshot Not a whole window, but only a specific part of it. In order not to trim the image by third-party funds, developers from the corporation Microsoft. Added a picture of a separate part of the screen to your editor. To take advantage of it, you will need to do the following:
Step 1.
- As the last time you create a new text document or open ready. Go to section " Insert"And click on the" button " Snapshot»On the toolbar.
- In the appeared window with miniatures of running programs and open folders at the bottom, click the "button" Screen clipping».
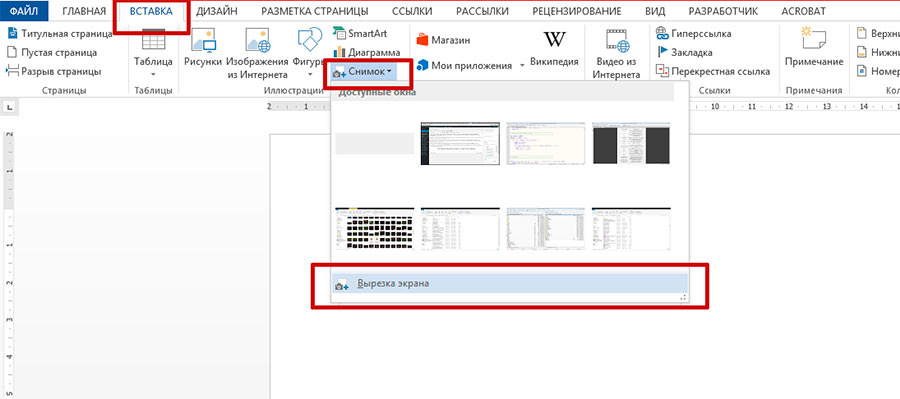
Image 5. Go to the tool for a snapshot of a separate part of the screen.
Step 2..
- After clicking on this button, the contents of your screen will slightly blur. You need to hold the left mouse button and highlight the area you want to capture on the screen.
- As soon as you release the left mouse button, the area allocated on the screen will be converted into an image that will automatically be added to your text document.

Image 6. Select the screen area and add its image to the document.