How to make borders in Excel Table 2003, 2007 and 2010: Methods
Step-by-step guide to work with the "Highlight of Borders" in Excel 2003, 2007, 2010.
In the previous article " How to make a fixed cap in Excel Table"We talked about a program tool that allows you to highlight and fix a specific area of \u200b\u200bthe table on the screen. Today we will talk about a no less useful tool that allows you to highlight the borders of the table.

How to make borders in Excel Table 2003, 2007 and 2010?
When you create a table, sometimes it becomes necessary to designate its boundaries with lines of different colors, width, etc. There are two ways to determine the borders of the table:
The first method (simple and limited)
Step 1.
- Open Excel With a clean sheet and highlight the area in which your table will be located.
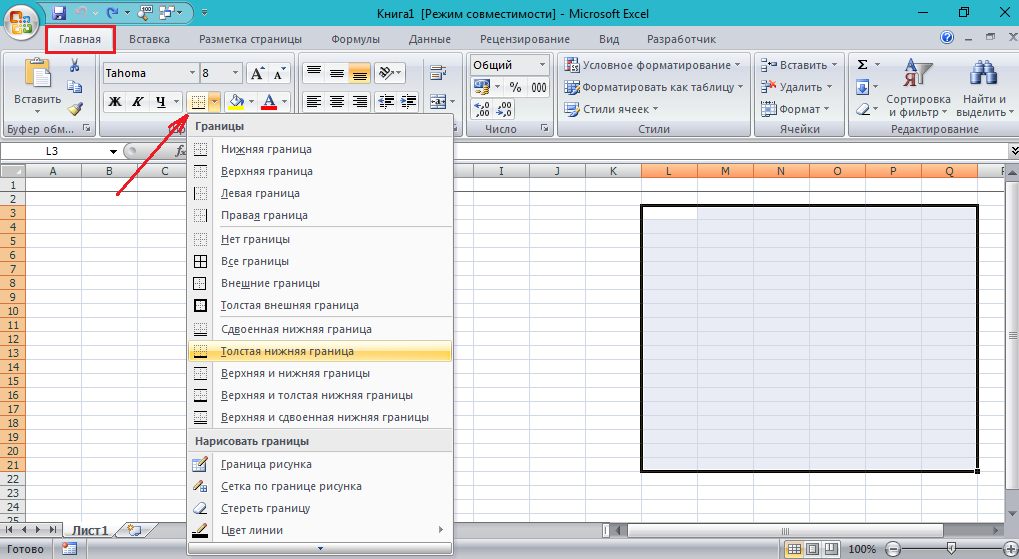
- At the top of the window on the tab " the main»Click on a special icon" Borders"And select the appropriate option from the list.

Figure 1. How to make borders in the Excel 2003, 2007 and 2010 table?
The method of the second (with extended capabilities)
Step 1.
- Open a new document Excel And highlight the area in which your table will be located.
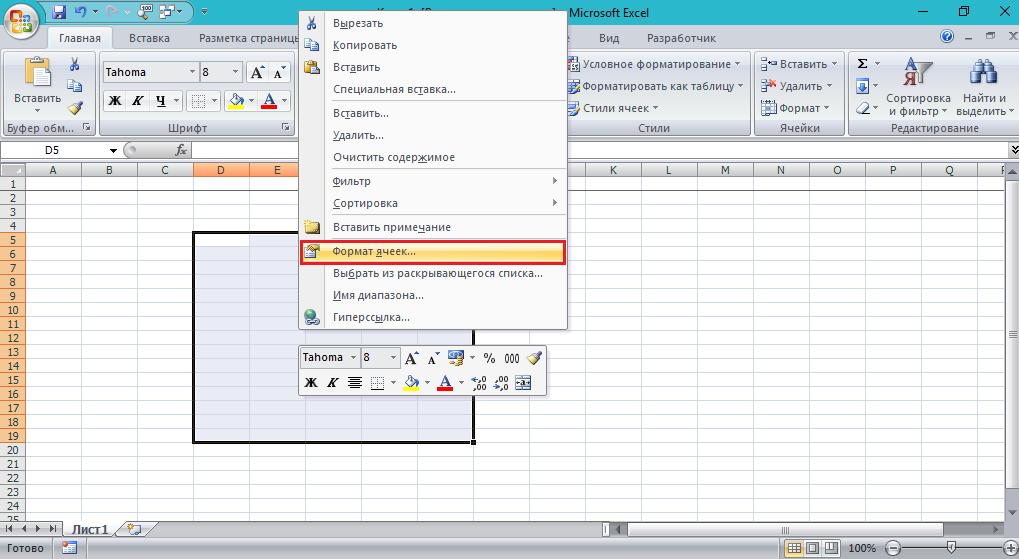
- Next, right-click on the selected area and select from the list of the list " Format cells».

Figure 2. How to make borders in the Excel 2003, 2007 and 2010 table?
Step 2..
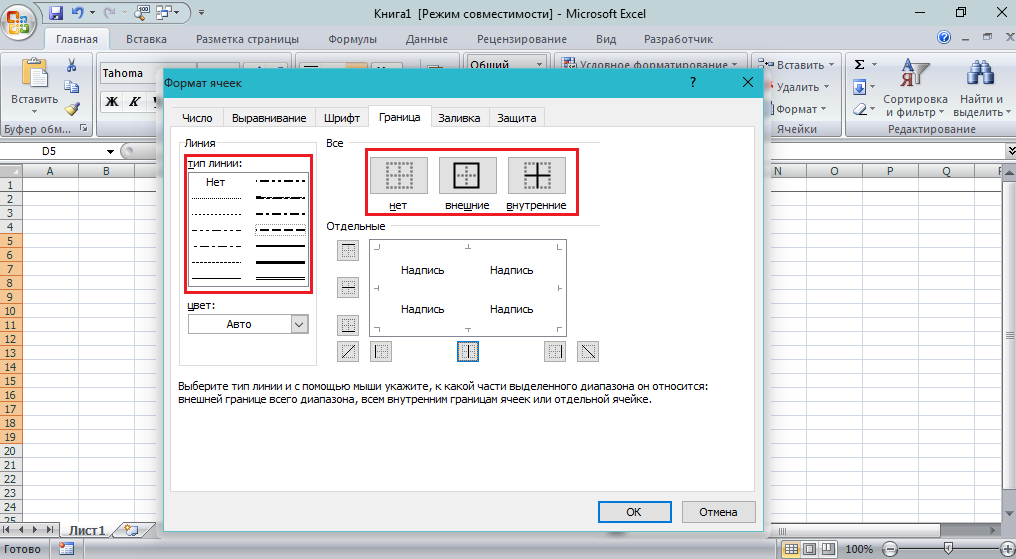
- In the window that opens, go to the tab " The border", After that, on the left part, select the type of line to which the border will be denoted.
- Next, on the right side, select the format of the border itself (internal or external).

Figure 3. How to make borders in Excel 2003, 2007 and 2010 table?
Step 3..
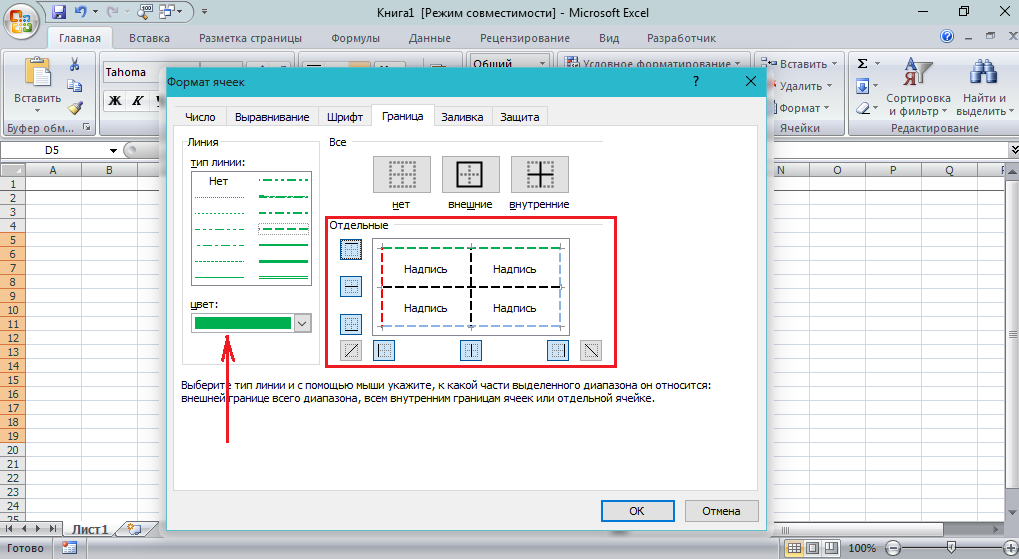
- Next, after selecting the line and the border format, you can add and remove the line from different sides of the table by clicking on the appropriate buttons. Also in the left part you can choose the color of the borders.

Figure 4. How to make borders in the Excel 2003, 2007 and 2010 table?
In conclusion, I want to add that the program Microsoft Excel. It is quite complicated and has a huge set of tools.
To master it, you can read a lot of articles and specialized literature, but you truly master the program and its set of tools only if you are given the practice of at least one hour per day.
