
Why do not work on a laptop, headphones are not connected, there is no sound in headphones: reasons. What to do if the laptop does not see the headphones?
Overview of the reasons for which headphones on a laptop may not work. Guide to solve the problem with the lack of sound in headphones.
Navigation
Users of stationary computers and laptops often face a situation when after connecting to their headphone device they detect that the headset does not play sound. This problem may be formed by a large reasons that can be divided into two categories: software errors and physical damage to the headset.
In our article we will try to consider all possible causes of headset refusal on laptops running operating systems Windows 7., 8 and 10, as well as provide step-by-step instructions for eliminating this unpleasant problem.
Image 1. Input does not work, headphone socket on laptop: What to do? Why there is no sound in headphones on a laptop, only noise: reasons what to do?
Why do not work on a laptop, headphones are not connected, there is no sound in headphones: reasons
Before switching to solving a problem with a malfunction of sound playback on a laptop, it is necessary to diagnose the causes of its occurrence, which, as mentioned earlier, there are either a software or technical nature. About everything in order.
Checking the health of the headset and its correct connection
Step 1.
- When you encounter any non-working peripheral device, it is initially necessary to exclude its malfunction. In the case of headphones to make it easier. Connect the headset to another computer, smartphone or tablet and listen, whether the headphones are playing sound. If everything is in order and sound comes, it means that physical damage to the headset is excluded and can be moved to the next item.
Step 2..
- On the case of absolutely all modern laptops and netbooks there are two identical connector, one of which is intended for connecting the microphone, and the second for sound-reproducing devices (columns, headphones). Since these connectors are almost close to each other, it is not difficult to make a mistake and plug the plug into the microphone socket.

Image 2. Location of sound jack for headphones on laptops.
- Make sure you have connected headphones in the socket on which the corresponding icon is present or the nest itself is painted in green. The microphone connector, as a rule, is always assigned a red shade.
Step 3..
- Many headsets are equipped with a special volume knob in the form of a box with a wheel on the cord. Screw the wheel and make sure that the sound on the headset is not disabled.
- It is also worth checking the volume in the operating system itself by clicking on the corresponding icon in the lower right corner of the desktop. In some cases, the sound level in the system can be knocked out automatically.

Image 3. Volume control on headphones.
In the event that your headset reproduces the sound on another device, and the above-described tips on adjusting the volume level did not give the desired result, go to the next section of the article.
Checking the sound connector on the front panel
Many stationary computers and some laptop models have additional audio connectors on the front panels, which often can be disabled by default. If you are trying to connect the headset through the front panel, you must perform the following steps to verify:
Step 1.
- At the right side of the operating panel, click the Sound Adjustment Icon right-click and open the item in the context menu. Playback devices».
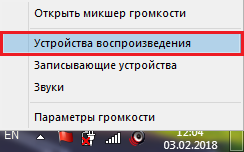
Image 4. Run playback settings.
Step 2..
- Make sure that your headphones are present in the unfolded window. If they are not, right-click on the free place in the window and in the menu that appears, mark the stitch markers " Show disconnected devices"And" Show disabled devices».
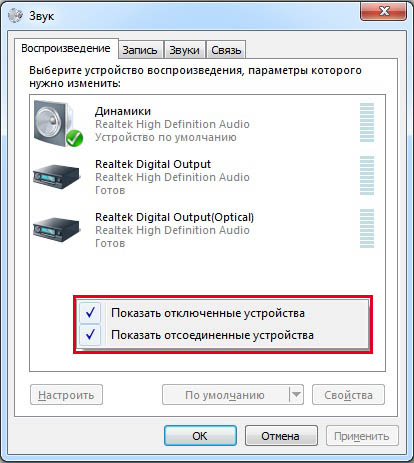
Image 5. Activating the display of disconnected audio devices.
Step 3..
- Next, right-click on your headphones, in the unfolding list, select the line " Properties"And in the next window, make sure that on the tab" General»There is a string" Front panel 3.5 mm».
- Similarly, check your microphone from the headset on the tab " Record».
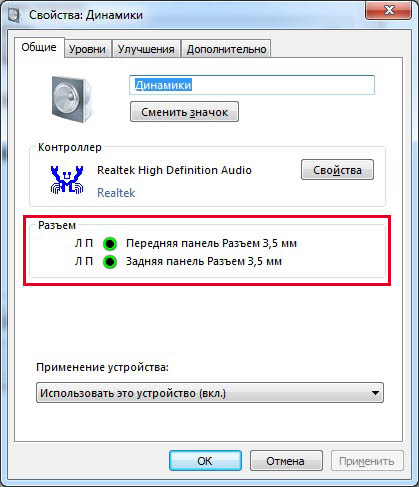
Image 6. Checking the activity of the audio jack on the front panel.
If the front panel is missing, you can activate it through the drivers mixer Realtek.on the tab " Dynamics" If there is no Icon of the RealTek Mixer icon, you can find it in " Control panels"After setting the parameter" Small badges"In the column" View».
Also activate the front panel can also be through Bios.However, inexperienced users are highly recommended to abandon this method.
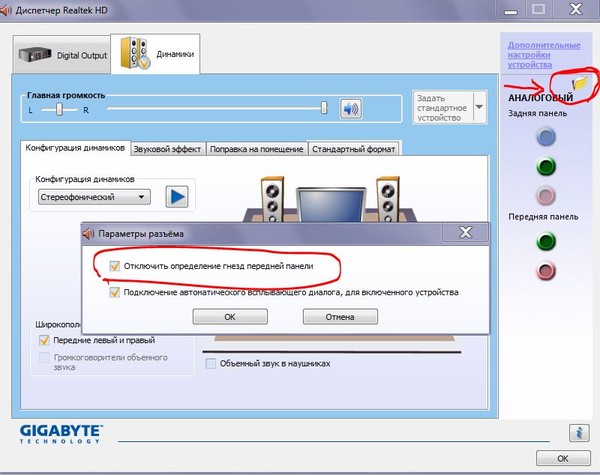
Image 7. Activation of the front panel through the RealTek program.
What to do if the laptop does not see the headphones with proper connection?
If you were convinced that the headset is properly connected to the computer, then the reason why sound is not played through headphones is programmed. Diagnose and solve this problem in the following ways.
Updating Sound Card Drivers
No rare cases when after installing a new operating system, users face low sound quality or its complete absence. The cause of this can be the old or missing audio drivers.
As a rule, in licensed versions of operating systems Windows 7., 8 and 10 When connecting to the Internet, an automatic search and installation of drivers for all peripheral devices is carried out, including a sound card. However, if this did not happen, you can search for driver updates for sound card in manual mode. This is done as follows:
Step 1.
- Expand the menu " Start", Choose a section " A computer"In the window that appears, click on an arbitrary empty place right mouse button and in the expanded context menu, click on the" Properties».
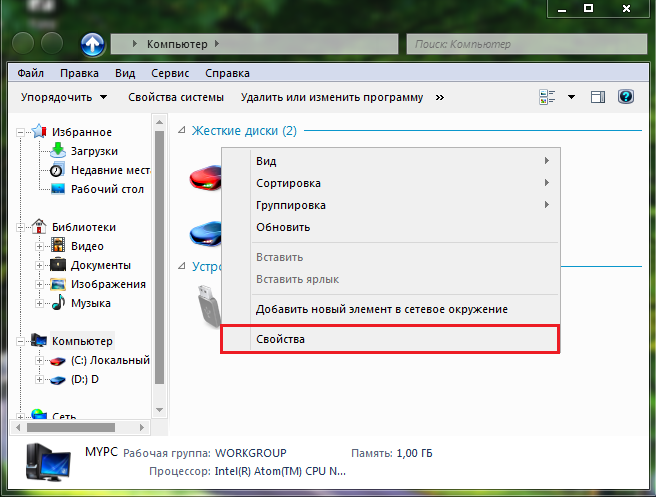
Image 8. Opening a window with information about computer parameters.
Step 2..
- The window will open with brief information about the parameters of the computer and the operating system in which, on the left side it will be necessary to click on the section " Device Manager».
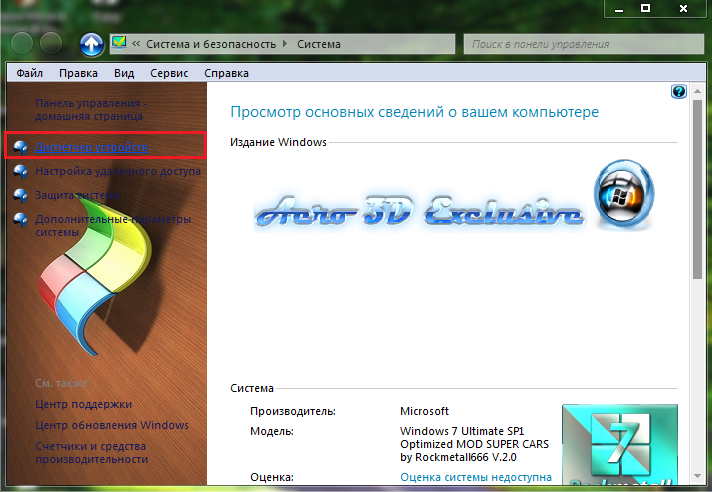
Image 9. Go to the task dispatcher.
Step 3..
- In the unfolded window, you must disclose the " Sound, video and gaming devices", Right-click on your sound card and then select item" Properties»In the context menu window that appears.
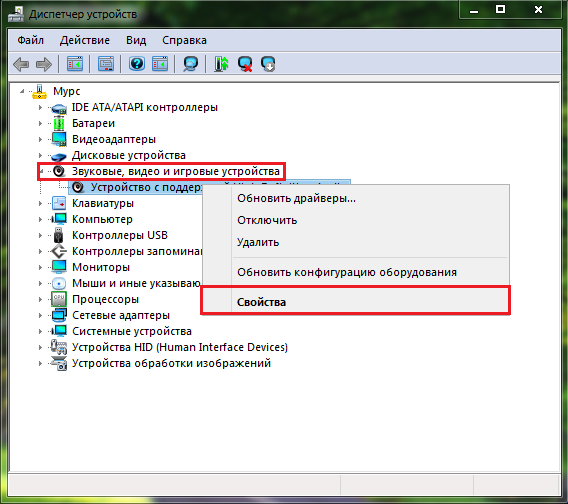
Image 10. Opening the properties of the sound card.
Step 4..
- In a small window that appears on the tab " Driver»You will need to click on the" button " Delete»To uninstall the existing driver version, after which you restart the computer.
- Next, in the same way, you must enter the properties of the sound card and click on the "button" Refresh»To search for the latest version of the last version of the driver and its clean installation.
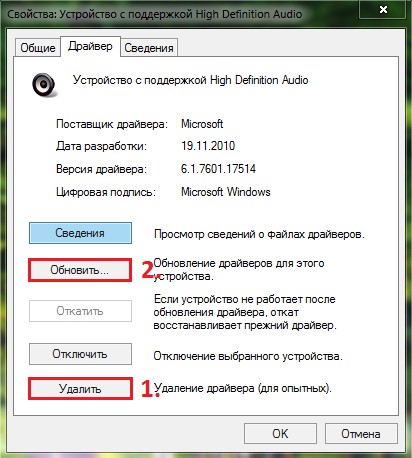
Image 11. Remove the old and install a new audio driver.
After completing the search and install the driver, restart the computer and check if the sound appeared in the headphones.
Video: How to update sound card drivers?
Computer scanning for viruses
- Often, the malicious software that has fallen on the hard disk may interfere with the correct operation of some processes and system services, which also include sound reproduction through columns or headphones. An obvious solution will be a complete scan of a PC for viruses and their removal.
- If your laptop does not have antivirus, then you can resort to the help of a free utility Dr.Web Cureit.which can be downloaded from the developer official website of this link. The program is not required to be installed. All you need to do is to start the downloaded file, agree with the terms of the license agreement, click on the button " Start check"And wait for the completion of the scanning process.

Image 12. Utility for checking a computer for viruses.
- After the scanning is completed, the utility will apply the recommended actions to the detected threats (will delete the infected file, send it to quarantine or tries to heal). Next, you will need to restart the computer and check the availability of sound in the headphones.
Restoring the operating system
Without timely testing of a computer for malicious software that have a virus hard drive, manage to damage the system files that can be restored only with the operating system roll back to its earlier state or using a complete reinstallation. Let us leave a complete reinstall in the extreme case and try to roll back the system to its earlier state. This is done as follows:
Step 1.
- Expand the menu " Start", Open the list" All programs", Then find the folder" Standard", And then the folder" Service».
Choose a line in it " System Restore».
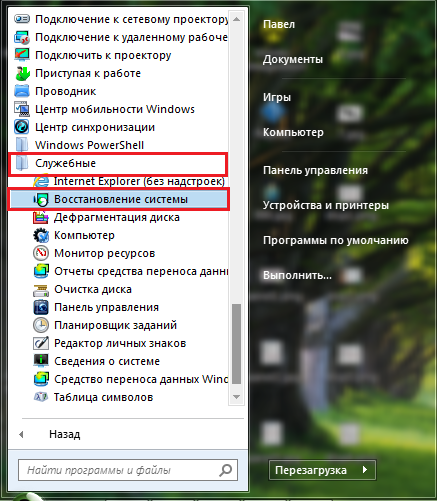
Image 13. Search for system recovery.
Step 2..
- In the window that appears, click on the button " Further"And before you will appear with checkpoints to return the operating system to the earlier state. Select the most suitable ones and click on the " Further».
- If the control points in the list are missing, check the string " Show other recovery points».
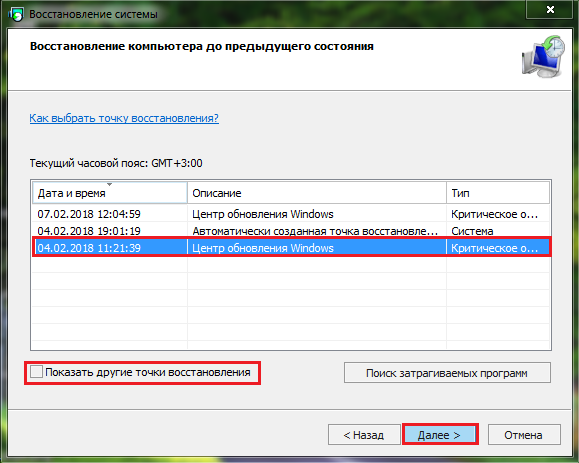
Image 14. List of system recovery points.
Step 3..
- In the next window, confirm the correctness of the selected checkpoint by clicking on the button " Ready».
- A system recovery will be launched, during which the computer can go to the reboot several times.
- The duration of the recovery process depends on the power of your computer and the degree of damage to files. On the end of the recovery you will notify the corresponding alert on the monitor.
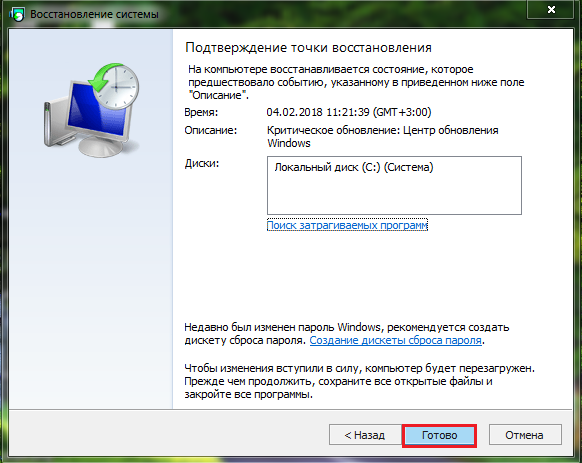
Image 15. Running system rollback.
Important: Keep in mind that recovery affects the operating system exclusively and its files. All your documents, programs and games will be saved in the form in which they were at the time of running rollback to the checkpoint.
Video: How to connect any Bluetooth headphones to a computer?
Returning to the theme of the correct headphone connection to the laptop separately, I would like to say about connecting a Bluetooth headset. The problem in the description of its proper connection and the setting is that the headphones from different manufacturers have their own settings and packages of drivers and if you start talking about each of them individually, then for reading this volume of "literature" can take more than one hour.
But, fortunately, there is a universal method of connecting Bluetooth headphones from any manufacturer to a laptop or a stationary computer. We invite you to familiarize yourself with it on the video below.