
The best programs for distribution Wi-Fi from a laptop: how to download, install?
In this article we will tell about how to distribute WiFi from a laptop.
Navigation
- How to find out if there is a wireless WiFi adapter on my pc?
- Creating a Wi-Fi Access Point in Windows 7 with Ostoto Hotspot
- Creating a Wi-Fi access point for Windows 7 without software and router
- Creating and configuring Wi-Fi Access Points in Windows 7 Using the command line (CMD)
- Video: how easy it is to distribute Wi-Fi from a laptop / PC?
Recently, wireless technologies are increasingly sneaking into our daily life. Thus, the need is growing at available Wi-Fi access points. But still, having a laptop and a wireless USB modem you can share the Internet with anyone. But the question is next - How to do it? What methods for this are available?
There are 3 most effective solutions for you to enable Wi-Fi distribution on a 64-bit or 32-bit Windows 7.
Before you do this, the most important thing you need is to check your computer for the presence of a wireless WiFi adapter, which is a mandatory device for creating an access point.
How to find out if there is a wireless WiFi adapter on my pc?
It is worth noting that most laptops and desktops are supplied with the already installed wireless adapter. But in any case, you can check whether it is on your computer, and for this you only need to adhere to our instructions:
- First of all, you need to find wireless equipment, or the so-called network wireless adapter. To do this, you need to click on the button. "Start" and enter "Device Manager" In the search window to find it) and deploy the parameter "Network adapters"To find out if there is a network adapter. In our case, the wireless adapter has a name "ATHEROS AR5006EG WIRELESS NETWORK ADAPTER".
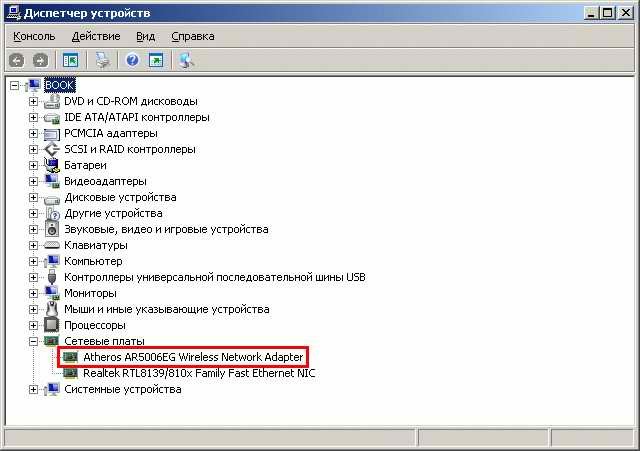
Device Wireless Adapter
If you do not have it on your computer with Windows 7, take it to install it on your computer. The universal sequential tire (USB) is an excellent choice, because it is small, easy to install and can move to different computers. Make sure the wireless drive driver is working correctly. You can download and install the correct wireless network driver to avoid network adapter or card errors.
Creating a Wi-Fi Access Point in Windows 7 with Ostoto Hotspot
There are no commands, no time-consuming steps and no wireless router - you can call the Wi-Fi access point in Windows 7 with Ostoto HotSpot software (previously called 160WIFI). This allows you to configure a stable, as well as the most powerful Wi-Fi access point to exchange Internet connections. You can try it on any laptop, laptop or desktop PC, such as Asus, Acer, Dell, HP, Sony, Lenovo, Samsung, Toshiba, IBM, Alienware, Compaq, Gateway, LG, Microsoft, MSI, etc.
If you want to download and install Hotspot Ostoto on your computer with Windows 7, you need to go to link.
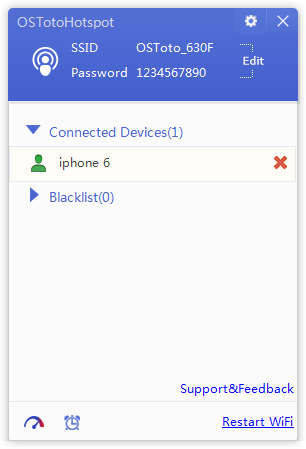
Run Ospot Hotspot, and it will automatically create a Wi-Fi access point on your computer. You can edit the name hot spot (SSID) and password. This utility has a standard WPA2 to protect the password. Your family, friends, colleagues, neighbors on the room or any other, who has a password, can easily join your network, and you can add to the black list of anyone.
Creating a Wi-Fi access point for Windows 7 without software and router
Here's how to convert your Windows 7 PC to the Wi-Fi access point using the Wizard to exchange Internet connections:
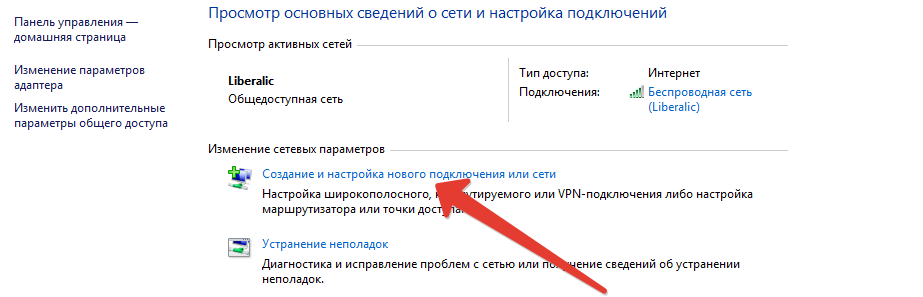
- First of all, you need to press the left mouse button on the up arrow to invoke the application menu.

- Now you need to click PKM by button "Network Management Center and Common Access".

- Then you need to click on the option. "Creating and configuring a new connection or network."
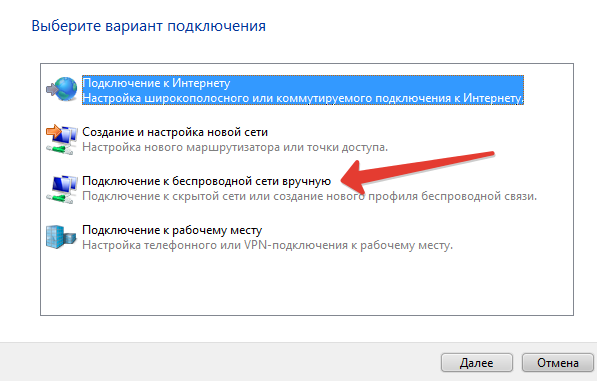
- Now you need to call the item in the context menu "Connecting to a manual wireless network".
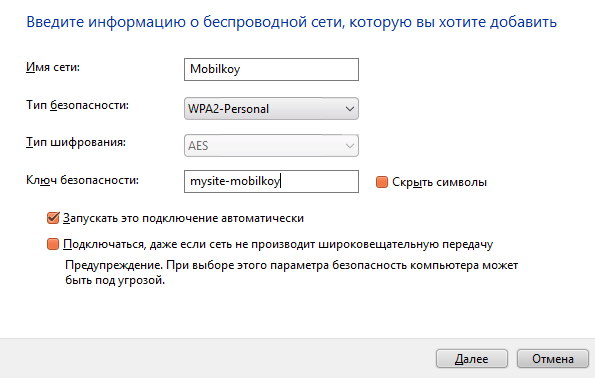
- After that, you need to enter the future Wi-Fi Wireless Access Point. Thus, it is necessary to fill out the name of the access point, select the security type, as well as set the type of encryption.
- And of course, do not forget to enter a password that will be the key to authentication on the network.
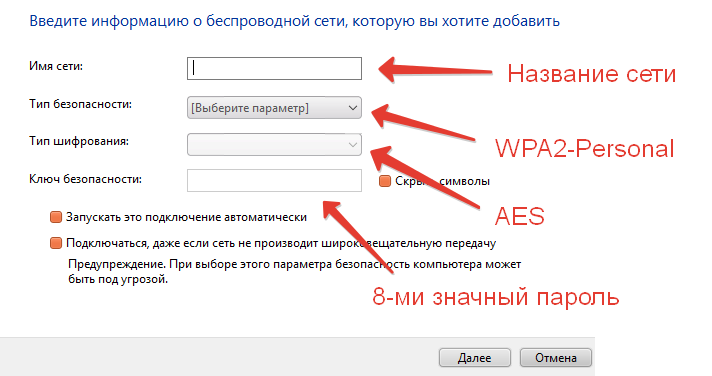
- When you fill in all the fields, you will need to click on the tick "Hide Symbols",to see the password and make sure that you entered it in a faithful way.
- After that you will need to click on the button "Further".
- On this, the creation and configuration of the wireless access point is completed. Consequently, you, your friends and colleagues can use it for your own purposes.
Important! Some users faced the situation when the wireless access point did not have Internet connections using this method. It could happen if the wireless network adapter driver does not work or if there are other conflicts on your computer. We recommend that you try Ostoto Hotspot to create a secure and stable access point for Windows 7.
Creating and configuring Wi-Fi Access Points in Windows 7 Using the command line (CMD)
On some computers and laptops there is no graphic wizard in Windows 7, which would help you enable Wi-Fi access point. You can use the command prompt to convert your Windows 7 to "Wireless Wi-Fi Access Point".
But in order for you to succeed successfully run your access point, you need to adhere to our instructions and rules:
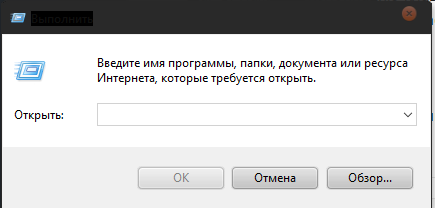
- First of all, you need to press the key combination Windows + R.To open the window to execute the following commands.
- After that you need to enter a command "NCPA.CPL" and press "Enter".
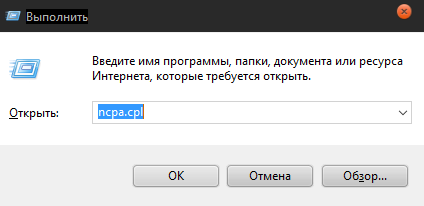
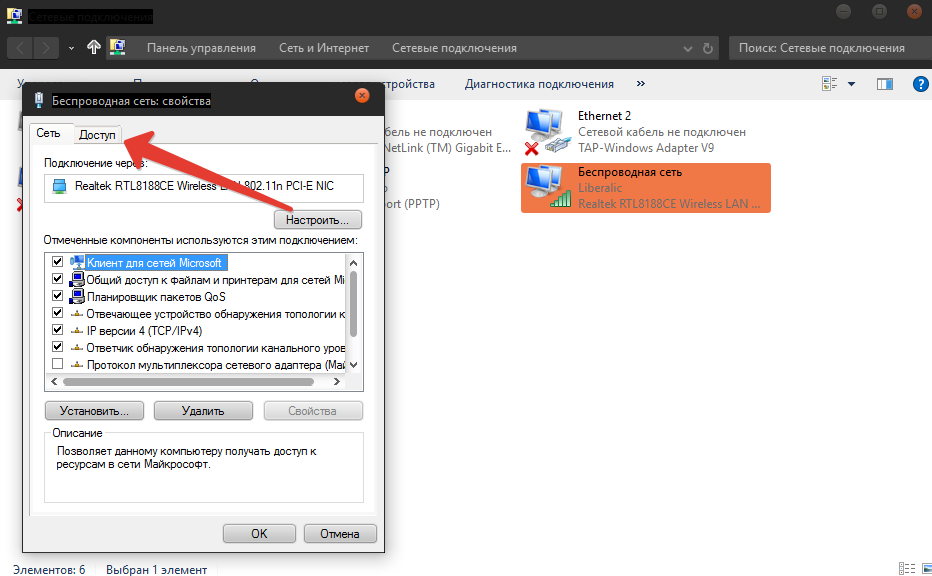
- Then you need to find your connection that will have a connected name with wireless. For example, "Wireless Network". After you find your network, you will need to click on it with the right mouse button, call the menu and click on the last item "Properties".

- Now you will need to click on the second tab "Access"To continue further settings.
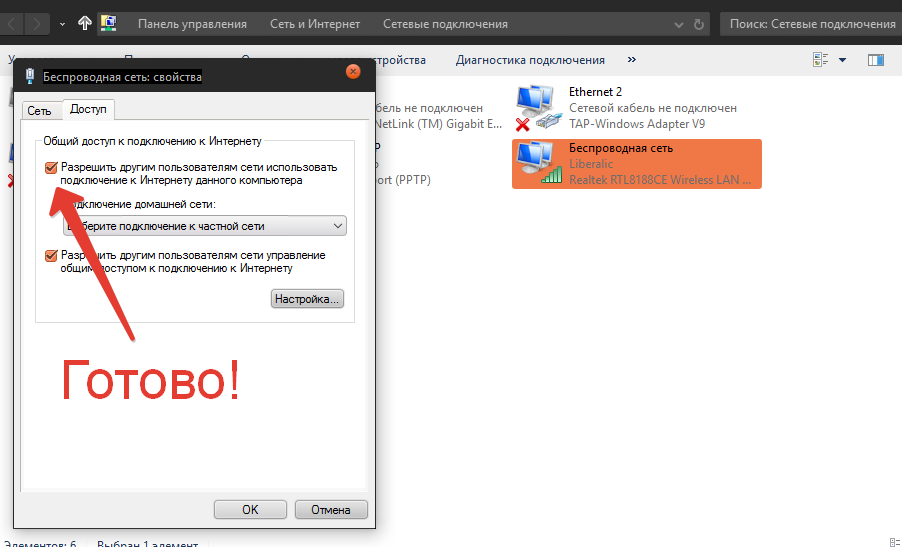
- After moving to the second tab, you will need to install a tick opposite the item.
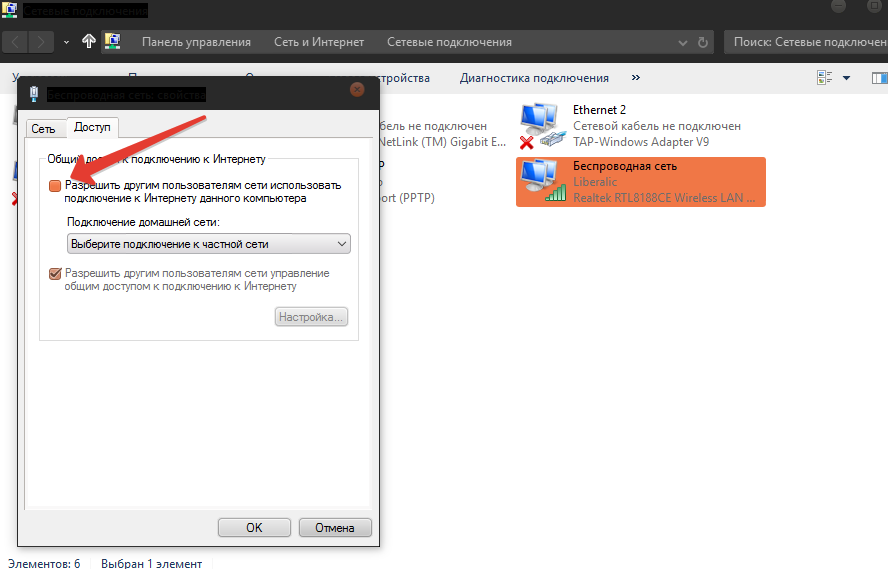
- After clicking on the tick, you will need to save all the parameters and settings by pressing the OK button.
- Then you need again you need to press the key combination Windows + R,and after opening the start window you need to enter a command "CMD".
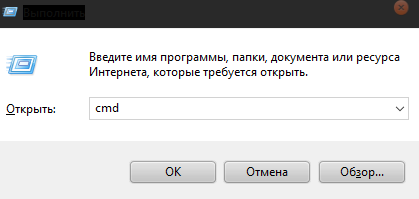
- Then you will display the command editing window. Enter the following command: Netsh WLAN Set HostedNetwork Mode \u003d ALLOW SSID \u003d "MOBILKOY" KEY \u003d "12345678", and then click ENTER.
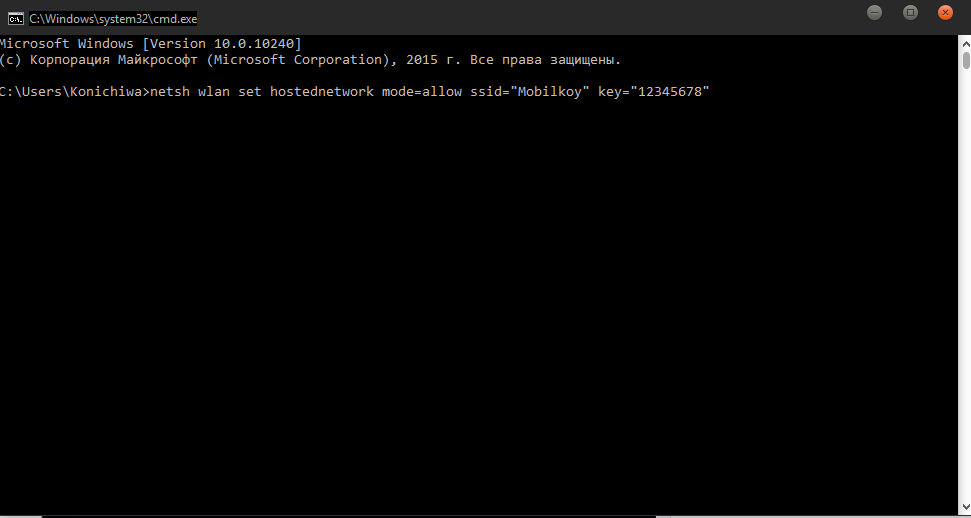
- When the above steps are completed, your Windows 7 system will create a Wi-Fi access point.
Since Microsoft has deleted a graphic wizard to help customize access points in Windows 8 and above, you can try CMD as described above, create your Wireless Access Point Access Point on your computer with Windows 8, Windows 8.1 or Windows 10. If you prefer point and one-time solution, try Ostoto Hotspot.