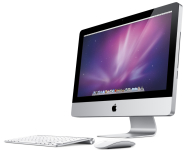
How to make a screenshot of the screen on McBook: key combination. How to make a screen screenshot on MacBook Air, Pro: Step-by-step instruction
In this article we will tell about how to make a screenshot on Mac OS X, and what methods to create a screenshot are provided.
Navigation
- How to make a screenshot of the screen on a laptop of the Poppy OS?
- How to make the screenshot of the screen part on the MacBook laptop?
- How to make a screenshot of the screen or area on a laptop MacBook?
- How to properly scrape the screen or area in the clipboard?
- Video: how to make a screenshot on Mac. Full instruction
So, I would like to note right away that it is possible to make a screenshot on the McBook screen using several ways. At the same time, the methods do not include any download, download and other discrepancies that can be found when creating a screenshot on Windows.
Therefore, today we will discuss in detail how to make a screenshot on iMac, MacBook, as well as on the professional version of Mac Pro.
How to make a screenshot of the screen on a laptop of the Poppy OS?
So, to scrape the screen, you need to follow our instructions:
- First of all, you need to put your fingers to combine keystrokes «Command "+"SHIFT "+" NIGHT 3 ". It is worth notingthat on McBook a slightly different keyboard layout, so here is a button «Fn » referred to as the usual «Shift. "

- After you click on the combination of the above keys, you will hear a click sound, which is similar to the shutter sound on the camera. Thus, the click sound means what you made the screenshot of the entire working screen.
- Ready!Now the screenshot is preserved .

How to make the screenshot of the screen part on the MacBook laptop?
- First of all, you need to put your fingers to combine keystrokes «Command "+"SHIFT "+" Digit 4 ". It is worth notingthat on McBook a slightly different keyboard layout, so here is a button «Fn » referred to as the usual «Shift. "

- After you click on the combination of the above keys, the pointer of your mouse cursor will turn into the semblance of the cross, and at the same time the coordinates of the areas will be displayed at the bottom of the screen.
- Thus, when you have a cross with coordinates instead of a pointer, then you can allocate the object you are interested in, which you want to rush. Note that you have the opportunity to bind the point of the start of the coordinates, for which you need to hold the button «Option "(Alt).
- When you finish the selection of the screen area and release the LKM on the touchpad, then hear the sound of the shutter, as evidenced by the creation of the screenshot.
- Ready! Now the screenshot is preserved .
How to make a screenshot of the screen or area on a laptop MacBook?
- First of all, you need to put your fingers to combine keystrokes «Command "+"Shift »+" Digit 4 ", then you need to click on them, and after lowering them, you need to make one click on the button "Space".
- Now you need to specify a window / area that needs to be rolled. Hence
- Ready! Now the screenshot is preserved .
How to properly scrape the screen or area in the clipboard?
On the OS X operating system, both on Windows has the ability to save a snapshot into the clipboard. Thus, by sending a snapshot to the clipboard, you can insert it somewhere. For instanceIf the snapshot later goes into a graphic editor.
So to make a screenshot in the clipboard, you need to adhere to our instructions:
- To remove the screenshot of your screen to the clipboard, you need to combine keystrokes «Command "+"SHIFT "+"CONTROL "+" NIGHT 3 ", then you need to click on them.

- To remove the screenshot of the screen area to the clipboard, you need to combine keystrokes «Command "+"SHIFT "+"Control »+" Digit 4 ", then you need to click on them.
Well, in this, we probably finish our article.
