
How to flash android without a computer? How to flash android through recovery (recovery)?
Tips for selecting the firmware and instructions for installing it on Android through the Recovery menu.
Navigation
The Android operating system is famous for its stable work today, but even the troubles sometimes happen to it. Your device begins to slow down, close automatically applications, issue critical system service errors and the like. As a rule, it is connected with the firmware installed on the mobile device.
There are two types of firmware: Stock and Castomnaya. And, before you flash your device, first need to think carefully, weigh all the "for" and "against" each of the firmware and choose the one that suits you most

Android firmware
The main advantages and cons of stock firmware
- And so, stock firmware - official software issued by developers and the most optimized as possible for most mobile devices
- As a rule, tablets and mobile phones are originally sold with the optimal version of the operating system (firmware) and replacing it to earlier or later versions are not recommended, but in some cases such a need may appear. For example, if you missed the update to the new version, receiving root rights
pros
- Official firmware gives a guarantee of quality and stable system operation
- Provides reliable protection against hacking from the outside
- It is possible to automatically update if the new version of the operating system is released
- The absence of any serious bugs, glitches and conflicting with third-party applications
- In the event of a breakdown of the device with stock firmware, it can be passed to repair service or exchange under warranty
Minuses
- In official firmware there are many unnecessary software that cannot be removed. If you have a weak mobile phone or tablet, it may even slow down the system
- There is no full access to the management of the device.
- There is no possibility to establish some additional software.

Custom android firmware
The main advantages and cons of custom firmware
- Castom "firmware - the official version of the operating system upgraded by skillful users. Since Android has an open code, anyone has the opportunity to edit the operating system as he wants
- Custom firmware There is a great set and they all have their pros and cons. Some work as a clock on all devices, others only on certain models, others at all in any way. It depends on the mastery of a man who created it
pros
- Most custom firmware are distinguished by high speed
- Lack of unnecessary standard software
- Availability of additional third-party software
- Multiple bugs that were present on the stock firmware of this version
- Availability of root rights
Minuses
- There is a sufficient amount of firmware that the system is very slow
- No security guarantee and data safety on the device
- Custom firmware works on all devices
- Having a device with a custom firmware installed, warranty on it burns and hand over it for repairs to the service center will not work
Thoroughly glue all "for" and "against" and decide that out of the above you enable
RECOVERY menu on Android
How to flash the device through the RECOVERY menu?
- Regardless of which firmware you want to put on your device, stock or custom, you must first get root-rights. After receiving them, you must install one of the versions on your device. custom Recovery menu. The most reliable and popular today are TWRP. and ClockworkMod Recovery.
IMPORTANT: Remember that getting root rights resets the warranty to your device and, in the event of a breakdown, it will not be possible to pass it into the service center.
- To set the menu TWRP., you need to upload in Play Market Program Goo Manager.
- To install the menu ClockworkMod., you need to upload in Play Market Program Rom Manager. and mostly menu click on the point " Setup Recovery.»
Android firmware via the RECOVERY_3 menu
IMPORTANT: Before starting the procedure, make a full backup of all important data on the SD card, since all applications and contacts will be deleted during the firmware process, and the settings will be discarded to factory
- Download and place the firmware file on the SD card in the format zip." Remember that you need to download only that firmware that is designed for your device! In the case of using incompatible firmware, you risk losing the device forever
- After the menu is set, and the firmware file is moved to an SD card, you must upload the phone to recovery mode
- This is done by simultaneously clamping multiple buttons on your device in the off state. On all models, the combination of buttons is different, however, most often clamped volume button "+" and power button
- You can also boot into the menu through one of the previously drunk applications. On the main tab, select Start Device in recovery mode And wait for the device loading in this mode.
- Once you booted in the RECOVERY menu, you can start directly to the firmware installation
Android firmware through the recovery_2 menu
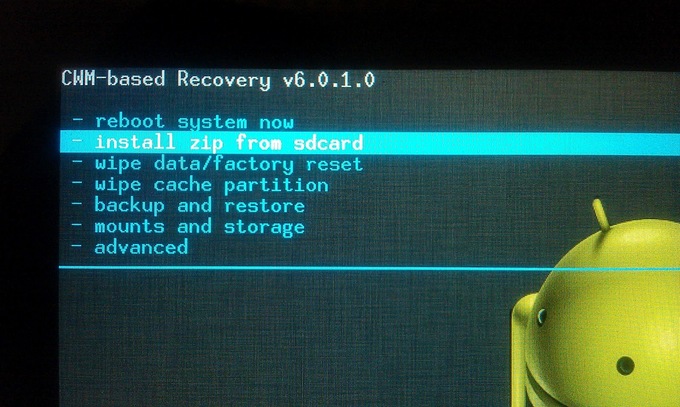
- If you installed the menu device ClockworkMod.Using the "Lose / Hush" sound buttons, move the following actions in strict order:
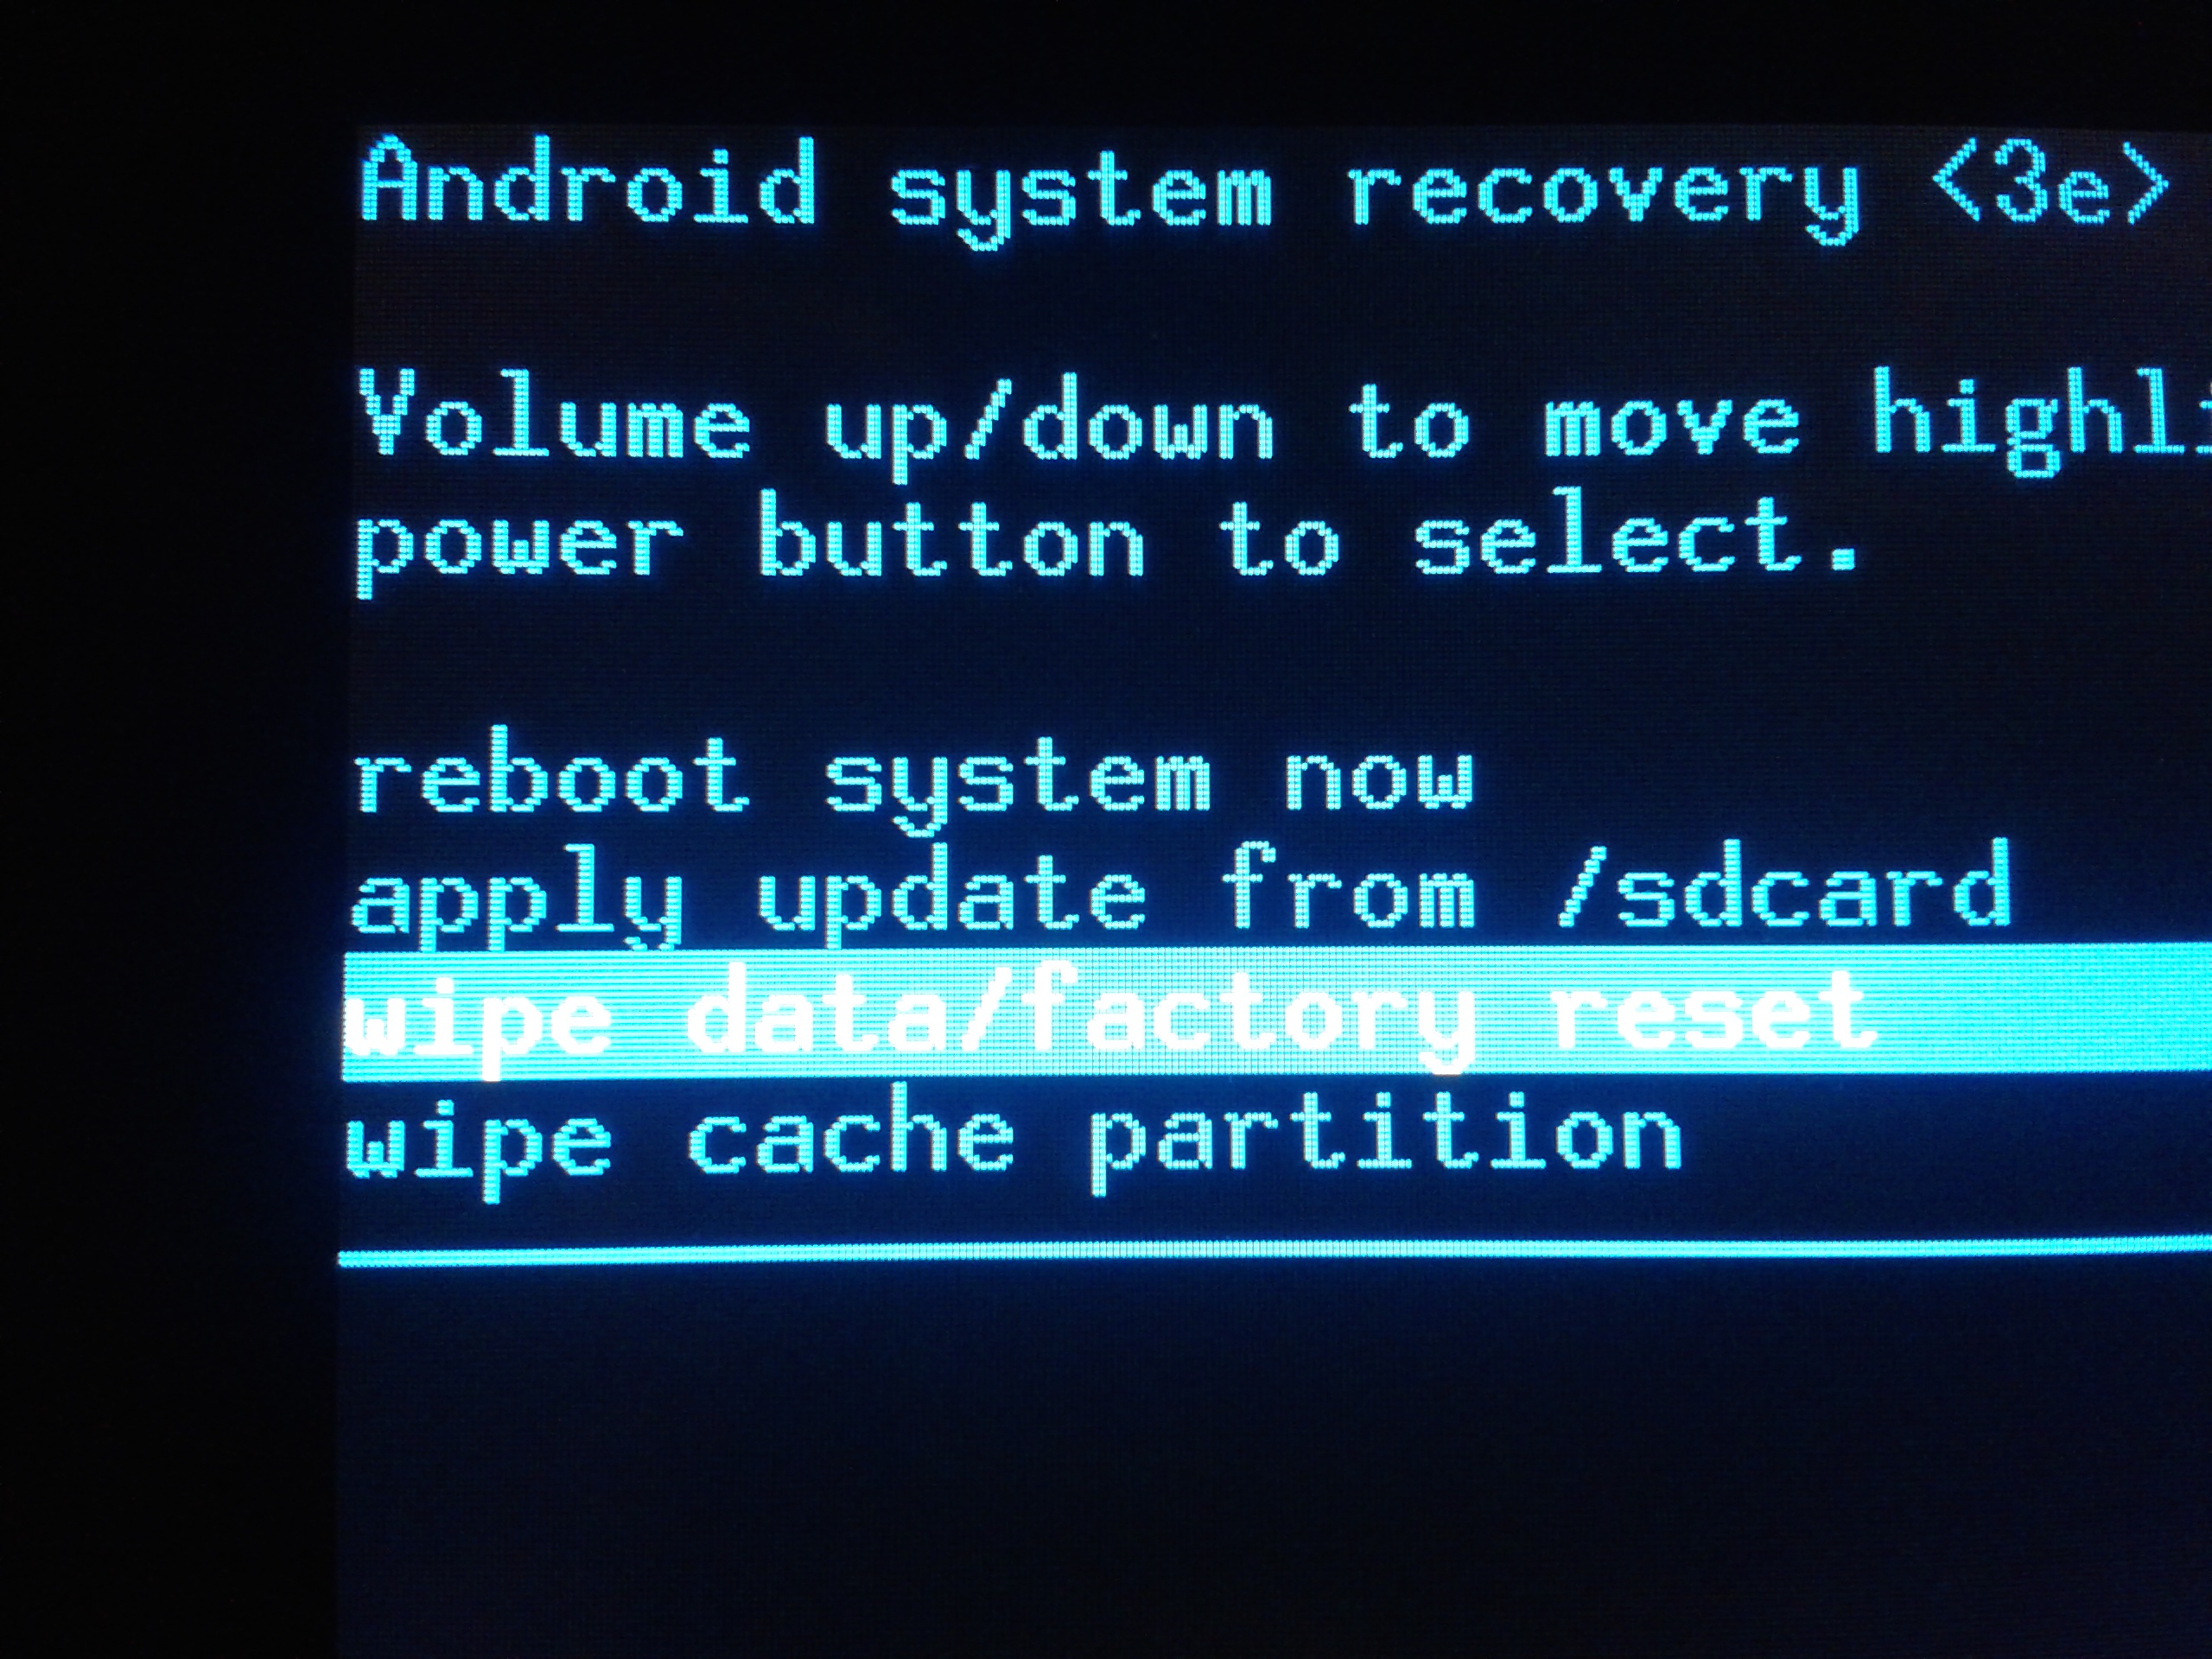
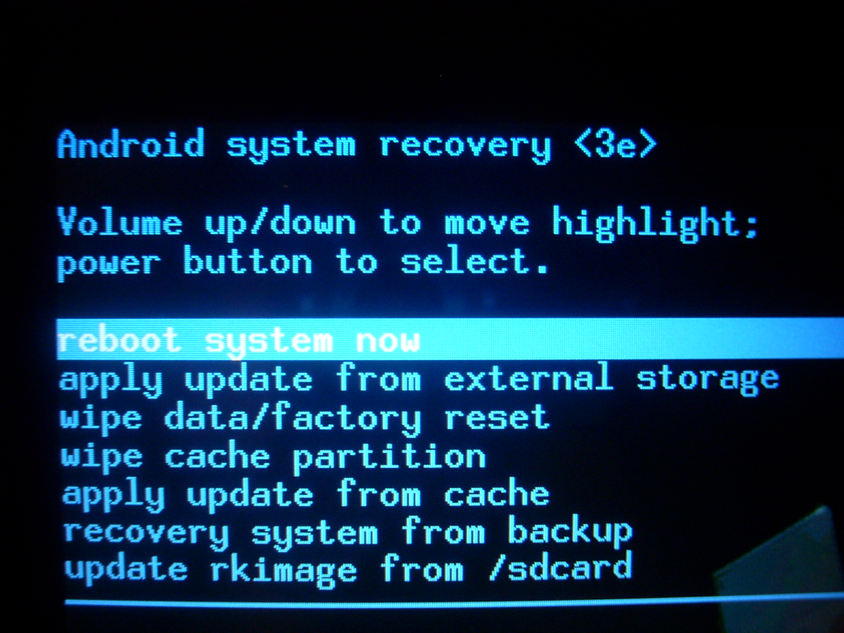
WIPE DATA / FACTORY RESET, Further YES - WIPE ALL USER DATA;
WIPE CACHE PARTITION., Further YES - WIPE CACHE;
Advanced, Further wipe Dalvik Cache., Further YES - WIPE DALVIK CACHE;
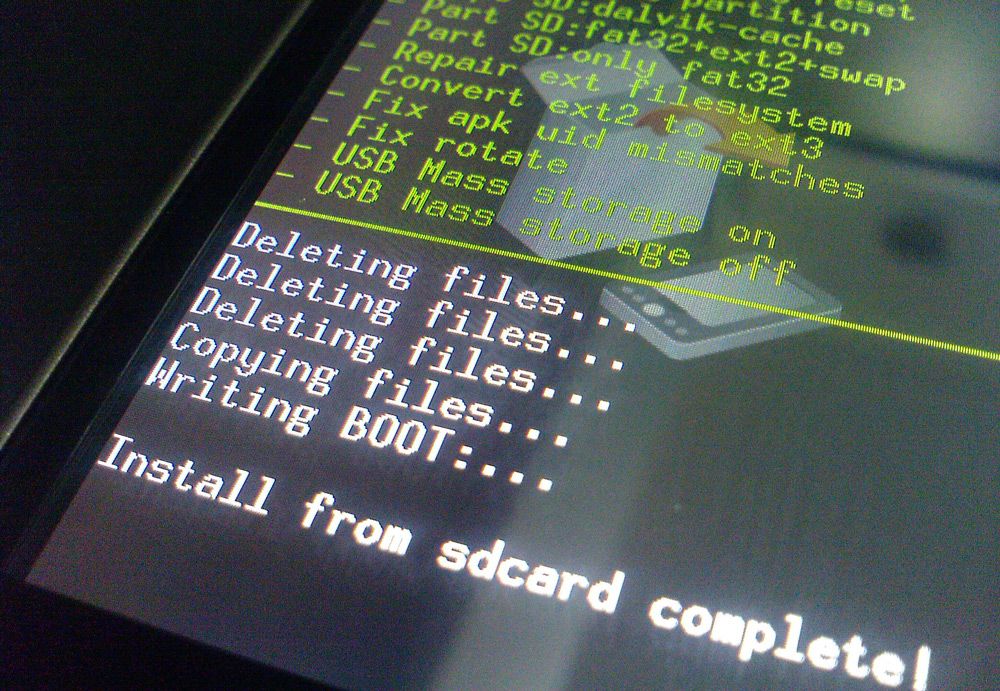
Install Zip., Further choose Zip From Sdcard (Here you need to specify the downloaded file with the firmware - After all these actions, the installation process will be launched, which may take an indefinite amount of time. Typically, the installation lasts from 15 to 40 minutes. After the process is completed, it is necessary to return to the main menu and select item " reboot System Now.»
Android firmware through the RECOVERY_1 menu
- If you installed the menu device TWRP.It is sensory and you can use your finger for navigation by clicking on the desired items. Do strictly following the following actions:
WIPE., Further Swipe to Factory Reset; (then return to the main menu)
Install, Further specify the downloaded file to installwhich you shoved in advance on the SD card;
I went to the installation process. Wait for it to complete, then go back to the main menu and click " Reboot System.»
- After rebooting the firmware will be delivered and the phone will load in normal mode
IMPORTANT: If you do not imagine what you do and why you need it all, it is recommended to refrain from your own firmware and entrust it is a professional, otherwise you risk staying without a device
Important: resorting to an independent firmware of the device, you act at your own risk. The site administration and the author of the article are not responsible for the possibility of problems on your devices during installation.
Thank you, I reflash the phone, no glitches!
thanks for the answer
thanks for answers
Loose
SASA228.
Thank you for support
Please refress the mobile I ask