
How to clean the camera on iPhone?
Instructions on the external and internal cleaning of the camera on the iPhone.
Navigation
Today, every modern phone, smartphone or tablet is equipped with a camcorder so that the person at any time can capture or take out his lifestyle on any time. Most of the existing devices are equipped with two cameras: rear (on the back of the housing) and frontal (front above the display).
Many new smartphones models are able to shoot excellent photos and videos, the image quality is comparable to professional digital cameras. This is especially true of the popular line of "apple" smartphones iPhone..
However, at some point, the user of the device with an excellent chamber may notice that the pictures began to get fuzzy or completely blurred. In most cases, this problem is due to the dusting of the lenses or other types of pollution. This is facilitated by the wearing of a smartphone in pockets, bags, backpacks, and just an untidy handling of it.
In our article we will tell, how to clean the front and rear cameals on smartphones iPhone. And what means it is recommended to do it.

How to clean the rear / front chamber on the iPhone?
- The usual cleaning process of the camera without disassembling the smartphone is not more difficult than the process of cleaning the display from fingerprints. The most important thing in this business is to choose suitable cleaning materials. For this purpose, the alcohol napkin for hands is perfect for this purpose, however, at the right moment it may simply be in your arsenal.
- In this case, a conventional clean napkin or any other piece of soft tissue can come to replace. The most important rule is not to use wet, well not pressed rags or sponges. It is also important that the fabric is without pamper, which can remain on the lens and spoil the quality of the pictures.
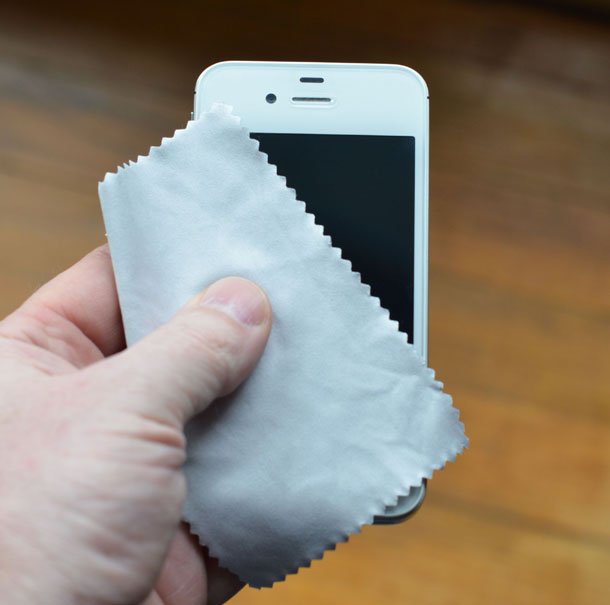
Image 2. Tools for cleaning the display and cameras on the iPhone.
- Another convenient tool for cleaning the camera from dust and other contaminants is cotton sticks that are scored cosmetic bags and handbags of almost all fine sex representatives. The dry wand will not bring the desired result, so it is pre-it must be moistened by some liquid, on the likeness of the cologne or wiper, after which it is carefully squeezed.
- If the wand is too wet, then there may be divorces on the camera lens or, even worse, drops of fluid will be fastened to the lens and break the operation of your device.
Important: Refrain from cleaning the camera by any rigid fabric, toilet paper and all other dry materials. The rigid surface or the inconspicable object contained on it is capable of imparting an irreparable damage to the protective glass of the chamber, leaving scratches on it.
How to clean the rear / front camera on iPhone: disassembling the device
- In some cases, an attempt to clean the camera outside and thus return to the image of the pictures to the existentive clarity can be crowned with failure. The essence of the problem is that dust and other dirt are clogged under the lens and clog the lens from the inside. New smartphones, such as iPhone 6., 6s, 7 and 8 have protection against dust and water, however, for old models like iPhone 4., 4S., 5 and 5s. The problem with contaminated from the inside the lens is still relevant. In this case, it is possible to clean it only by disassembling the device.
- If most smartphones can remove the rear panel without much difficulty and the presence of third-party tools, then with smartphones from the company Apple Such a focus will not pass. Owners of "Apple" gadgets know that smartphones from the line iPhone. The back cover is not removed and is associated with a policy conducted by the Company. In fact, remove the lid on any iPhone. You can, however, if you do not understand the electronics and especially in smartphones, then the best solution for you will appeal to the service Apple For the service cleaning service.
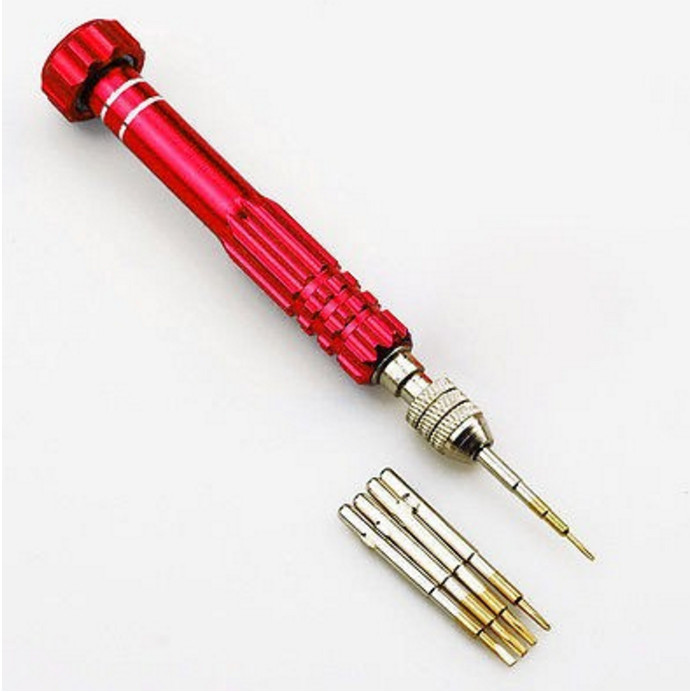
Image 3. Special screwdriver for disassembling iPhone with set of nozzles.
- If you do not intend to spend extra money for cleaning services, you can independently remove the back cover iPhone.By reloading two small screws that are located on both sides of the power connector. Since the screws are very small, remove them using a conventional crush screwdriver will not work. You will need a special screwdriver on 0.8, buy which you can at any electronics store for a completely small price (approximately 100 rubles). If you are too lazy to go behind a screwdriver and you are not afraid to scratch the case, then instead you can use the blade from the paper knife.
- You can also use a suction cup to remove the screen, the blade for removing the housing (a plastic card or mediator is suitable), cotton wands for cleaning the camera and a special plastic tweezers to work with small parts of the device. Of course, instead you can use the usual metallic, but they can damage the "insides" of your iPhone..
Important: The article presents an example of device disassembly. iPhone 5. and 5s.. If you are owner iPhone. 4 or 4S., the principle of disassembling these models is similar to disassembly of the fifth iPhonov. If you are the owner of newer models ( iPhone 6., 6s, 7 etc.), we strongly do not recommend it to conduct their independent disassembly, and in service Apple In the event that you have started problems with cameras. These models are perfectly protected from dust penetration and other dirt under the camera lens.
Step-by-step instructions for disassembling iPhone 5 and 5s
So, after you have acquired the necessary set of tools, you will need to perform the following actions:
Step 1.
- Turn off your iPhone. And with a screwdriver, remove the two fastening bolts from the bottom of the housing.
Important: Do not lose the bolts, as they are extremely small.
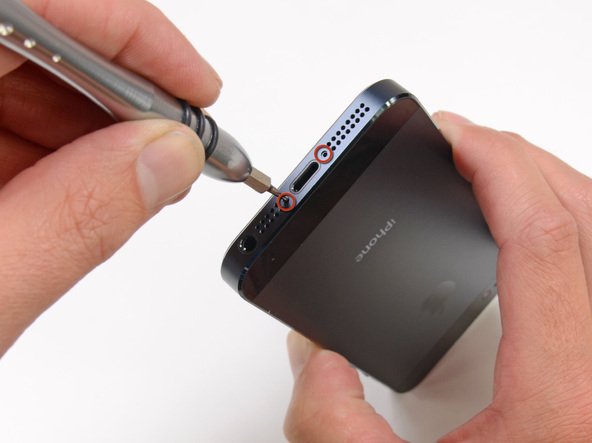
Image 4. The process of removing fastening bolts on the iPhone 5S housing.
Step 2..
- Stick a predetermined suction cup on the bottom of the screen, as shown in the photo below, then pull it up and the spatula carefully go through the entire perimeter of the screen, delaying it from the case.
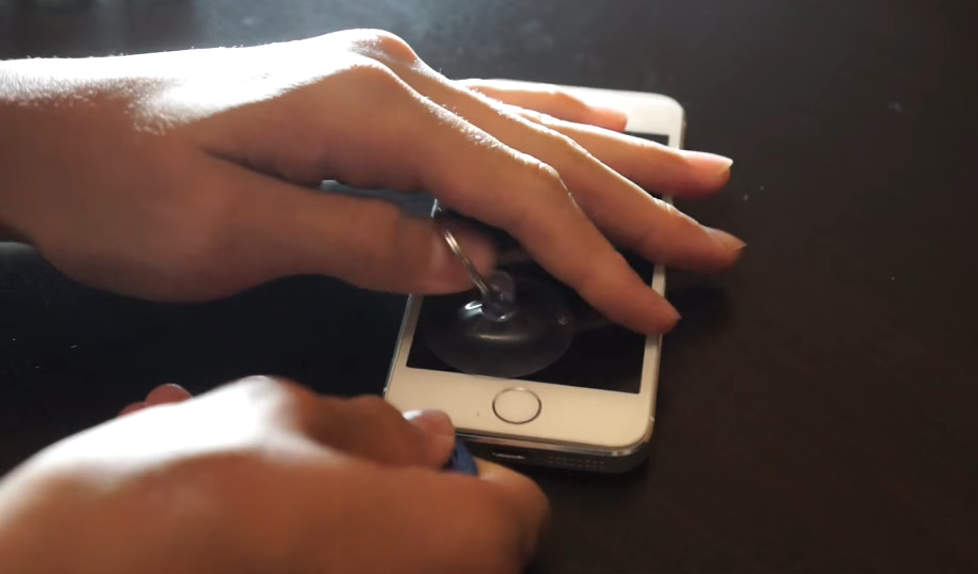
Image 5. Display compartment from iPhone 5 / 5S housing with a suction cup.
Step 3..
- If you are owner iPhone 5.The screen will immediately rise as soon as you disconnect it from the case.
- If you are owner iPhone 5S.You will additionally need to disconnect the loop that connects the screen and with the housing. To do this, you need to deduct the piece of iron to which the loop is leaving, after which it from the connector.
- Raising the screen, you will get access to the "insides" of your iPhone.. You will need to unscrew the protective plate and remove the plumes from the connectors under it, after which disconnect the screen from the case completely.
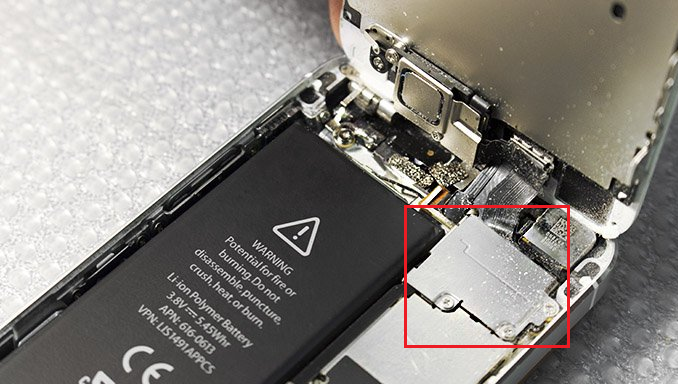
Image 6. Disconnecting the protective plate to disable loops.
- In the same corner that the revealed earlier plate, the rear camera itself is located. Lift it and slightly wet cotton chopsticks thoroughly clean the lens and protective glass. It is best for wetting sticks to use alcohol-containing liquids.
Step 4..
- After cleaning the rear camera, set aside the housing aside and take part into the screen with the screen. To get to the front camera, you need to unscrew another protective plate fixed by two bolts. In no case, do not unscrew the third bolt located next to the desired two.
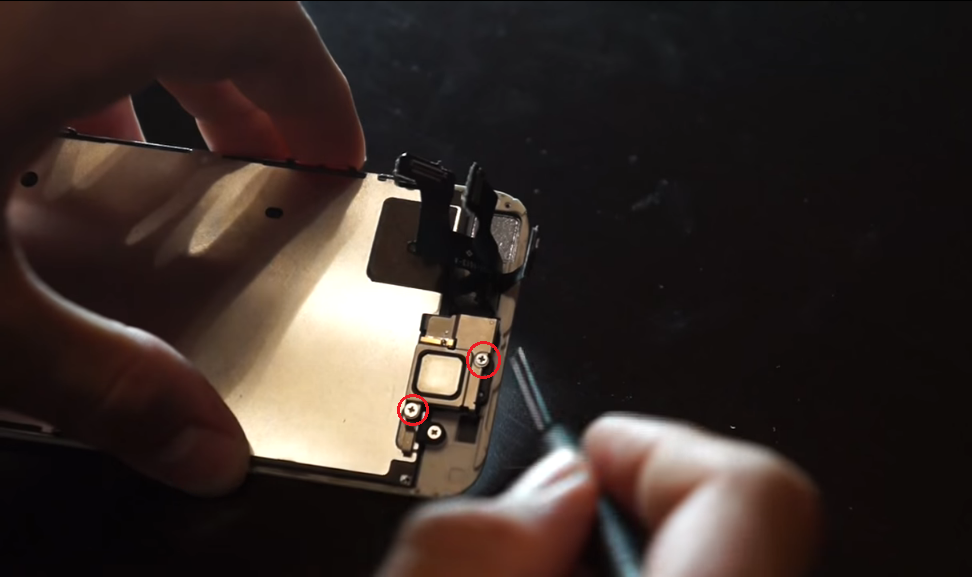
Image 7. Disconnecting the second protective plate to access the front chamber.
Step 5..
- As soon as you disconnect the plate, a sound speaker will be removed with it, which can be deposited aside.
- In the upper left corner, under the factory scotch, there is a frontal (front) camera, which can be reached by rejoicing a small portion of the factory tape.
- As with the rear chamber, clean the lens and protective glass with cotton chopsticks, put the camera itself and stick the factory tape back as it was.
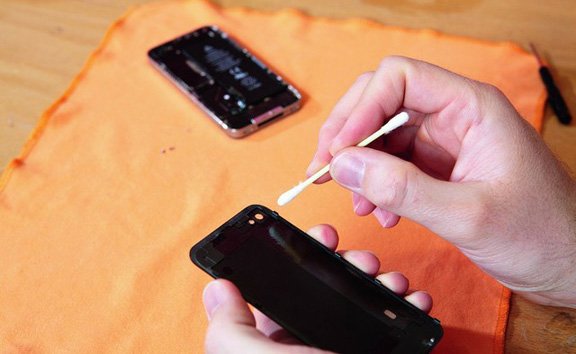
Image 8. Cleaning the optical camera optics on iPhone 5 and 5S.
Cameras clean. Now you need to perform the above-described actions in the reverse sequence.
IMPORTANT: Remember that independently opening the iPhone housing, you lose the warranty on it. All material contained in the article is presented exclusively for familiarization. If you intend to try it in practice, you act on your own risk. The site administration is not responsible for your actions. Also, in the process of disassembling and assembling, Iphon strongly recommend that the video structure presented below is guided.
Thanks for the instructions! She helped me replace the iPhone 5 camera.