How to change image sizes in the program "Photoshop"?
The article will tell how to change the size of the photo in the photoshop program.
Image editor " Photoshop."Used to design photos and offers a huge amount of features. But today we will consider such a function such as scaling, which users often ask.
Learning to change the size of the photo in Photoshop
Scaling images in " Photoshop.»Does not require any skills and knowledge in working with the program - almost any newcomer will cope with this feature. In addition, when you reduce the size of the photo, then its quality is maintained at a normal level. For example, in other programs, the change in the size of the photo can strongly affect the quality of the picture, whereas in " Photoshop."This can be done without a strong drop in the image clarity.
So, in today's review you will learn how to change the size of the image in the program " Photoshop.».
Instructions for scaling photos in the Editor "Photoshop"
We change the size of the image
To carry out all operations as an example, we will take such an already modified in the size of the photo:
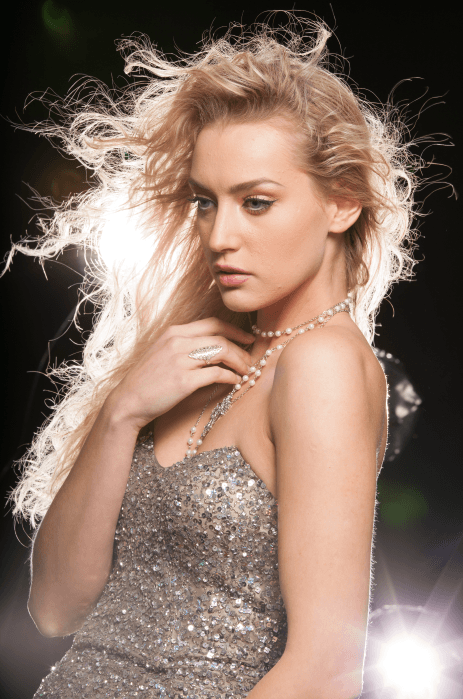
We took advantage of this image, and the initial size of it (below we will show it in the screenshots) was much bigger - the photo was made on a professional camera. We squeezed this photo to make it possible to place it on the site.
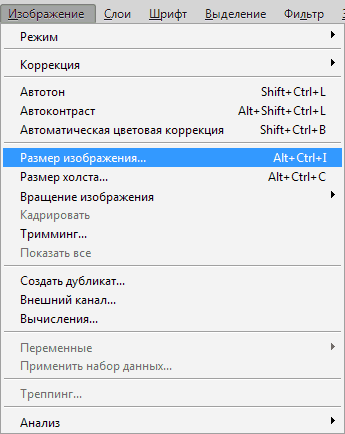
So, as we have said, the change in the size of photography does not require any professionalism. Just open the program " Photoshop."And we use the team" Image size" You can find this item through the top toolbar in the menu. Picture", As shown in the screenshot:
Learning to change the size of the photo in Photoshop
When we placed the original original photo in the editor window Photoshop."And used the above command, then we have revealed this window that contains all image parameters:
Learning to change the size of the photo in Photoshop
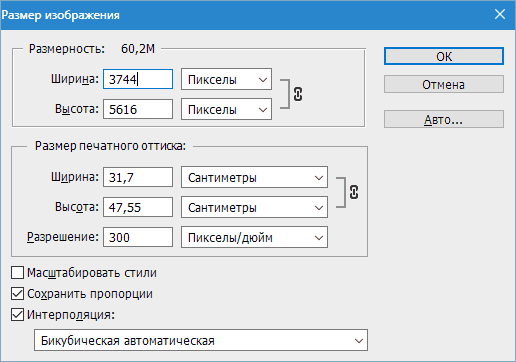
As you can see, in this window you can see two sections, and we are only interested in the top called " Dimension" In it in the fields " Width"And" Height»You can set the size of the photos in pixels, percentages, centimeters, and so on. Initially, we installed pixels for better visibility when working on a computer.
Now we will study all the specified options.
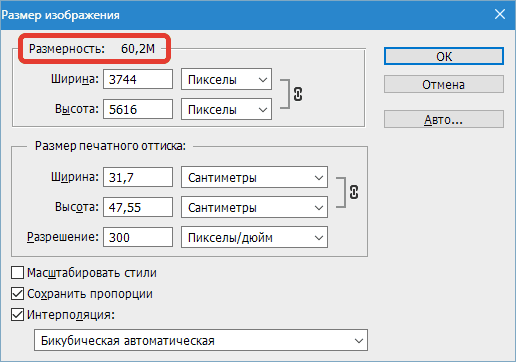
The right of the inscription " Dimension»We are watching a figure that means the weight of the image file itself (whether files" jPEG», « pNG.», « jpg."Either any other). The weight of the image file is measured in megabytes " M."(In our case it is 60.2 m), you should not be confused by the specified figure with the size of the photo, for example, in percent:
Learning to change the size of the photo in Photoshop
But in newer versions " Photoshop."Additional parameters in the same percentage, pixels, centimeters, etc. can also be indicated. It is also important to know which weight has the current photo in megabytes so that we can compare it with its subsequent sizes after the change. It is useful to you if you continue to change the weight of the image file and synchronize it with its size.
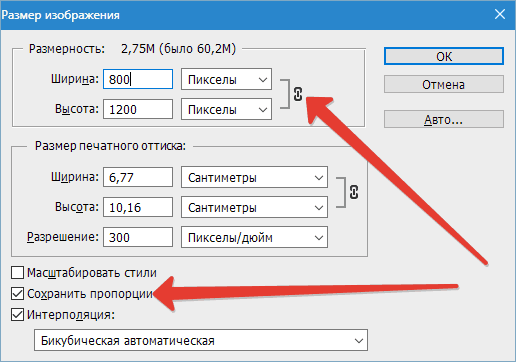
In our case, the current photo has such dimensions: " Height"- 3744 pix.; " Width"- 3744 pix. In centimeters it would look like this: 132.08 centimeters in width and 198.12 centimeters in height. Agree, large enough dimensions to hang it on ordinary sites.
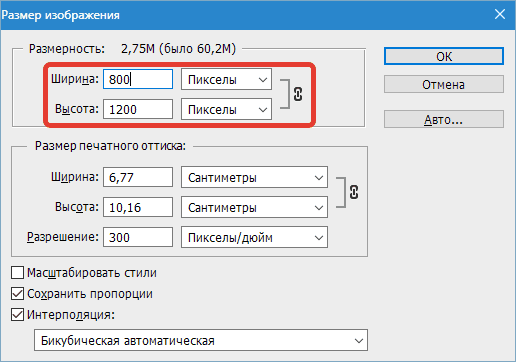
But, since we need to post a photo on the site, we will reduce images to more optimal values. We use the fields already known to us " Height"And" Width" It will be enough to enter into one field, for example, at an altitude of any value (in our case 1,200 pixels), as in another field a digit that denotes the width of 800 pixels will automatically appear. That is, the photo will change harmoniously. Then click on " OK»:
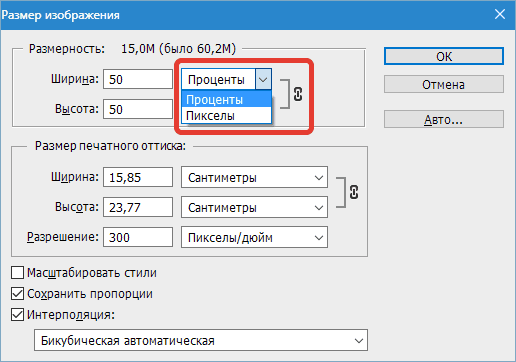
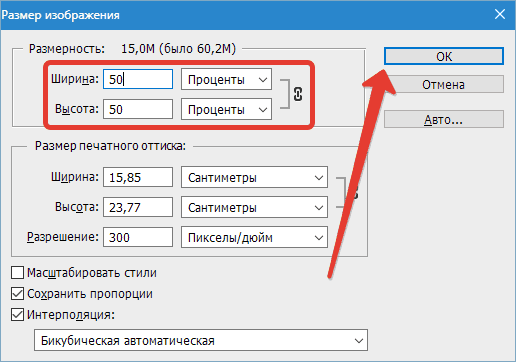
That's all. Photographs are changed. But, if we do not say meanings in pixels, then we can use another metric. We will use the percentage that it is most clear how much the image will change relative to the original.
We go to the same window and change the pixels per percentages, as shown in the screenshot:
Learning to change the size of the photo in Photoshop
Also pay attention to the numbers of the right of the inscription " Dimension" We see the following: 15, 0 m (it was 60.2 m). That is, we already see that we reduced the weight of the photo four times.
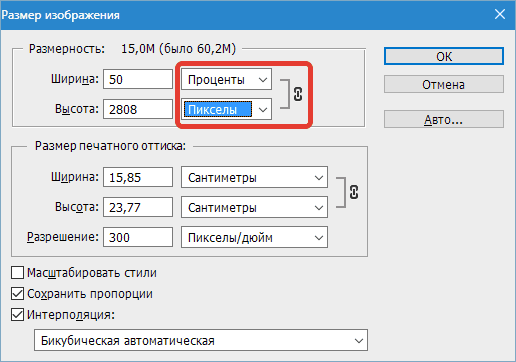
In addition, if you do not need, the width and height change synchronously, or you wish to see each parameter in different metrics, then click on the chain icon on the screenshot in the red frame. Now the width and height can be measured separately and change their values \u200b\u200bis also separate (more about this below):
Learning to change the size of the photo in Photoshop
We work with image proportions
The described ability to automatically change the parameters of the height or width when the change in one of these options in the program " Photoshop."It works by default. The editor is so configured initially, and this is considered the most convenient option so that when changing the size of the photo, its initial proportions remained.
In principle, in reality, it happens when in most cases users need only to reduce or increase the size of the photo without any additional manipulations.
It is also possible to stretch the photo by width or height, if you need it, and you can specify any values \u200b\u200bfor both characteristics. The editor will tell you, whether these characteristics are synchronized with each other or not, as can be seen in the screenshot on the chain icon, as well as the activated option " Save proportions»:
Learning to change the size of the photo in Photoshop
In newer versions " Photoshop.»This option is not provided, you just just press the chain icon to turn on or off the connection between the width and the image height.
Photo quality when changing its size
How we were convinced above, change the size of the photo in the editor " Photoshop."It's easy enough, we can use any options. But what happens to the photo quality, for example, if we will increase the photo in two or three or more times? Let's try to learn this on a specific example with the photo already known to us.
We will experiment and first try to reduce the image twice. To do this, it is enough to specify the values \u200b\u200bin percent, that is, mark in the fields and heights - 50%:
Learning to change the size of the photo in Photoshop
After we save our changes by clicking on " OK"The program will change the original image, closes the settings window, and we will immediately see the results. If we now look at the photo, then we note that it is although it has decreased, but practically did not change in its quality:

Learning to change the size of the photo in Photoshop
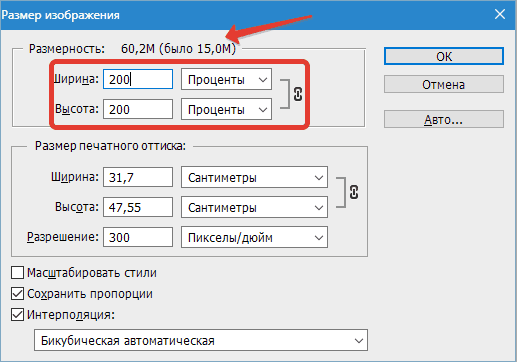
Well, now let's try to increase the original photo twice. First we will refund the resulting image to the original state (it must be increased by 200%):
Learning to change the size of the photo in Photoshop
Yes, we returned a photo to her original state, but now we are seeing that the image quality deteriorated a little. The sharpness was lost, the photo was a bit blurred, some details and completely disappeared somewhere. If we increase the photo further, then the quality will decrease and decrease:
Learning to change the size of the photo in Photoshop
Now let us ask yourself, why is it going on? Why, when a photography decreases, the quality is not lost, and with an increase in the photo - decreases? Everything is explained quite simple.
The fact is that with a decrease in the size of the photo, the editor removes simply extra pixels that we can not see the unarmed look without refund. Moreover, when removing unnecessary pixels, the photo does not lose its initial quality. The image does not lose contrast, clarity and other characteristics.
But when we increase the photo, then completely different events occur. Now the program does not delete too much, but on the contrary, trying to add new pixels. The question arises where does she get them from? The problem is that the editor simply generates extra pixels, which in reality has never been in the original image.
Therefore, quality is lost. " Photoshop."I simply cannot guess, no matter how it would look like a photograph in an enlarged form, it has to" invent "it according to its capabilities. But with a slight increase in the size of the photo, we still be able to get optimal quality.