How and what to check, scan a flash drive for viruses online and clean from viruses without deleting files: ways
Guidelines for checking the flash drive for viruses and its treatment.
Navigation
Due to the fact that the USB flash drive is very often used on a variety of devices, it is most susceptible to infection with viruses, in comparison with other information carriers. In order to make a malicious software on the flash drive, it is not necessary to have access to the Internet at all. It is enough to insert a device in an already infected computer and the infection will instantly repain with removable media.
If the virus penetrates the USB flash drive, then its owner immediately begins to look for a way to get rid of malicious things in such a way as not to damage and not delete information stored on a carrier. From our article you will learn several ways to check and heal the flash drive from viruses without the need for its formatting.
How and what to check, scan a flash drive for viruses and clean from viruses without deleting files: ways

Check flash drive for viruses homemade antivirus
If you say in a simple language, the USB flash drive inserted into the computer is recognized and displayed by the system as any other storage medium. Thus, it is not different from scanning the hard disk of the computer for the presence of viruses.
If you insert a flash drive into your computer and run a complete check of viruses, then no matter what kind of antivirus you have, it recognizes it as one of the partitions of the hard disk and will fully check and treat the device without the threat of deleting important information from it.
If you do not have time to wait until the computer is complete, then almost each antivirus has the ability to check a specific partition selected by the user. For example, in Kaspersky Anti-Virus, this is as follows:
Step 1.
- Open the antivirus window. In chapter " Protecting computer»Click on the link" Check"And select" Custom scan».
- In the displayed window, tick the sections that you want to scan for viruses. If the desired section is missing, then click on the "button" Add"And select the section manually.
- After selecting partitions, click " OK»To start checking.
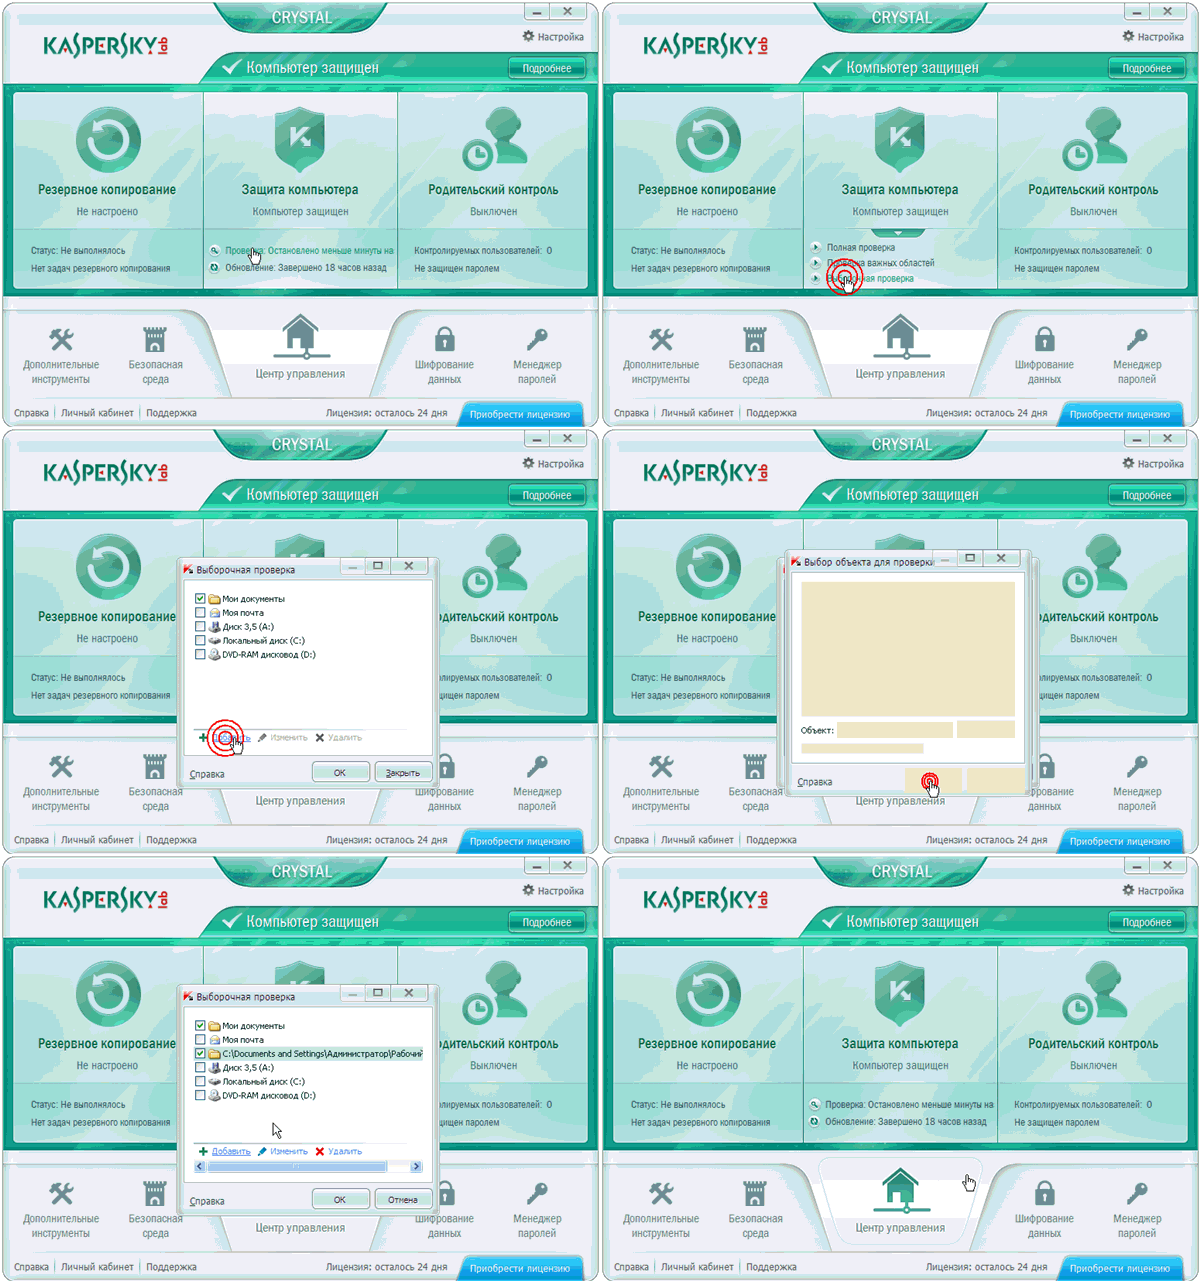
Image 2. The process of scanning a flash drive for viruses of Kaspersky Anti-Virus.
Step 2..
- Wait for the verification process to complete and if the program detects a threat, select the action you want to make an infected file.
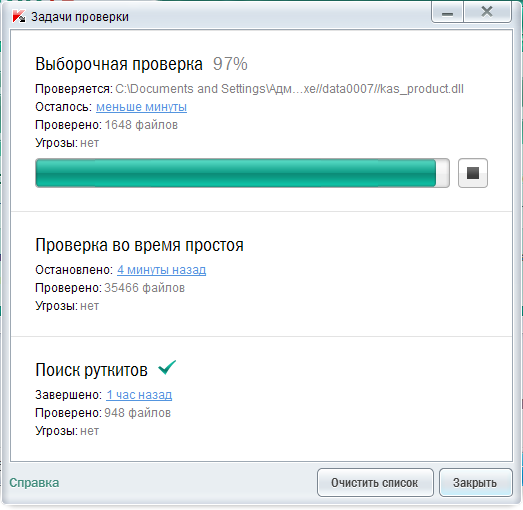
Image 3. Completion of checking flash drive antivirus Kaspersky.
Check flash drives for viruses online program Dr.Web Cureit
If anti-virus software is not installed on your computer and you do not on the desire to install it, then you can use the free program. Dr.Web Cureit.which can be downloaded by of this link.
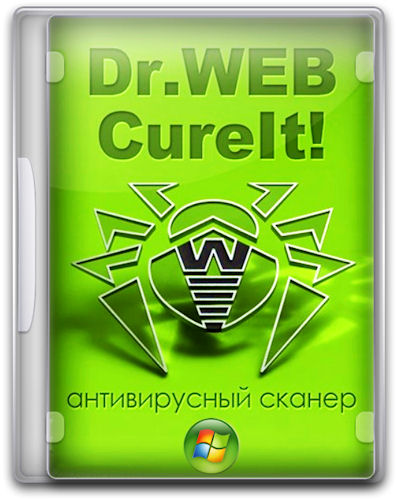
Image 4. Check flash drives for viruses online via the Internet program Dr.Web Cureit.
The program's uniqueness is that it does not require installation and has the widest antivirus base, which is constantly updated. Via Dr.Web Cureit. You can fully scan a computer or a specific section selected by the user for viruses. In the process of scanning a PC, the program is checked not only with the built-in antivirus base, but also searches for information about threats on the Internet online.
From the disadvantages of the program, it is possible to distinguish the fact that it does not protect the computer from viruses in real time, but only conducts a search already penetrated on the parasite device. In addition, after updating the viral database, you need to download a new version of the program to check the computer. And it is updated quite often.
To check the flash drive for viruses program Dr.Web Cureit.You need to do the following steps:
Step 1.
- Download, Run the program and in the first window, accept the terms of the license agreement.
- Next, in the upper right corner of the program window, click on the options icon and make sure that the string " Automatically apply actions to threats"Not marked with a check mark. It is necessary in order for the program to accidentally delete the files from the flash drive important for you.
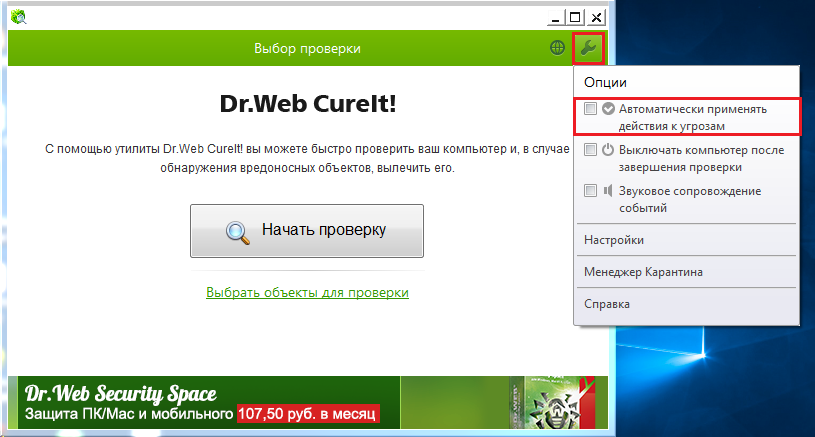
Image 5. Configuring Dr.Web Cureit program before you start scanning a flash drive.
Step 2..
- Now under the button " Start check»Click on the link" Select objects to check».
- In the window that opens, click on the link " Click to select Files and Folders"In the next window, tick your flash drive and click" OK».
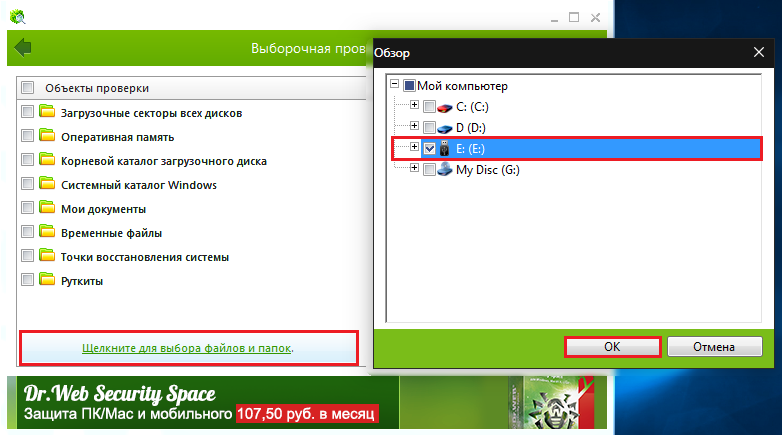
Image 6. Select scan area in Dr.Web Cureit.
Step 3..
- At the final stage, click on the button " Run check"And wait for the scan process to complete.
- If the program finds any threats, select the action for them " Treat».
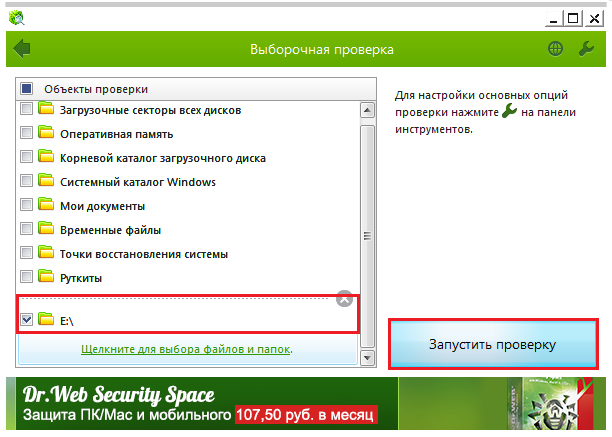
Image 7. Starting a flash drive scan for viruses by Dr.Web Cureit.
