How to make the screen of the entire screen and parts on the Windows 7, 8, 8.1, 10 laptop? How to photograph the monitor screen on Windows 7, 8, 8.1, 10 laptop?
The article will tell how to make screenshots on a computer or laptop.
Navigation
To make screenshots on a computer or laptop never interferes with the user, especially if it is necessary for work, hobbies and other activities. A snapshot of the screen or its area could be done in the old versions " Windows" Today we will talk about how to take screenshots and its parts on computers / laptops in " Windows 7, 8, 8.1, 10».
We make a screenshot on computers / laptops in "Windows 7"
We make the screenshot of the entire screen using keys
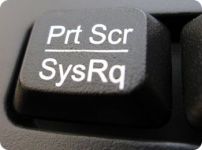
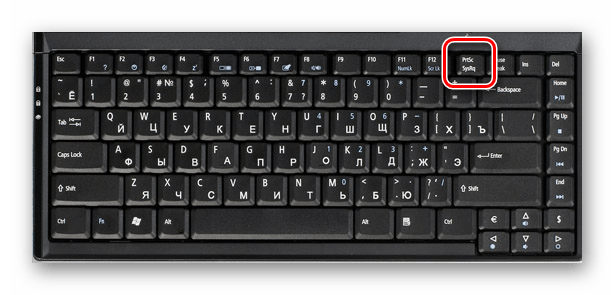
- Click on the keyboard in the upper right area on the " PRINT SCREEN."(On your keyboard, this key may look different, for example," PRT SC.»).
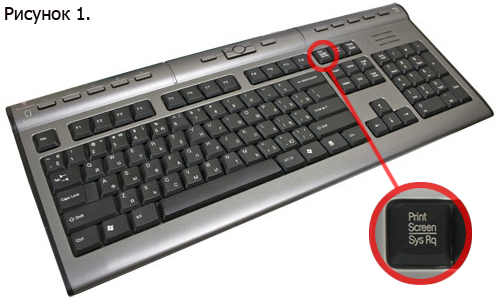
PRINT SCREEN key
- The action implemented above, we photographed the entire screen, and photograph as it were written in the clipboard. Now it needs to be saved to any editor of images, for example, in " Paint." Through " Start»We go to" My programs", Then in" Standard"And then choose" Paint.».
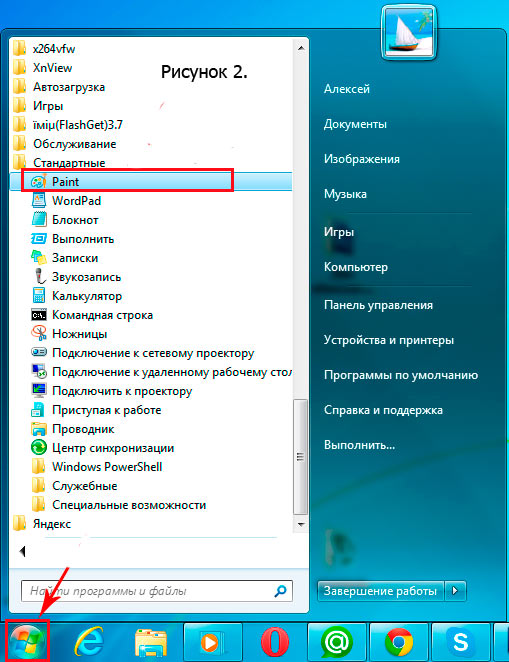
The program "Paint" in the "Start" menu
- In the window that opens, click on " Insert»

Insert the copied image in Paint
- After that, the photo made and saved by us earlier will boot into the program window. Now it needs to just save. Go to " File", Further " Save as"And, in the end, choose the image format and storage location.
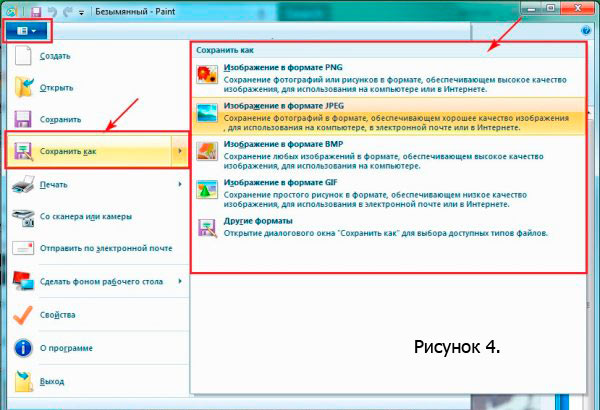
Choose photo format
We make a screenshot of the active window using keys
- Click on two keys at the same time - " PRINT SCREEN."And" Alt.”
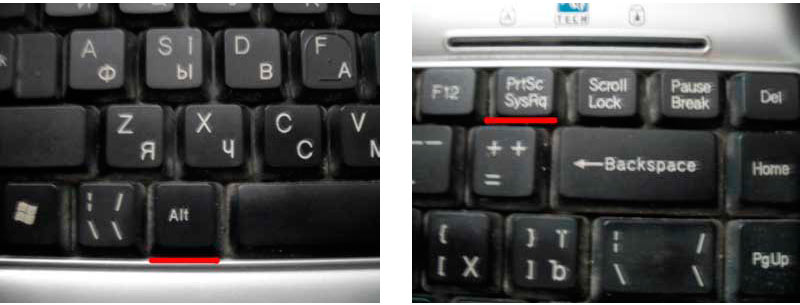
Screenshot of the active window using the keyboard
- Next, launch the program " Paint."And we do exactly the same actions as the previous time
We make screenshots using the scissors system program
- Go to the menu " Start", Then in" My programs", Choose the folder" Standard"And find the program" Scissors"- Run it.
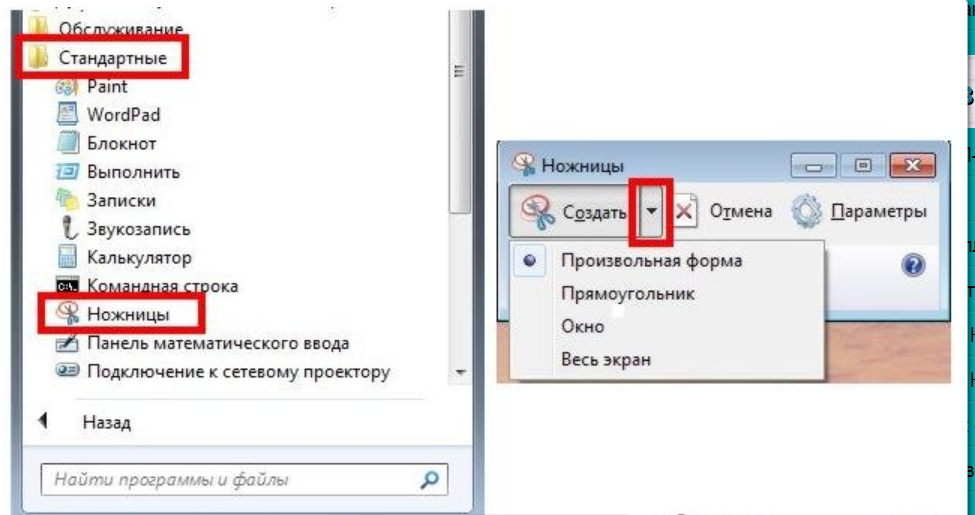
Application "Scissors"
- Now click on " File"And then -" Save as" After that, select the image format and storage location.
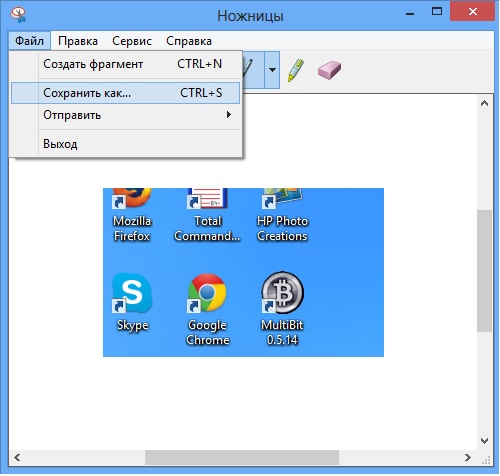
We make a screenshot with the application "Scissors"
We make a screenshot on computers / laptops in "Windows 8, 8.1"
In principle, to make screenshots in the eight, seven and others " Windows»You can use third-party programs, but we decided to abandon it. Our task is to quickly take a picture of the screen without having to download and install an additional software. Make a screenshot in " Windows 8."It's just just like in the seven, and we will apply almost the same method - a system program.
First, in the eight for a snapshot of the screen, you can use again the program " Scissors»:
- In the list of standard applications, find the program " Scissors"And click on it. In principle, this program can take a snapshot and the entire screen, not only its part.
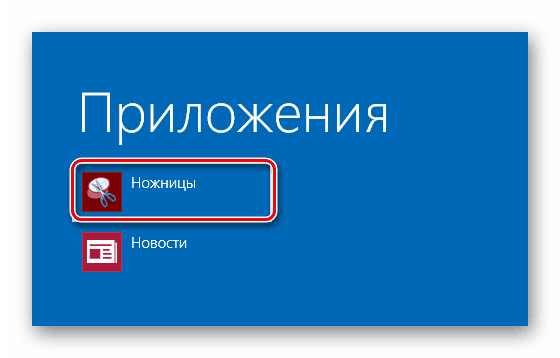
Application "Scissors" in "Windows 8"
Secondly, we can take a picture of the entire screen using the key PRINT SCREEN."(And the active window - with the help of simultaneous pressing" PRINT SCREEN."And" Alt."), After which the screenshot can be saved on the computer via the image editor:
PRINT SCREEN key
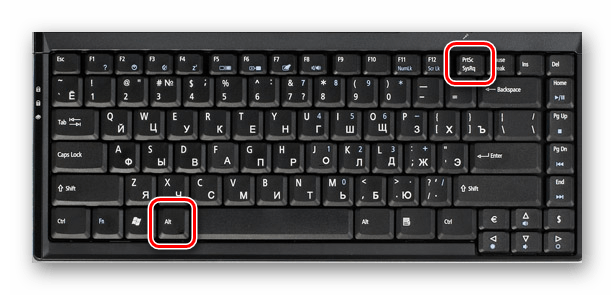
Keyboard shortcut: "Print Screen" and "Alt"
By the way, if you do not want to bother once again to copy the picture taken into the image editor, then in this case you can go the simplest way. Click simultaneously " PRINT SCREEN."And" WIN.”:
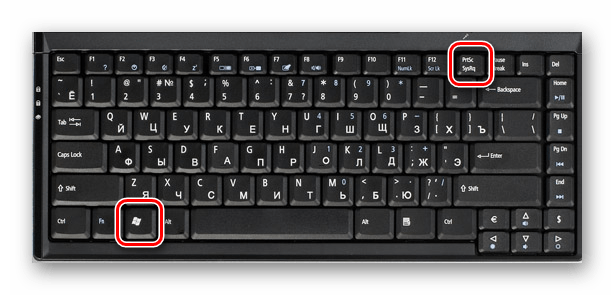
Keyboard key: "Print Screen" and "Win"
After that, the screen snapshot will be automatically saved to the system folder along the path " This computer image screenshots»:
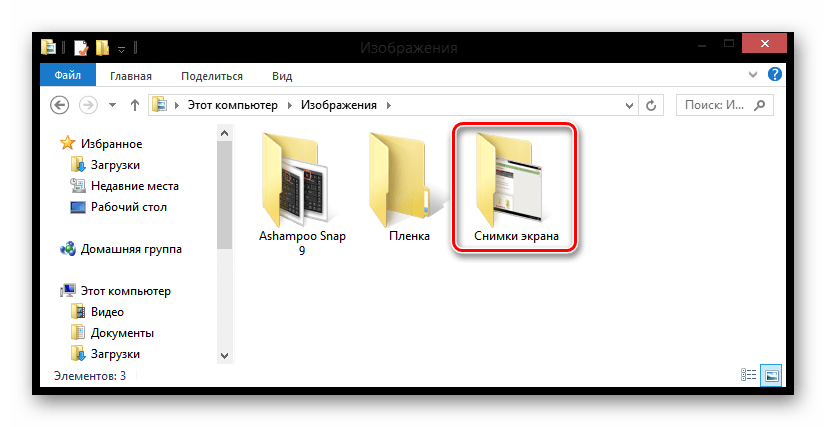
Folder for storing screenshots in "Windows 8, 8.1"
We make a screenshot on computers / laptops in "Windows 10"
You can do screenshots in the top ten, in principle, according to the previous instructions, both using the keys and using the system program. You can copy pictures in " Pain."You can make automatic pictures.
- To take a picture of the whole screen, click simultaneously " PRINT SCREEN."And" WIN.". The screenshot will automatically save on the same path as in the case of eight.
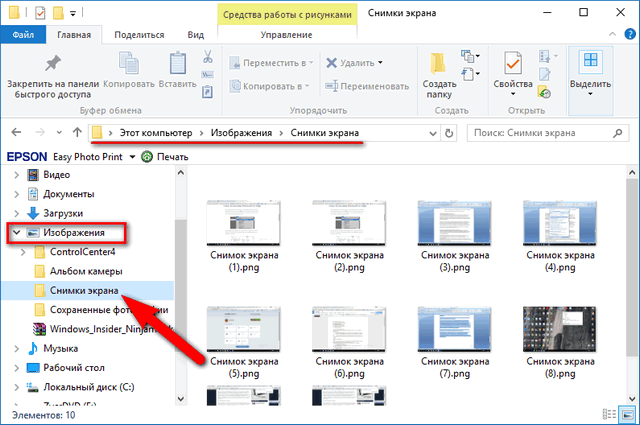
Folder for storing screenshots in "Windows 10"
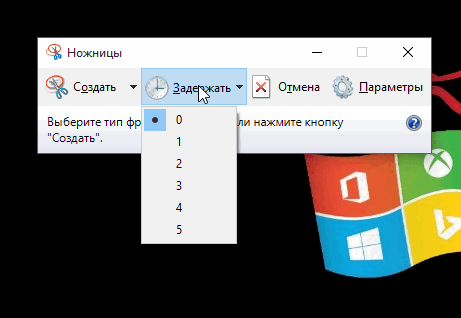
In the case of the program " Scissors»Tenth Windows is more convenient. The fact is that in the previous " Windows»This program has not had the ability to capture pop-up windows and context menus. In the top ten, this problem is eliminated using added in " Scissors»Functions" Delay»:
- Run " Scissors" If you need, for example, take a picture of the menu " Start"You will go to it for a few seconds. Therefore, click on the button " Delay", As shown in the screenshot. Next, the program will offer you to choose a period of time up to five seconds for which you want to have time to open and drop menu " Start».
Screenshot using application "Scissors" in "Windows 10"
- Choose the time for which you have time to take a picture, and then click on " Create"(Choose as well in what form should be a screenshot - in the form of a rectangle, arbitrary form, the entire screen, etc.).
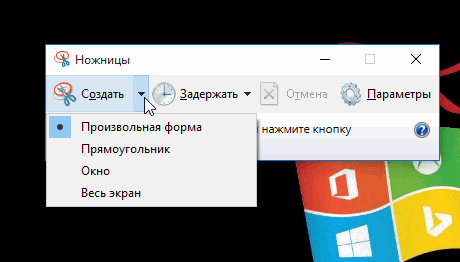
Screenshot using application "Scissors" in "Windows 10"